I got momentarily distracted when I saw the successful pass of M4 Vulcan textures converted to Paul. Actually it was more like turning cartwheels

So...I had to start messing with the face of course. As I was preparing to post this, it occurred to me that those of you who don't have Poser 11 may not even be able to relate to what I'm describing when I mention face handles, or "chips". They can be found in the pose folder under Paul / Face Controls.
The first two previews below show the chips as they appear when one is working on the face. The Paul Plus morphs from Rendo provide dials that accomplish a similar result...but they were better for tweaking, whereas pushing and pulling the chips help get down to business faster without so much spinning of the dials.
I forgot to take a screen capture of how the texture transfer appeared before I started sculpting...but suffice it to say, it was so good, I just HAD to start sculpting

The conversion still leaves dark areas in the mouth corners...like he's been eating pizza...but it will be a lot easier to fix that than it would have been to create the entire texture from scratch.
I think I figured out what I was doing wrong about the textures failing to show on Paul...I wasn't careful in the conversion process...there is an option that unfortunately defaults to .duf....hmmm....refrain from comment....but it gives a pull down with options for .pz2 and .mc6, and I'd never heard of a .mc6...but it turns out that some textures need to go that way. The Vulcan textures were the old .pz2 that I was accustomed to seeing, and they show on Paul just fine, with a mat pose automatically generated during the conversion.

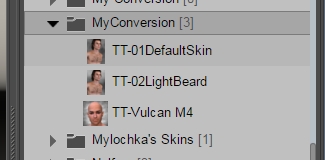
After some experience with this, I think there may be a more correct way to name the mat pose file, so that stuff doesn't get overwritten when sharing the textures with other figures. I did set up dedicated runtime in which to play, so that I didn't unintentionally trash something that I needed....with M4, Paul, Dusk, Dawn, Pauline, Roxie and V4 figures only. Texture Transformer 2 is similar to XD in that it needs to be able to "find" the figures for which one is licensed, as it needs to compare geometry during the conversion process. I got a little distracted with the explanations about folder placement. I'll just say this much, to save someone else time...you don't need to create the My Conversion folders (which looks like MyConversion) that are described...they are automatically created for you during the process. Having the information about their locations helps you find where the textures are located once it's done.
Below are the face chip screen captures, and a quick render of Paul's transformation into Spock. He needs some more tweaking, but my eyes need the rest even more, so I'll make this a stopping point for now.
One of the most important morphs needed to get a Spock likeness is that which would make the area above the eyes slant opposite from the eyebrows...without that, you can come close, but it's not the real deal. I opted to slant the eyes downward some to compensate for this, and I need time and fresh eyes to study the morphs further to see if this capability is hidden somewhere that I've not yet found. Anyway, it was fun creating a Paul Spock...or should I say....fascinating

Have a good day everyone


 . I guess that's why I found the Nursoda characters so refreshing... they were (and still are) unique, and original, and wonderfully strange, leaving lots of room for imagination and creativity....and a safe place for everyone to share in the fun with no thought about profits, porn or popularity.