-
Welcome to the Community Forums at HiveWire 3D! Please note that the user name you choose for our forum will be displayed to the public. Our store was closed as January 4, 2021. You can find HiveWire 3D and Lisa's Botanicals products, as well as many of our Contributing Artists, at Renderosity. This thread lists where many are now selling their products. Renderosity is generously putting products which were purchased at HiveWire 3D and are now sold at their store into customer accounts by gifting them. This is not an overnight process so please be patient, if you have already emailed them about this. If you have NOT emailed them, please see the 2nd post in this thread for instructions on what you need to do
You are using an out of date browser. It may not display this or other websites correctly.
You should upgrade or use an alternative browser.
You should upgrade or use an alternative browser.
SKYLAB CHAT
- Thread starter skylab
- Start date
skylab
Esteemed
Okay...hope this is clear...I threw it together...haha 
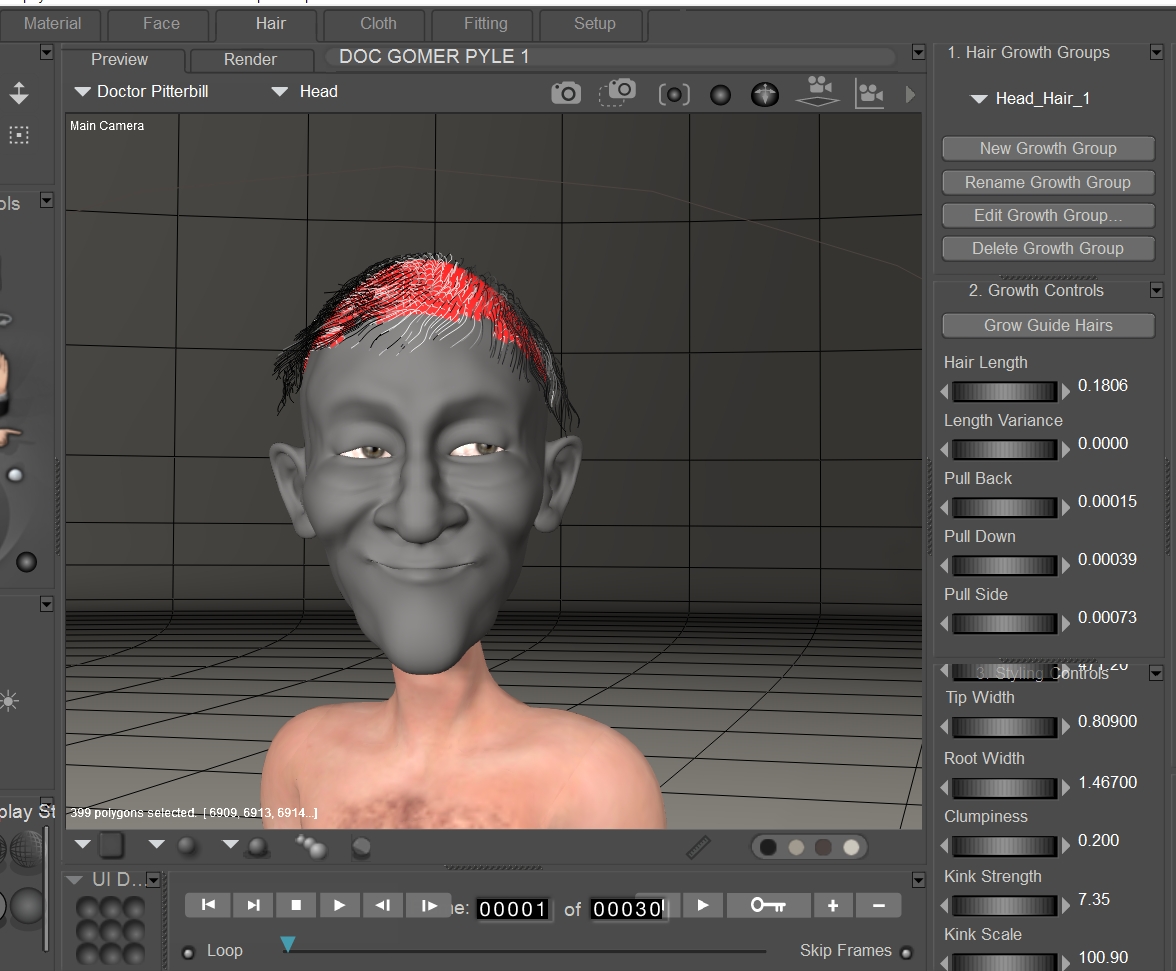
STEP 1 - This is in the hair room, actually creating the tuft of hair on Doc's head.
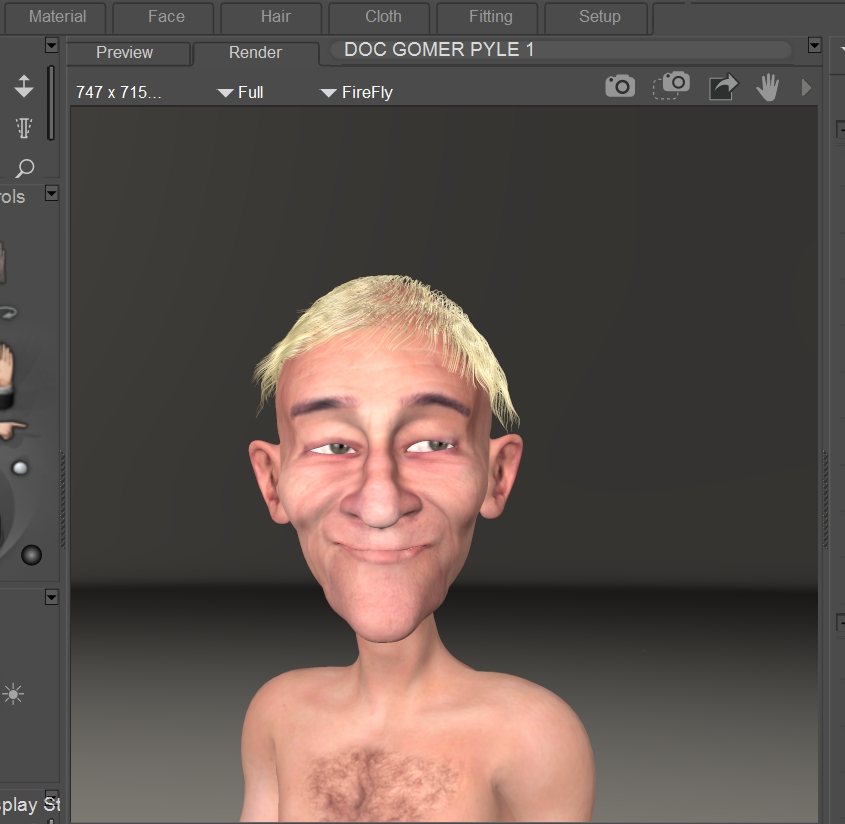
STEP 2 - This is the default hair color, which is really, really blonde. It's good to check it with a render before proceeding, to make sure there are no stray hairs sticking through the eyes or ears.
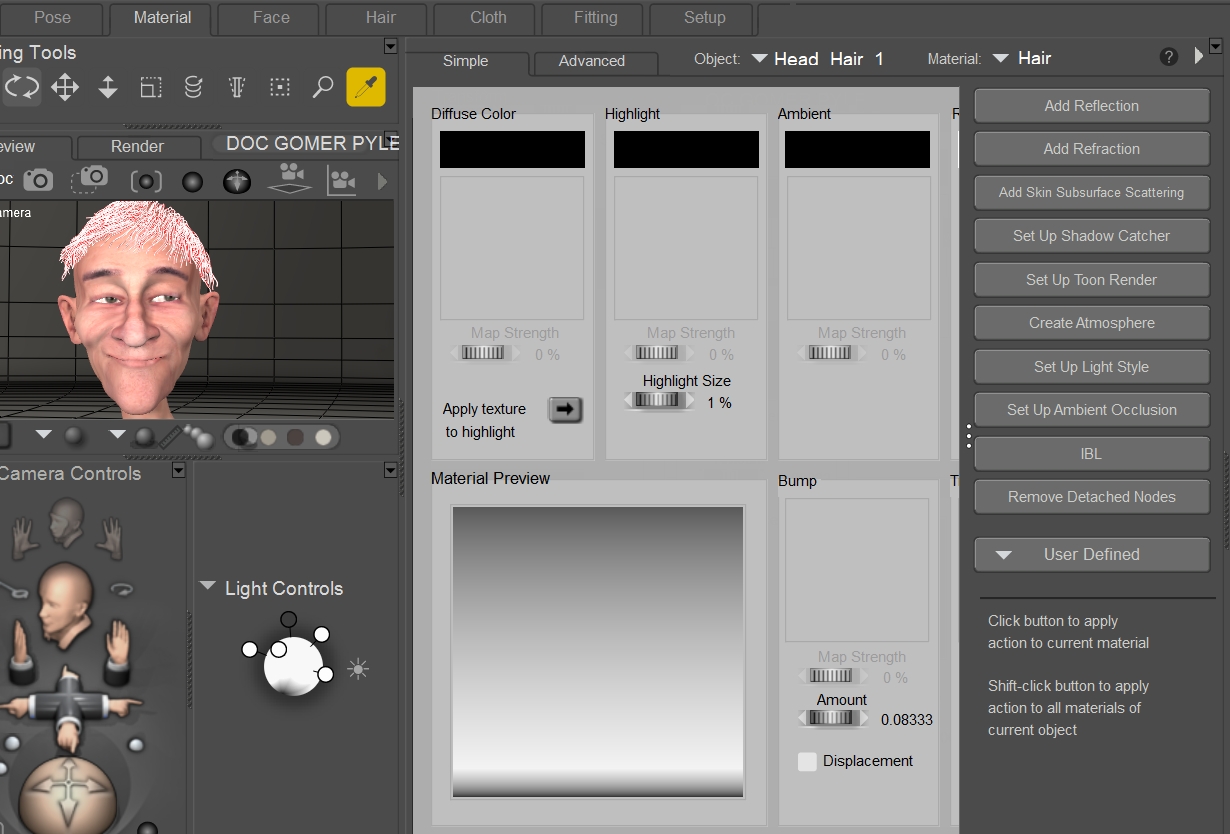
STEP 3 - Next (making sure the hair is selected), you go into the Material Room by clicking the Material tab at the top. It defaults to the Simple Material Room option.
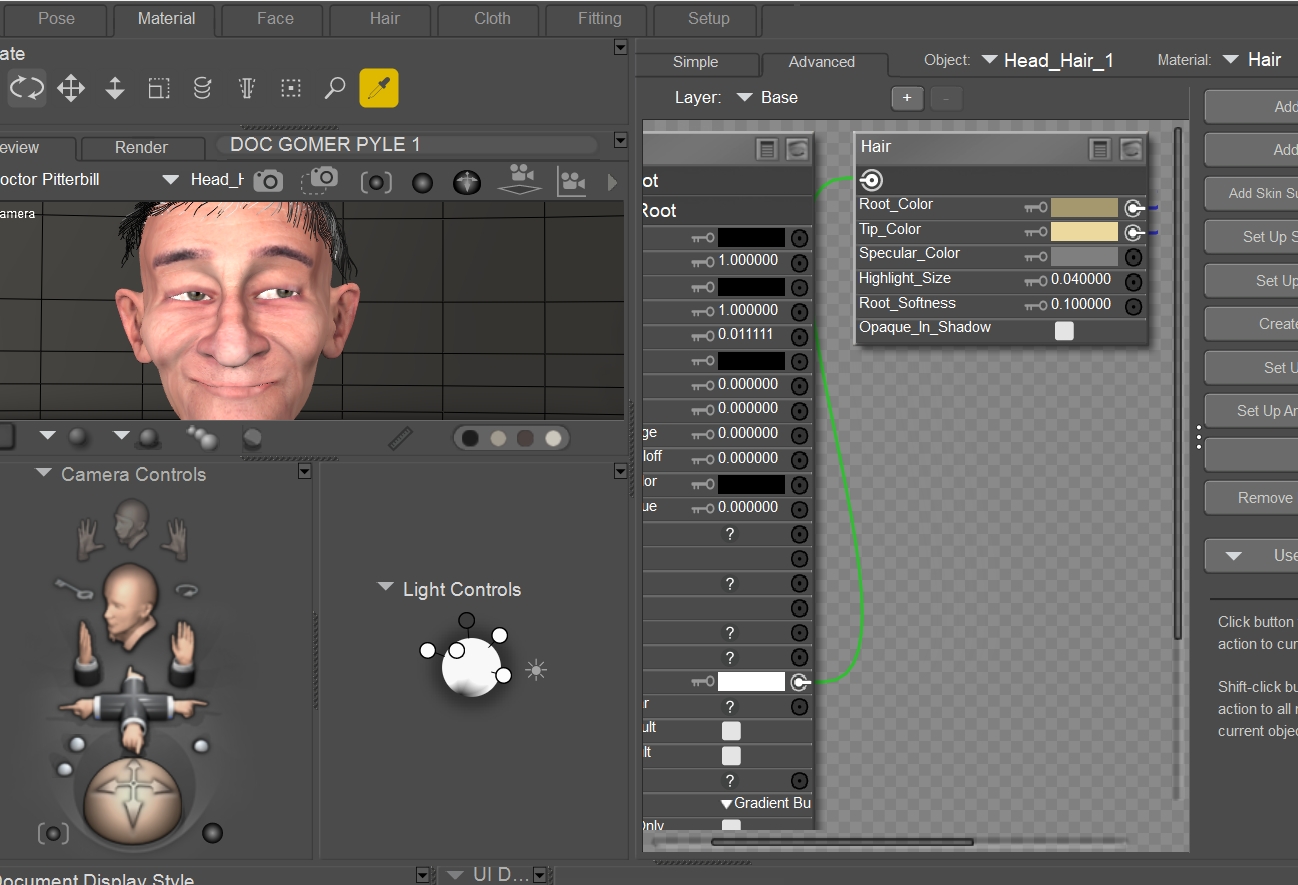
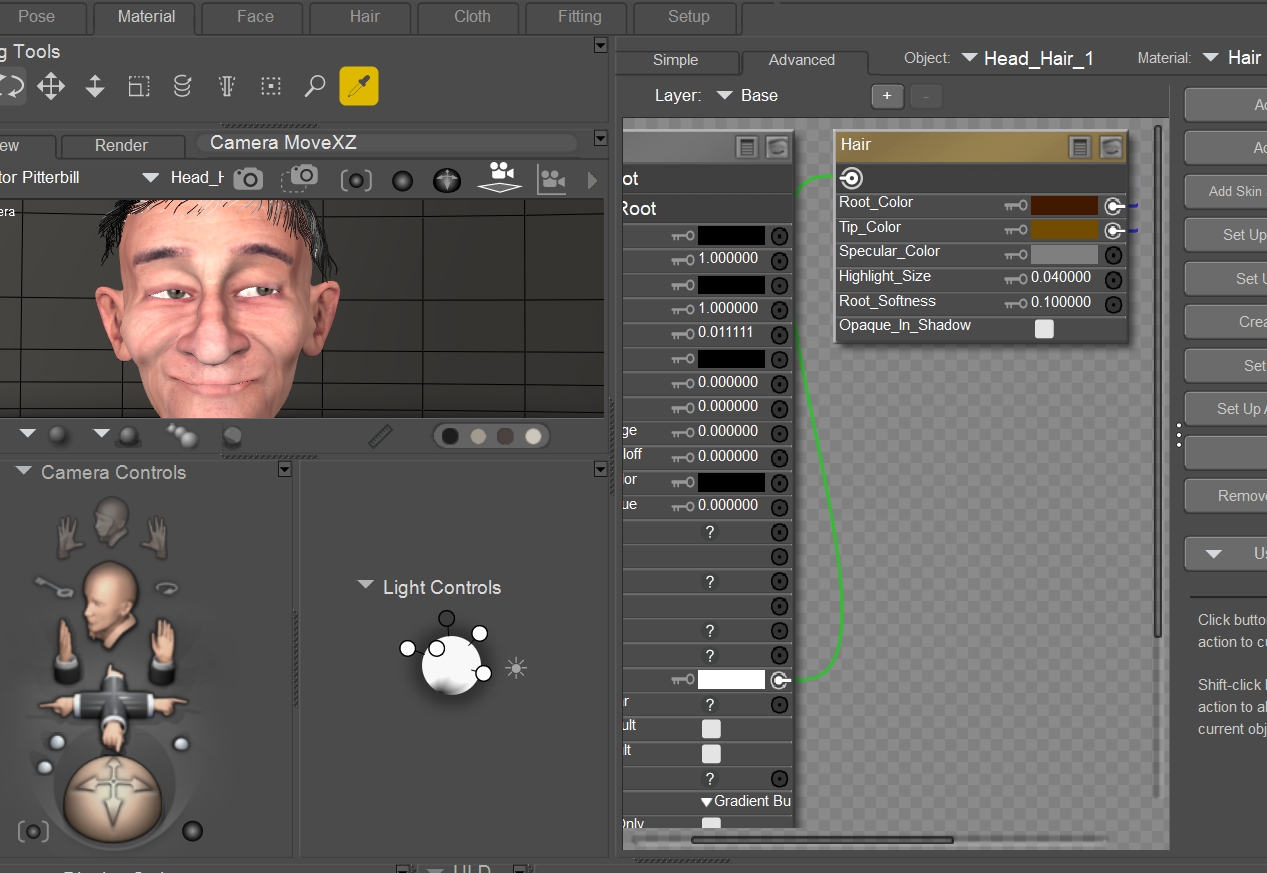
STEP 4 - We'll switch over to the Advanced Material Room by selecting the Advanced tab. Notice over on the right side, under Hair, you'll see three colors...Root_Color, Tip_Color, and Specular_Color...or greenish beige, a cream color, and a gray. This is where you choose your hair color in the Material Room, and you can keep tweaking it until you get it like you want it.
STEP 5 - In this example, I chose a reddish dark brown, a light brown, and I left the specular color.
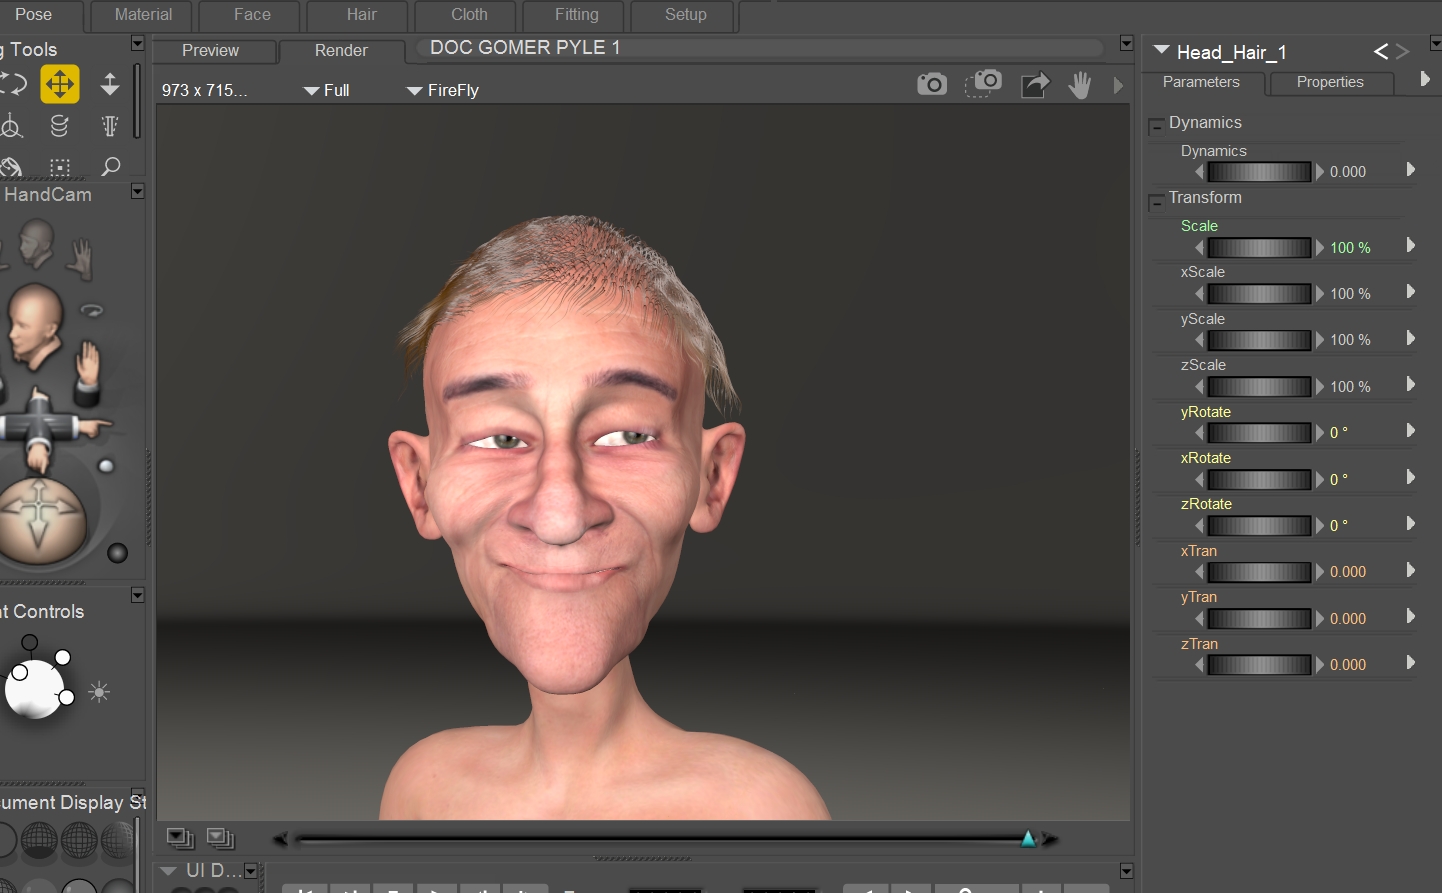
STEP 6 - Render to check the results. In this case, I ended up with a very light brown, so this gives you an idea of how much play you have in choosing colors...you can go much darker than what I've chosen.
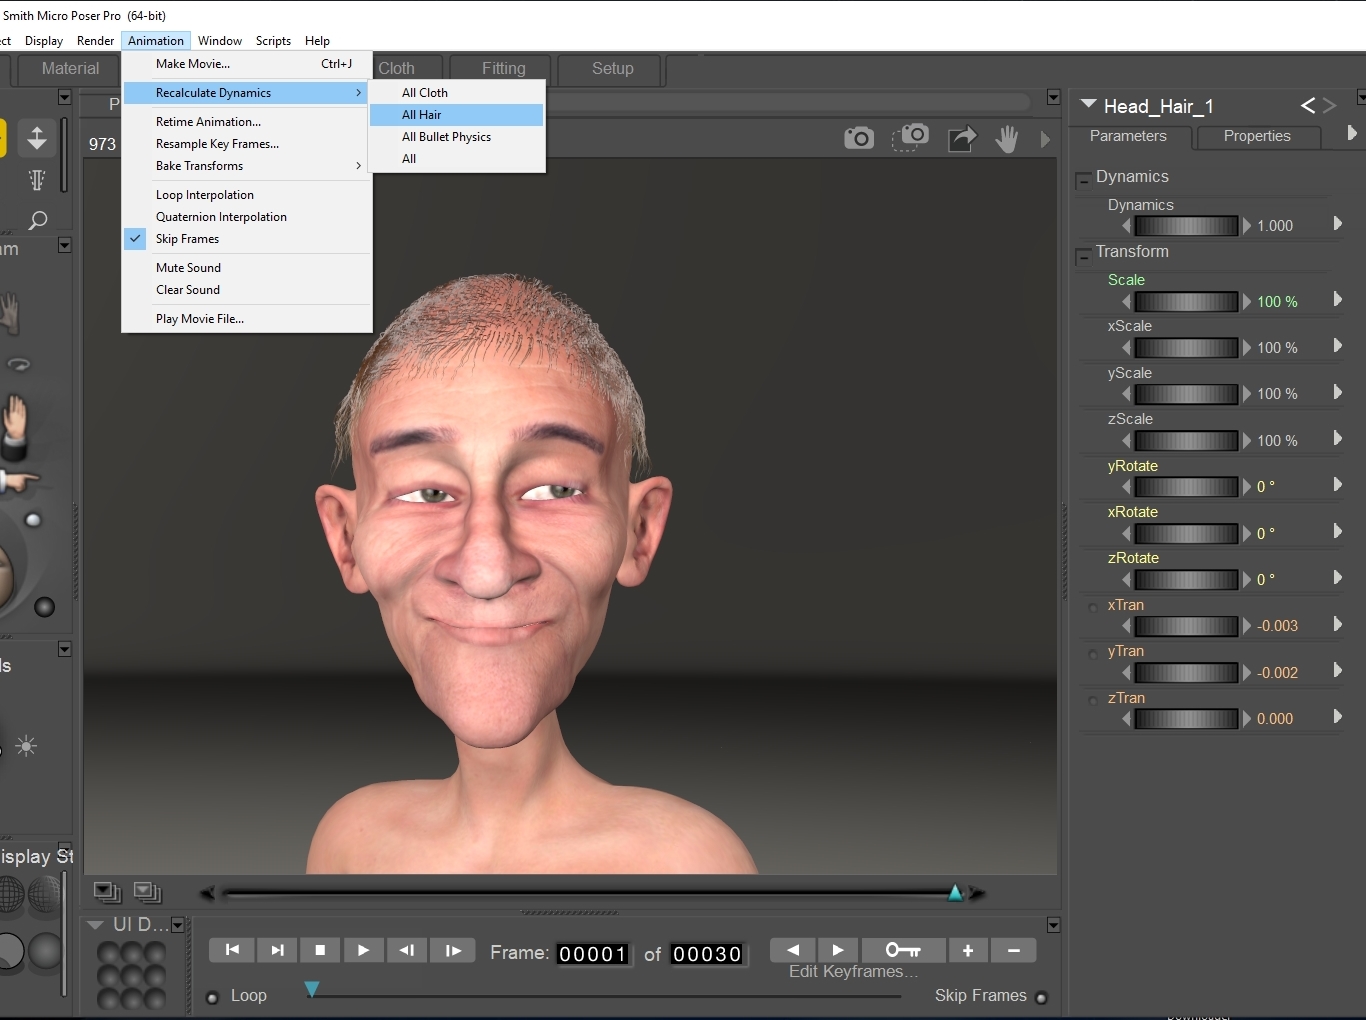
STEP 7 - If you want the hair to "lay down" on the head more, you can choose to run dynamics....at the top, pull down under Animation, and choose Recalculate Dynamics (making sure the hair is selected), and select All Hair. Some hair styles you might want to be sticking up, so just choose to do this if you want the effect.
STEP 1 - This is in the hair room, actually creating the tuft of hair on Doc's head.
STEP 2 - This is the default hair color, which is really, really blonde. It's good to check it with a render before proceeding, to make sure there are no stray hairs sticking through the eyes or ears.
STEP 3 - Next (making sure the hair is selected), you go into the Material Room by clicking the Material tab at the top. It defaults to the Simple Material Room option.
STEP 4 - We'll switch over to the Advanced Material Room by selecting the Advanced tab. Notice over on the right side, under Hair, you'll see three colors...Root_Color, Tip_Color, and Specular_Color...or greenish beige, a cream color, and a gray. This is where you choose your hair color in the Material Room, and you can keep tweaking it until you get it like you want it.
STEP 5 - In this example, I chose a reddish dark brown, a light brown, and I left the specular color.
STEP 6 - Render to check the results. In this case, I ended up with a very light brown, so this gives you an idea of how much play you have in choosing colors...you can go much darker than what I've chosen.
STEP 7 - If you want the hair to "lay down" on the head more, you can choose to run dynamics....at the top, pull down under Animation, and choose Recalculate Dynamics (making sure the hair is selected), and select All Hair. Some hair styles you might want to be sticking up, so just choose to do this if you want the effect.
Last edited:
skylab
Esteemed
Here's my original Hair Room tutorial on ShareCG, if you need a step by step approach to beginning to actually do the hair. It was done with Poser 7, but the settings and procedure have not changed, just the interface has a different appearance.
Poser Hair PDF with video
Poser Hair Tutorial - Part 2
Poser Tips
Poser Hair (PDF version)

Poser Hair PDF with video
Poser Hair Tutorial - Part 2
Poser Tips
Poser Hair (PDF version)

skylab
Esteemed
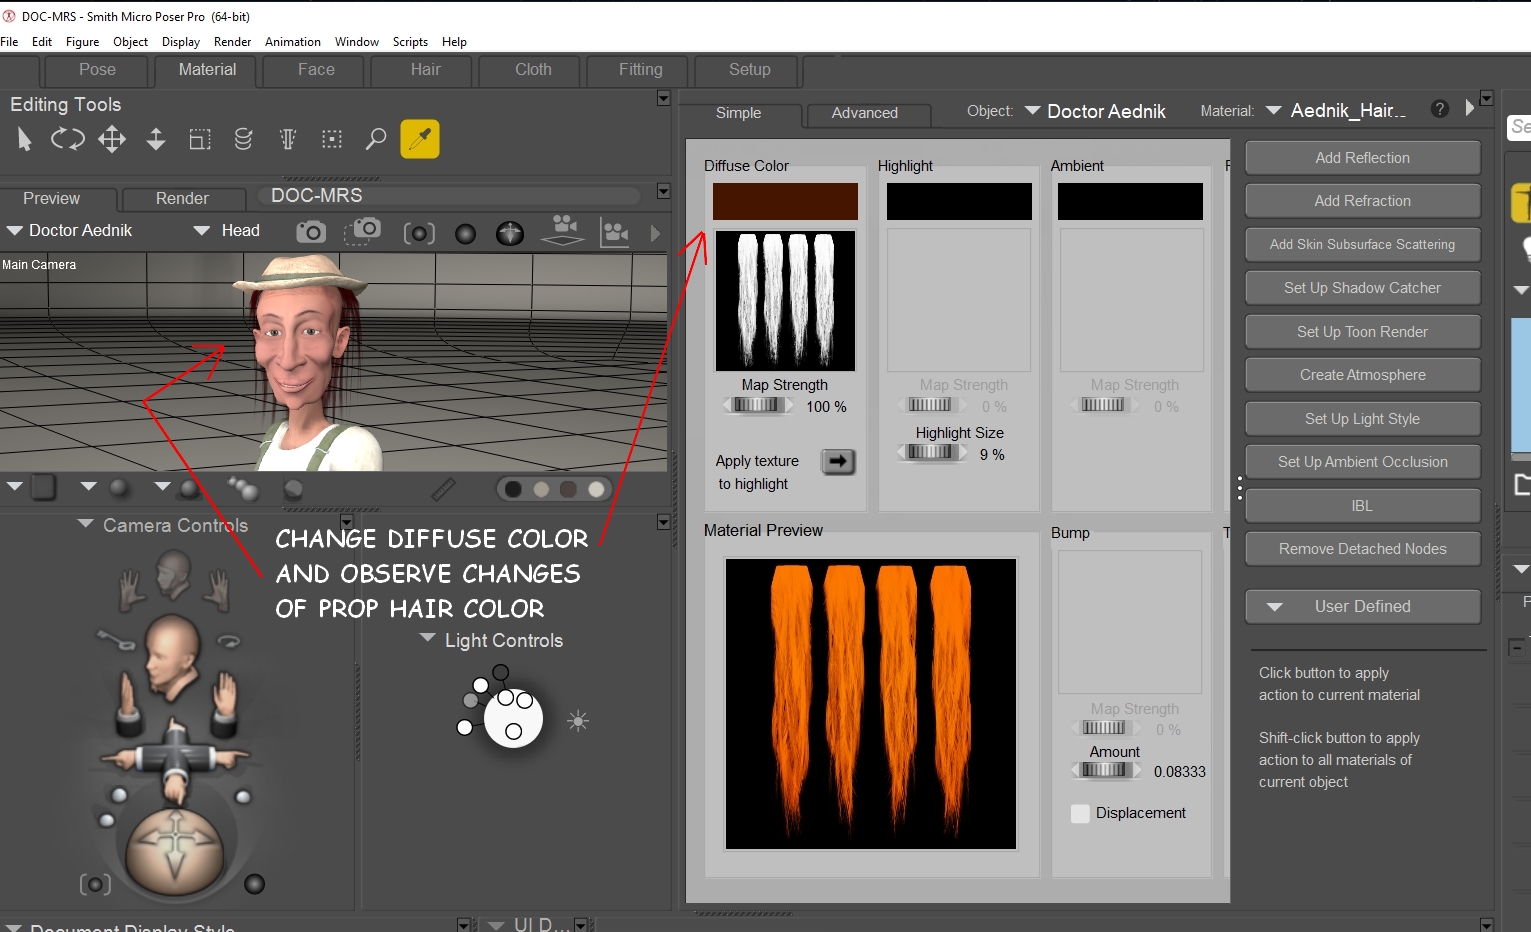
And, the thought occurred to me, that you may have been asking how to change the prop hair color that Nursoda had supplied, so here's how to do that.
STEP 1 - Select the prop hair, and go to the Simple Material Room. Look for where it says Diffuse Color (in this case, it's gray).
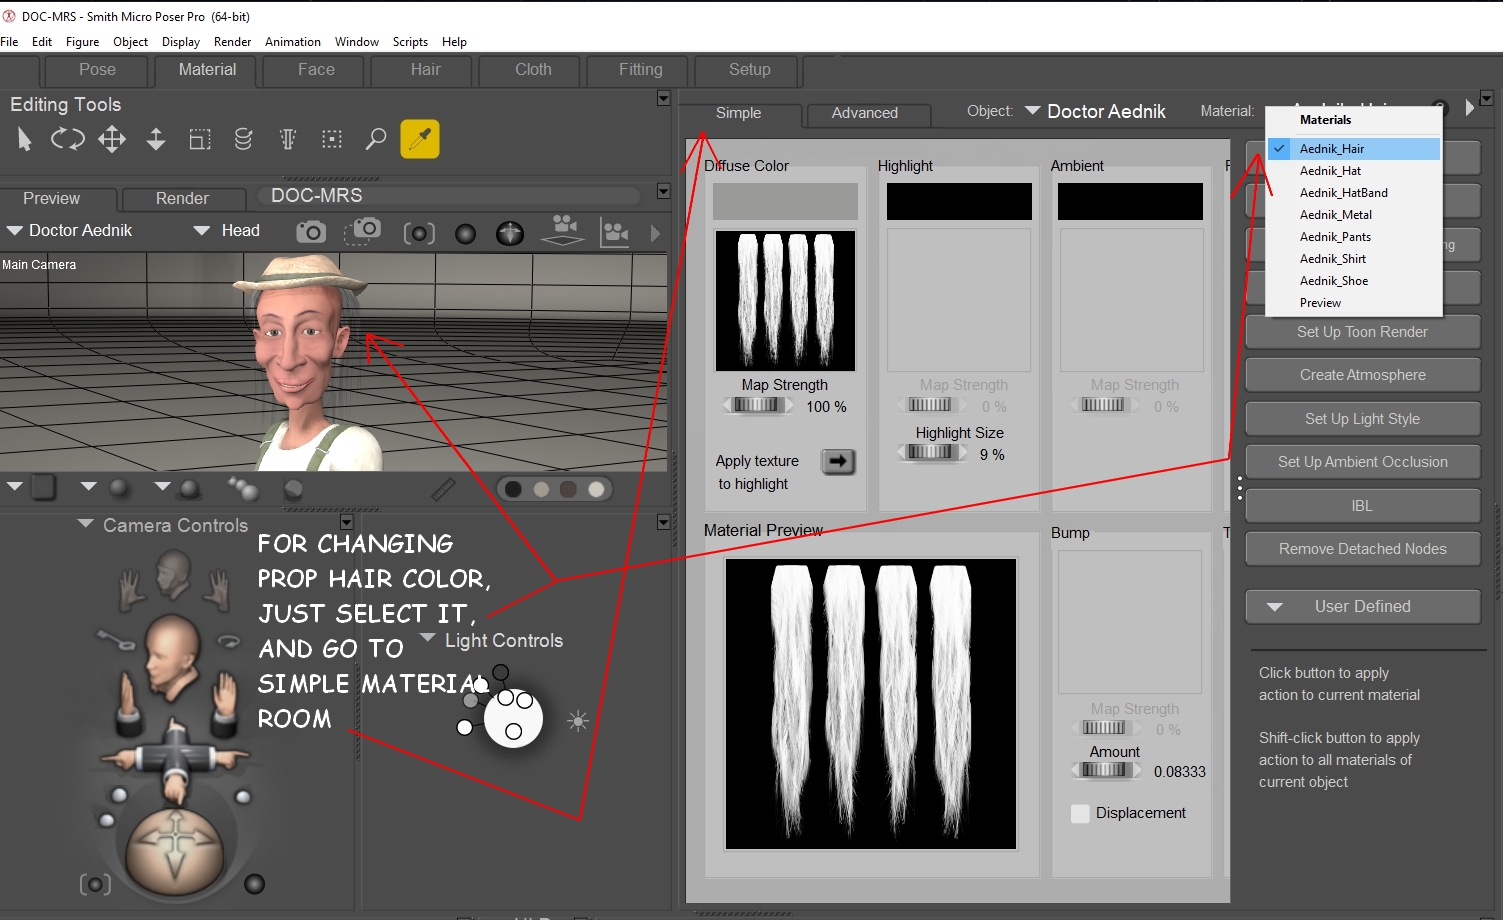
STEP 2 - Just keep adjusting the diffuse color, and observe the changes to the color of the prop hair. You can leave the Mat Room, render out the scene to check the color, and go back to the Mat Room again to tweak the color if you want to make changes. That's all there is to it
STEP 1 - Select the prop hair, and go to the Simple Material Room. Look for where it says Diffuse Color (in this case, it's gray).
STEP 2 - Just keep adjusting the diffuse color, and observe the changes to the color of the prop hair. You can leave the Mat Room, render out the scene to check the color, and go back to the Mat Room again to tweak the color if you want to make changes. That's all there is to it
