-
Welcome to the Community Forums at HiveWire 3D! Please note that the user name you choose for our forum will be displayed to the public. Our store was closed as January 4, 2021. You can find HiveWire 3D and Lisa's Botanicals products, as well as many of our Contributing Artists, at Renderosity. This thread lists where many are now selling their products. Renderosity is generously putting products which were purchased at HiveWire 3D and are now sold at their store into customer accounts by gifting them. This is not an overnight process so please be patient, if you have already emailed them about this. If you have NOT emailed them, please see the 2nd post in this thread for instructions on what you need to do
You are using an out of date browser. It may not display this or other websites correctly.
You should upgrade or use an alternative browser.
You should upgrade or use an alternative browser.
Nataani for Dusk
- Thread starter Seliah (Childe of Fyre)
- Start date
Okay... getting back onto this...
How the blazes am I supposed to make the facial hair pop out? Poser seems to do nothing with the normal maps other than to lighten the color of the the whole material zone, so basically my normal maps are bloody useless for this.
And in the meantime, his facial hair looks like a kid drew it on his face with a pencil... it's already showing little white speckles in a few spots, and if I increase the bump value AT ALL the speckling just gets worse and it STILL doesn't do jack squat to make the hair pop out at all.
WTF am I doing wrong here?
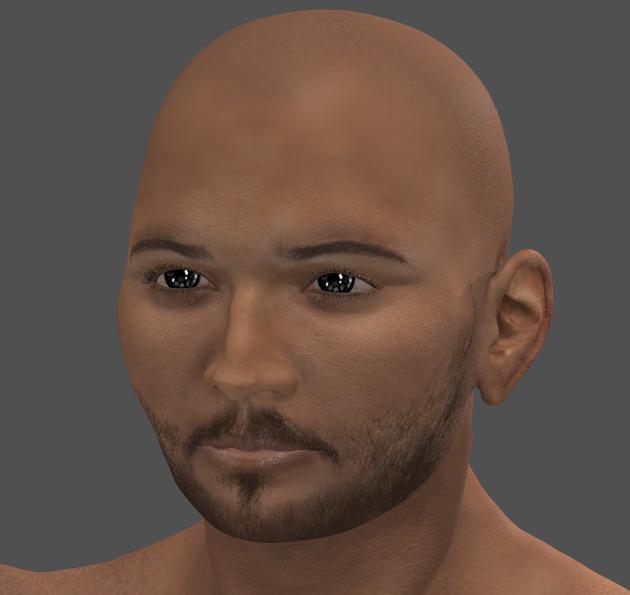
This is the render of his face with the full beard map applied :
And this is a screenshot of the blasted material room with my current settings :
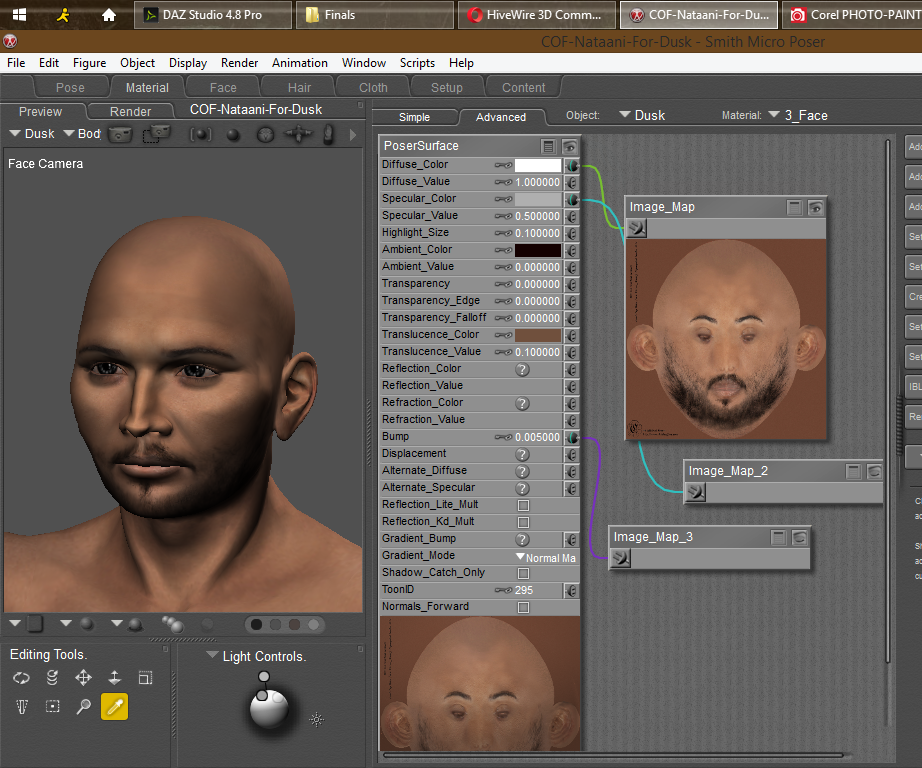
No matter what I do here, the facial hair basically just stays flat and the speckles remain when rendered. Reducing the bump just makes it even more flat, and increasing the bump AT ALL brings even MORE speckles into the render. Applying his normal map to the Gradient channel and using any of the Normal "modes" does nothing but make the texture look even worse.
I really, REALLY don't want to rely on displacement mapping for him, because if I apply it to his face, I HAVE to apply it to the rest of his body and THEN folks will have gobs of trouble putting clothes on him without bloody poke-thru happening.
WTF am I doing wrong?
How the blazes am I supposed to make the facial hair pop out? Poser seems to do nothing with the normal maps other than to lighten the color of the the whole material zone, so basically my normal maps are bloody useless for this.
And in the meantime, his facial hair looks like a kid drew it on his face with a pencil... it's already showing little white speckles in a few spots, and if I increase the bump value AT ALL the speckling just gets worse and it STILL doesn't do jack squat to make the hair pop out at all.
WTF am I doing wrong here?
This is the render of his face with the full beard map applied :
And this is a screenshot of the blasted material room with my current settings :
No matter what I do here, the facial hair basically just stays flat and the speckles remain when rendered. Reducing the bump just makes it even more flat, and increasing the bump AT ALL brings even MORE speckles into the render. Applying his normal map to the Gradient channel and using any of the Normal "modes" does nothing but make the texture look even worse.
I really, REALLY don't want to rely on displacement mapping for him, because if I apply it to his face, I HAVE to apply it to the rest of his body and THEN folks will have gobs of trouble putting clothes on him without bloody poke-thru happening.
WTF am I doing wrong?
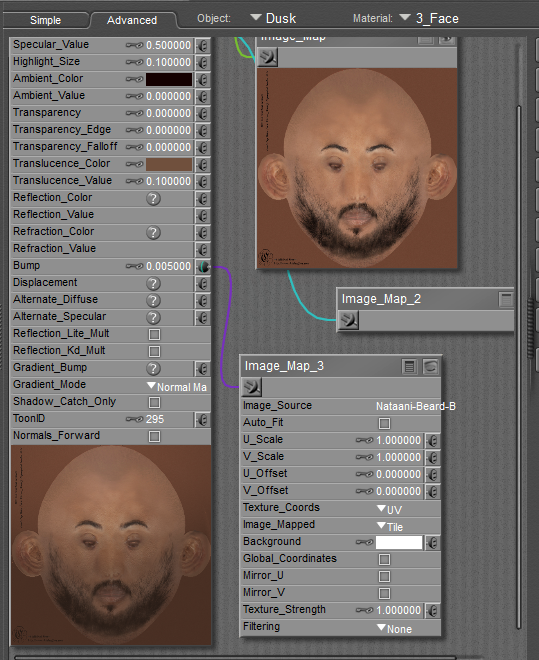
I can't see the palette for your bump map in the screenshot, so I'm wondering what "filtering" you're using. If you're using Quality, try upping it to Crisp. I do that a lot for bump maps for clothing textures. I don't always do it for the diffuse map, because sometimes, depending on the kind of texture, it might be too much, but the bump alone might help. That might work better than upping the bump setting.
Currently the filtering on ALL my maps is set to "None." I started doing that when Firefly first came out, because any other option resulted in constant blurry renders.
Should the filtering be set to something other than "None" these days?
Should the filtering be set to something other than "None" these days?
This is the expanded palette for the bump map (it's Image_Map_3) :
And... THIS is what happens when I set the bump maps to use "Crisp" on the Filtering :
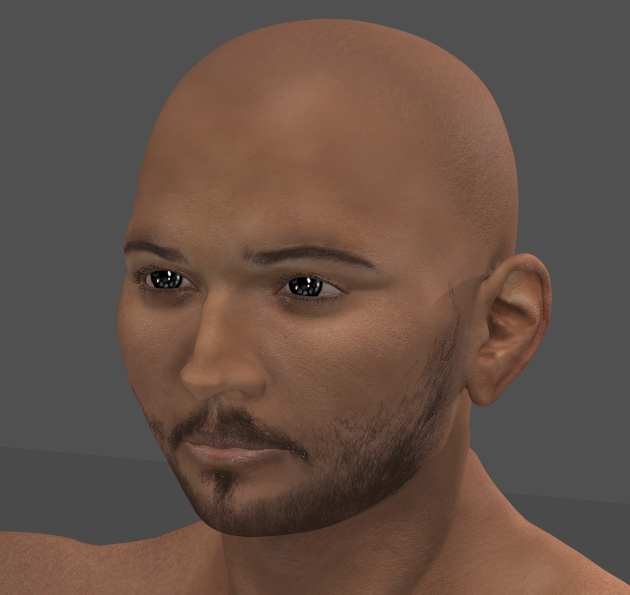
Even more speckling than the first render as a result, and still flat hair. :/
Even more speckling than the first render as a result, and still flat hair. :/
Yes indeed. Those banners are difficult to do! I hate turning the image sideways, but sometimes that's the only way you can do it and have a banner where you can actually see something.
Did you try displacement for the beard?
Did you try displacement for the beard?
As I mentioned above, if I applt displacement to one material zone, it must then be applied to all zones, otherwise you get visible raised seams at the end of the one material zone.
And when displacement is used on a skin, it makes it hell to dress the figure without a craptastic load of poke-thru. I HATE displacement on skins for that reason. It has it's uses - but skin is NOT it.
So I really do not want to use displacement on him if I can avoid it at all.
My question is... CAN Poser make use of normal maps at all? If not, why the heck is the option there under the gradient bump? Normals are great for skin; they add the extra detail that displacement maps do, but without ballooning the mesh out to create problems with wardrobe.
Crisp doesn't always work Seliah, try Quality, which is the default I usually use, and see what happens.
Yup. Tried that, too. No difference. Tried each of the Filtering options with no joy.
From what I understand, Poser can use normals. I just haven't researched it.
I was referring to using displacement on the face for the beard. It's what I use for eyebrows, lips, and face paint/makeup. I don't use displacement on the body. If the map is black except for those areas (eyebrow hair) you want raised, it doesn't affect seams.
I was referring to using displacement on the face for the beard. It's what I use for eyebrows, lips, and face paint/makeup. I don't use displacement on the body. If the map is black except for those areas (eyebrow hair) you want raised, it doesn't affect seams.
As an example, this is what my displacement map looks like for eyebrows.
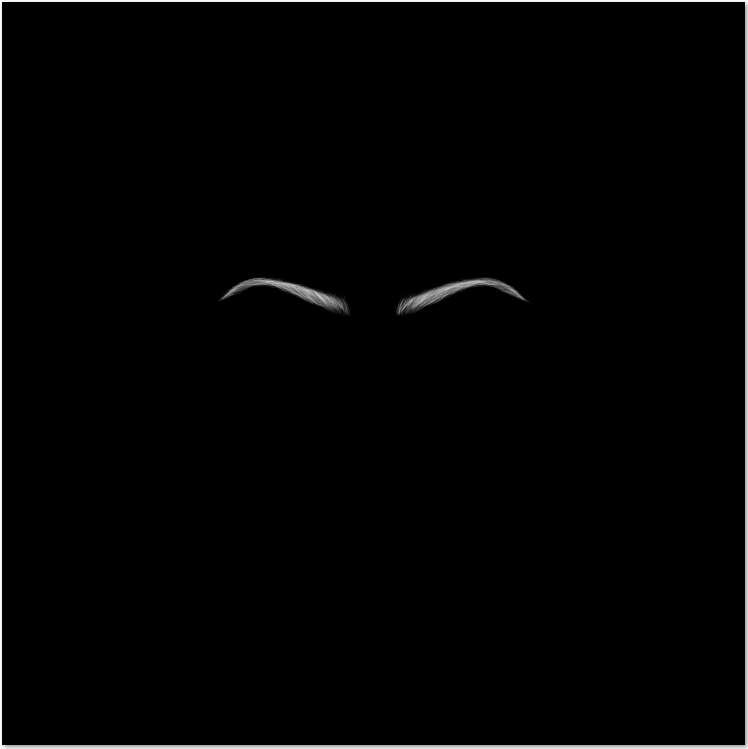
This is the eyebrow at full size. What's white is raised, what's black isn't.
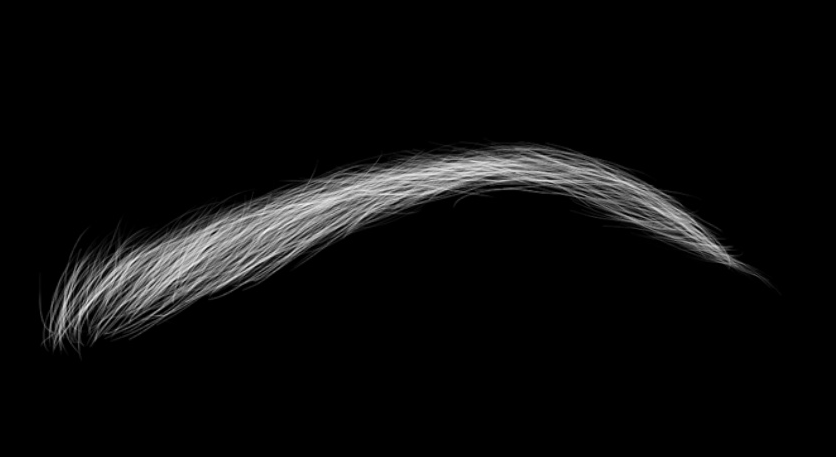
This is the eyebrow at full size. What's white is raised, what's black isn't.
I see. Okay. Let me reload psd files for him to my computer (they're stored on the external HD), and try it that way. Thanks, Satira.
Mmmm I can ask at pfd for you Seliah...pdg always keeps an eye out for poser questions that need answering...
Thanks, Sanbie. Let me try what Satira suggested first. If that doesn't work, I'll take a trip over to the PFD forums and post. Ok?
parkdalegardener
Adventurous
Without reading the entire thread I can offer a suggestion or two.
What are your Poser units? Inches, feet, pnu, meters? What ever you use; your bump is set to .005 of it. Five one thousandth of an inch is a lot different than five one thousandths of a meter.
Is your bump map prepared for Poser or Studio? They use a different method as regards mid grey.
If your beard map is grey scale it gets plugged into Gradient_Bump and choose Gradient Bump from the Gradient Mode selection offered. The Bump channel is for legacy .BUM image maps.
What image gamma is used in loading the image. 2.2 is normal for RGB images but 1 is used for grey scale data?
If you actually want a true normal map for your beard then it won't be a straight Firefly shader. A Normal or Tangent Normal image map is mostly blue. Object and World Space maps are rainbow coloured. I can't see your maps so I don't know what they are.
The speckles are probably from the Specular map.
Everything can be generated from your main texture image via math and HSV nodes but that may be a bit advanced for this issue.
Sorry for all the questions but I can't see your maps or the gamma used to load them.
Glitterati3D
Dances with Bees
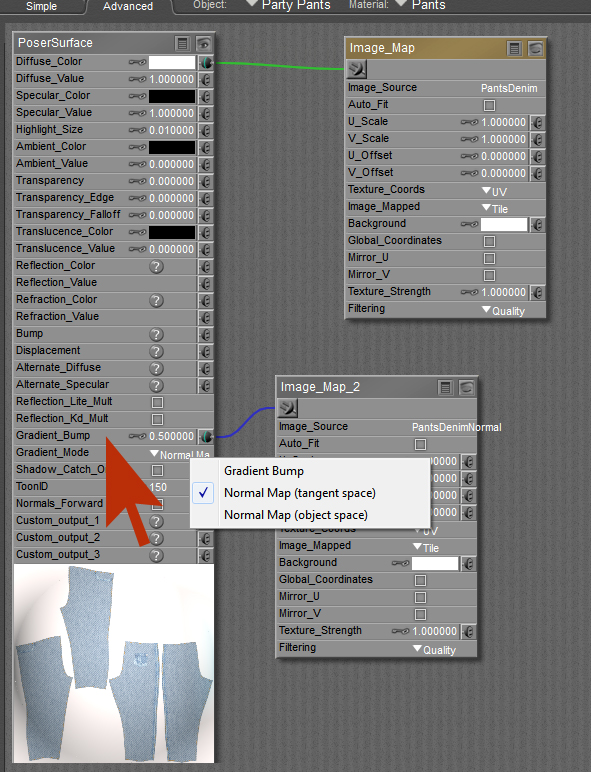
Seliah, Poser uses Normal maps easily, including in Firefly. And, in fact, there's a free nVidia plugin for Photoshop that will make creating a normal map with a few simple clicks.
https://developer.nvidia.com/sites/...iles/Photoshop_Plugins_x64_8.55.0109.1800.exe
Just use your texture, not your bump/displacement maps with that plugin to create your normal maps.
If you look at the Dawn, Dusk and Baby Luna textures in the material room, you'll see they ALL use Normal maps. Very effectively.
Holler if you want some help using a normal map.
Last edited:
