• Welcome to the Community Forums at HiveWire 3D! Please note that the user name you choose for our forum will be displayed to the public. Our store was closed as January 4, 2021. You can find HiveWire 3D and Lisa's Botanicals products, as well as many of our Contributing Artists, at Renderosity. This thread lists where many are now selling their products. Renderosity is generously putting products which were purchased at HiveWire 3D and are now sold at their store into customer accounts by gifting them. This is not an overnight process so please be patient, if you have already emailed them about this. If you have NOT emailed them, please see the 2nd post in this thread for instructions on what you need to do

Towards better grass in Poser...

3dcheapskate

Engaged
Forgetting about the grass for a moment, I recall that a big limitation of my hex figure approach is that while it's fine for perfectly flat expanses...
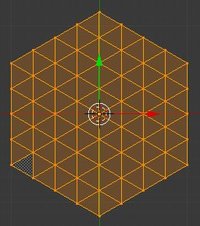
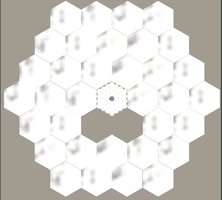
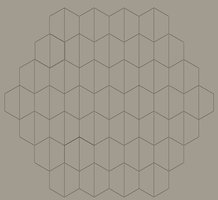
My basic hex geometry of 6 vertices and two trapezoid faces means the basic 37 hex figure's mesh is just 222 vertices and 74 faces. That's good enough for completely flat terrain. Or even for slightly bumpy terrain via micropolygon displacement (so not SuperFly), - provided you don't mind the random holes that inevitably appear in the surfaces, a workaround for which is a perfectly flat non-displaced non-shadow-catching plane just beneath it with the same texture applied.
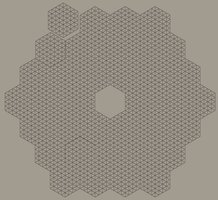
For more seriously bumpy terrain it's really got to be mesh, but using the same geometry swapping idea. So let's try simply making a hex out of 6 triangles, subdividing that a few times (61 vertices, 96 faces), and making this an alternate geometry for each of the 37 hexes (2257 vertices, 3552 faces total for all 37). If the figure was then scaled up about 700% and the hex in the middle was made invisible then a new figure could be loaded and it should fit in the hole in the middle
hex0.JPG 61-96.JPG hexbump.JPG
 

3dcheapskate

Engaged
Rather than just using the flat 96 triangle hex I created a few bumpy versions of it by pulling the internal vertices upwards by varying amounts, but leaving the vertices around the edge at zero height so they'll match the adjacent hexes regardless of which of the bumpy altgeom versions and what 60° increment y rotation they're using. (I'm using Notepad++ to manually edit the cr2 and I've just realized how useful the extended syntax is for find-and-replace, making adding altgeoms by hand as and when I feel like it feasible).
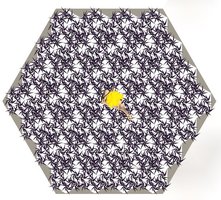
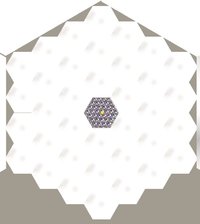
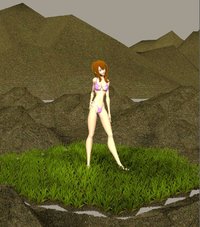
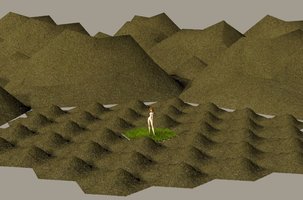
Start with Dollie for scale, add one 37 figure hex and set a grass geometry. Add a second, scale it up around 700%, make the centre hex invisible, adjust so that the original figure fits neatly in the hole (at this point I realized that it had to be rotated 30° too), and set one of the bump geometries. Add a third figure, scale it about 4,900%, poke a hole and adjust to fit, and set a different bump. Using the main camera I realized the outer hills were getting in the way so I simply made a few additional hexes invisible.
min.JPG mid.JPG max.JPG

I also realized that I needed to apply grass and hill textures and apply some random rotations. Grass I already had (posted to this thread before), and for the hills I used one of my ground terrain freebie textures, but replaced the two image maps with cloud nodes using global coordinates. But my existing randomize rotations pose didn't work and I didn't fancy doing that manually so I left the rotations at default.

Bearing all of the above in mind I knew this wasn't going to be brilliant... after looking at the first results I'm quite optimistic.

Yes, there are lots of problems. But I already have tentative solutions/workarounds for all the ones I can see, eg the aforementioned underlying groundplane to hide the holes.

What I'd really be interested in is other peoples observations, thoughts, and ideas. One good reason for posting a warts'n'all render ! :D

r2.JPG r1.JPG
r2.JPG


To get the ball, or stone, rolling I think that maybe I've made the basic hex a bit too small. It's a trade off between making the basic figure cover a large enough area and not making the grass mesh for a single hex too polygon heavy. Also of course bearing in mind that mutiple overlaid/conformed figures of the same size with different random rotatipons and grass geometries for each hex could be used to make the grass thicker.
 

3dcheapskate

Engaged
Next step while I'm waiting for responses (as I said I'm usually an optimist) is probably to write a script to randomize things, and/or create a few 'random' poses.
 

3dcheapskate

Engaged
I now have a (laughably bad) script that allows me to set random rotations for each hex in either 1° or 60° increments and also random geometries, either from the grass (1-5) or bump (6-10) variants.

Here's the main bit of the "code" :cool: (that's a "peril sensitive sunglasses recommended" emoticon!) which was cobbled together from pre-used sticky tape, rusty nails, and old mouldy cheese:


# Let user select random rortations in 1 or 60 degree steps (or skip)
confirm1=poser.DialogSimple.YesNo("Set random y rotation for each hex?")
if confirm1:
randinc = 1
confirm2=poser.DialogSimple.YesNo("60 degree increments?\n\n(If 'No' then 1 degree increments will be used)")
if confirm2:
randinc = 60

i = 1
while i < 38:
bone = "bone_" + str(i)
if randinc == 1:
randyrot = random.randint(0,359)
else:
randyrot = random.randint(0,5)*60
print bone + " y rotation set to " + str(randyrot)
act = scn.ActorByInternalName(bone)
act.Parameter("yRotate").SetValue(randyrot)
i = i + 1

# Let user select random grass or bump geometries
confirm1=poser.DialogSimple.YesNo("Set random geometry for each hex?")
if confirm1:
grassonly = 0
confirm2=poser.DialogSimple.YesNo("Grass geometries only?\n\n(If 'No' then bump geometries only will be selected)")
if confirm2:
grassonly = 1

i = 1
while i < 38:
bone = "bone_" + str(i)
if grassonly == 1:
randgeom = random.randint(1,5)
else:
randgeom = random.randint(6,10)
print bone + " geometry set to " + str(randgeom)
act = scn.ActorByInternalName(bone)
act.Parameter("bone_"+str(i)+"_variants").SetValue(randgeom)
i = i + 1

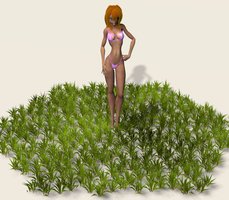
And here's a render with two basic hex figures at default size and the same position, one having random grass geometries and rotations, the other having random bump geometries and rotations. Dawn included for scale
Capture.JPG


The grass geometries are just ones I found in folder from the last time I was looking at this, so they're intended for a flat surface, so the bump geometries of the other figure are higher than the grass in places. But once again, a warts'n'all render is good at this stage as some of the problems are obvious.
 

3dcheapskate

Engaged
(Is there any chance that an admin could change the title of this topic to "An alternate(geom) approach to grass in Poser...")
 

3dcheapskate

Engaged
:)

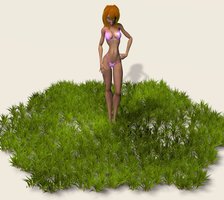
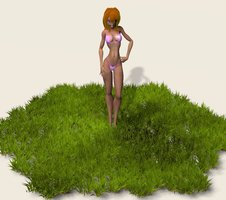
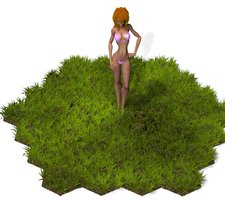
Now that I have an easy way to randomize the individual hex y rotations I resumed my wondering about using multiple overlaid basic 37 hex figures to make the grass thicker. Below are (left to right) renders using 1, 2, and 3 of these. All three figures use exactly the same geometry variant (704 vertices, 176 faces) for all hexes.
It looks as if the 2 figure render gave the same y-rotation to the hex just in front of Dollie in both figures - that's something I probably want to prevent, possibly by parenting any overlaid figures to the first making it easier for me to bash the script to fit?
(Sidenote to self: since all 37 bones of the hex figures are parented directly to the body, when I parent a second hex figure to the first it appears at the same level as the 37 bones. I might want to add an intermediate (geometryless) bone.)
1.JPG 2a.JPG 3.JPG


I then used my randomize script to make one of the figures just random bumpy ground geometry
1bump+2grass.JPG
 

3dcheapskate

Engaged
I also had another go at surrounding the first figure with progressively larger ones. This time one 37 hex figure with grass (I hadn't got the randomizer sorted when I did this), with three additional, progressively larger, figures. Increasing the displacement in the ground material (roughly in proportion to the scaling of the figure) helps a little bit I think). I also applied the same ground material to the Poser semi-dome thingy's ground to hide any gaps.
The second Ms Kez on the hill is the same size as the one in the centre, just to give a visual impression of how far away (or close depending on your wont) the hexes of the fourth figure are. Back-of-a-fag-packet calculation is that she's only around 150m away (I didn't save the scene and didn't note down the xyz trans)

2.JPG
 

3dcheapskate

Engaged
One 37 hex figure with random grass geometries (4 different ones) and random rotations, plus one 37 hex figure with the default geometry and the old ground texture.
Render 1.jpg

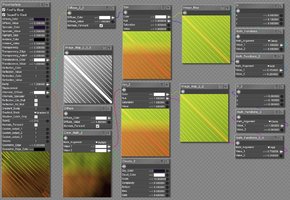
The grass material (same one I've been using all along) is making the flatter grass more brown than green because of the P node. It was a good idea but may need a rethink if I use grass of varying heights.
The edges of the 37 hexes are fairly obvious so I clearly need to put some of the grass of the alternate geometries closer to the edges of the small hexes with more overlap.
I also think that two or three overlaid 37 hex figures of grass, as I tried two posts back with Dollie, are necessary because despite the random geometries/rotations it still looks rather repetitive to me
 
Last edited:

parkdalegardener

Adventurous
Using the P node you are texturing the grass based on height from polygon base? Would a colour ramp work instead, or possibly a gradient from root to tip?
 

3dcheapskate

Engaged
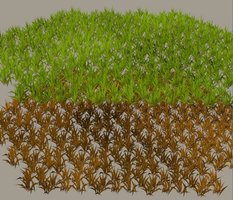
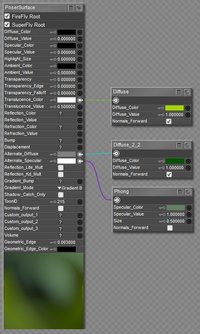
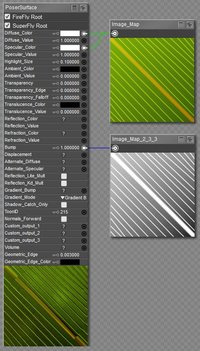
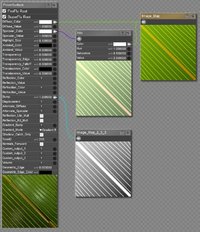
Apart from the fact that P node uses world coordinates, so height it relative to world origin, that's correct. I did the following render to double check - the upper grass is at default position with its base at zero height, while the lower one is dropped to a negative height. Shader screenshot shown too.

wc.JPG Capture.JPG

Colour ramp etc would be a good alternative, but I'd have to account for the odd mapping I've used: Each grass blade is a single face (4 vertices, 1 face) - this was so that simply by making the tip non-coplanar with the other three vertices the renderer automatically makes it look curved. The blade is UV mapped to the full UV square with the root bottom right and tip top left - I think that's just how Blender mapped it by default way back when I started on this and I thought why not ? Alternatively I could simply remap.

graass.JPG Leaf1.jpg

Or maybe just include a change in hue from root to tip on the texture map itself ?
Or even scrap the change in hue - I was only playing after all ! :D
 
Last edited:

3dcheapskate

Engaged
Regarding the shader in the previous post (edit timeout, so I couldn't add this), since it uses translucence any type of global illumination will totally screw it up (it looks as if translucence is always at full strength, regardless of viewpoint).

FF.JPG FF inf+ibl.JPG
For all my renders in this topic I think I've used two infinite lights, one from somewhere in front, t'other from somewhere behind. Except the render on the right above which uses a Diffuse IBL and an infinite - see what I mean ?

Also the shader only works in FireFly (I don't use SuperFly) - no surprise there
SF inf+inf.JPGSF inf+ibl.JPG

(The only reason I keep using this shader is that I think it looks rather good, provided I stick to non-global lights and FireFly :D )
 

KageRyu

Lost Mad Soul
Contributing Artist
@3dcheapskate Fascinating stuff, I wish I had more time to read it more thoroughly and try to put some of it to practice myself (same for your volumetric depth experiments, and book experiments).
I had been experimenting with using P node to make a magma pit that descended downward and applied a magma texture as it went negative... but render tests were taking a lot of time and I was having trouble getting it right.
 

3dcheapskate

Engaged
Here's a very basic translucence shader (for FireFly only, with no global illumination) plus two renders using two infinites in different positions.
After looking at lots of grass I used a dark green for the basic diffuse, a paler greyish green for the specular, and a more saturated brighter green for the translucence.

basictranslucence.JPG Transl + 2inf.JPG crap.JPG

Doesn't look too good.
 

3dcheapskate

Engaged
@3dcheapskate Fascinating stuff, I wish I had more time to read it more thoroughly and try to put some of it to practice myself (same for your volumetric depth experiments, and book experiments).
I had been experimenting with using P node to make a magma pit that descended downward and applied a magma texture as it went negative... but render tests were taking a lot of time and I was having trouble getting it right.

For me time's not a problem. Inclination is though ;)

(Aside: P-nodes and magma pits reminded me that I saw How do I make a smog layer in the sky with volume? | HiveWire 3D Community a couple of weeks ago, thought "I'd better refresh my memory on that", and then promptly forgot. Now that my render beast no longer threatens to ooze off the desk* when I start Poser I think I'll have a look - unless I forget again :rolleyes: )

*i.e. overheating and going into meltdown.
 

3dcheapskate

Engaged
Since it's been over three years since I started this topic I thought it'd be worth going over a few things to refresh my mind. It might also help me focus on what's important. ;)

This was basically a confluence of three separate ideas.

1) Using a single quad for a leaf or blade of grass and letting the renderer provide the curvature.
2) Using hex tiles for the ground instead of squares or circles.
3) Using geometry swapping to cut down (perhaps) on the resources.

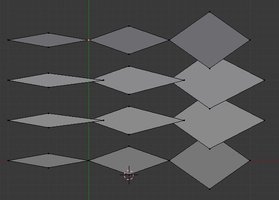
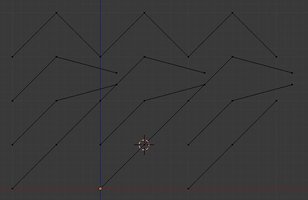
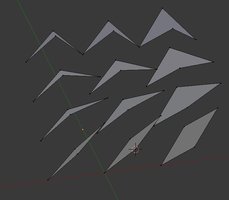
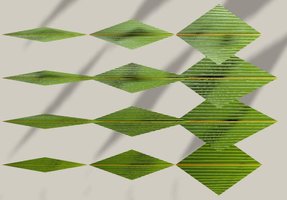
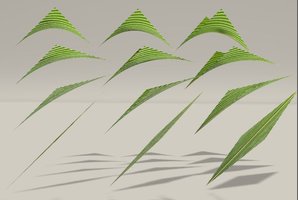
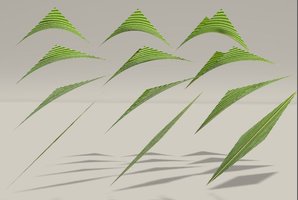
1) The fact that Poser FireFly automatically gives any quadrilateral whose vertices aren't coplanar a nice curve, which I first realized back in 2009 here - Pointers to useful threads in the 3D Modeling Forum for a relative beginner | Renderosity . It was much later that I noticed that the leaves on most Poser plants and trees often look too flat. It was much later still that I thought of combining the two, but I never did anything with the idea until I started doing this grass thingy. But I've only just discovered that this only happens in FireFly, not SuperFly. Here's a quick test - a simple mesh consisting of twelve separate quads. First the actual mesh in Blender - top, front, and angled views respectively:

TOP.JPG Front.JPG cam.JPG

Next the same three views rendered in Poser 11 FireFly (I applied my simple grass texture/bump maps to Diffuse/Bump respectively):

FFtop.JPG FFcam.JPG FFcam.JPG

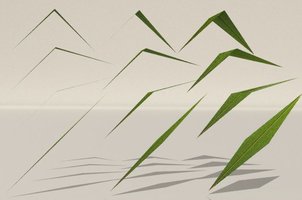
But in SuperFly I get this (just the angled view necessary to prove the point):

SFcam.JPG

Also, for a thin blade of grass I didn't see any need to use transparency, which I believe slows down the rendering. Yes, there'll be a couple of sharp corners halfway along each grass blade, but the idea is to have hundreds or thousands of these covering a (flat for now) surface and it isn't intended to be the focal point of the image.


2) Using hex tiles for the ground instead of squares or circles would give six possible orientations (y rotations) for each tile. Several identical tiles could be placed side by side at different rotations to give a more random effect. Two identical (or different) tiles could be placed in the same postion but with different rotations to give more density. Larger, and less detailed, hex tiles could be used for more distant areas.


3) Using geometry swapping to cut down (perhaps) on the resources used by having a figure composed of multiple parts which all use the same geometry and alternate geometries. The geometry swapping idea was something I'd been playing with for a while, but the possibility that it could be used to save resources was put forward in post #9 of my Instantiation Via (Poser) Geometry Swapping ? | HiveWire 3D Community topic. We never really got an answer as to whether this actually saves resources, but my experience of the speed at which FireFly renders comparatively large fields of grass mostly for this current topic tells me that it's probably doing something that helps render speed.
 

3dcheapskate

Engaged
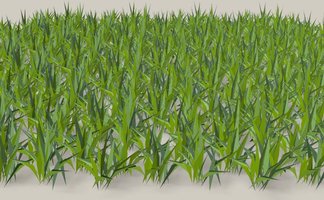
Just trying some of the things I thought about in post #50. A very simple shader (no translucence). One figure with a simple ground texture, another with random grass geometries for each hex, and a third with random grass textures for each hex

2 figures.jpg basic grass mat.JPG

And adding the third figure
3 figures.jpg


The basic idea still looks okay. Perhaps the very short tiny grass and the flattened grass don't work too well with the other longer grass geometries, so I probably need to create some better alternate geometries.

And not forgetting to make all the grass geometries extend over the edges of the hexes.
 

3dcheapskate

Engaged
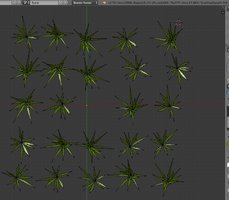
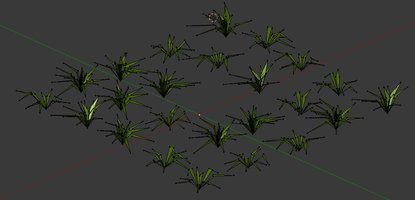
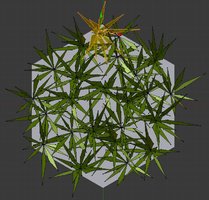
Starting from one of the alternate grass geometries that I already had I spaced the tufts out, merged the base vertices of all grass blades forming each single tuft, and then did a bit of translation and rotation for all the blades to give a bit more variety to the tufts. Basic mesh 888 vertices, 288 faces.
24 tuft, 888vert, 288 faces.JPG 24 tuft, 888vert, 288 faces, view.JPG

Then I randomly positioned each tuft with its base vertex somewhere in the small hex (right up to the edge so that leaves will overlap hexes), and randomly rotated each tuft.
Capture.JPG
I did this a few times to create 5 different alternate grass geometries. Here's a Poser 11 render showing 5 small hexes with each of the 5 geometries side by side - 2 infinite lights, ray-traced shadows.
5 grass obj.JPG

(Note: I'd also added an HSV node to my very basic grass shader to drive the specular.
Basic grass HSV spec.JPG
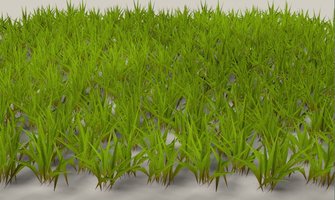
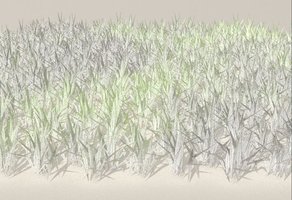
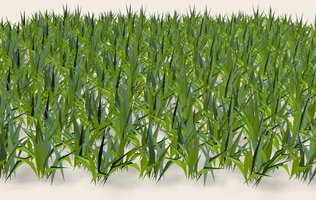
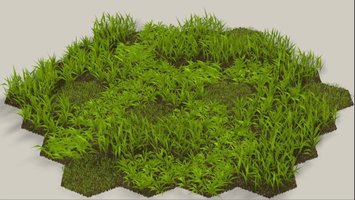
And then a render of the 37 hex figure with each hex having a random rotation (in 1° steps - no need to limit it to 60° steps) and a random grass geometry from the 5 I just created. Same lights as before, just the 37 hex figure and the Poser ground construct.
5 new grass obj.JPG

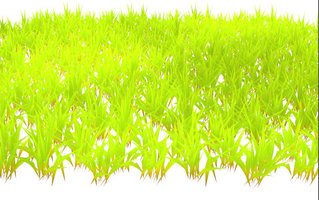
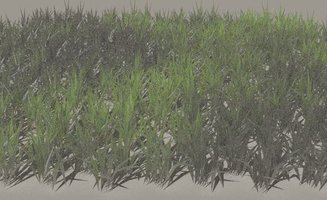
Exactly the same as above (same rotations and geometries) but with the ground set black
5 new grass obj bJPG.JPG

I think that looks quite good.
 
Top