-
Welcome to the Community Forums at HiveWire 3D! Please note that the user name you choose for our forum will be displayed to the public. Our store was closed as January 4, 2021. You can find HiveWire 3D and Lisa's Botanicals products, as well as many of our Contributing Artists, at Renderosity. This thread lists where many are now selling their products. Renderosity is generously putting products which were purchased at HiveWire 3D and are now sold at their store into customer accounts by gifting them. This is not an overnight process so please be patient, if you have already emailed them about this. If you have NOT emailed them, please see the 2nd post in this thread for instructions on what you need to do
You are using an out of date browser. It may not display this or other websites correctly.
You should upgrade or use an alternative browser.
You should upgrade or use an alternative browser.
Share your HiveWire Horse Renders Here!
- Thread starter HiveWire3D
- Start date
quietrob
Extraordinary
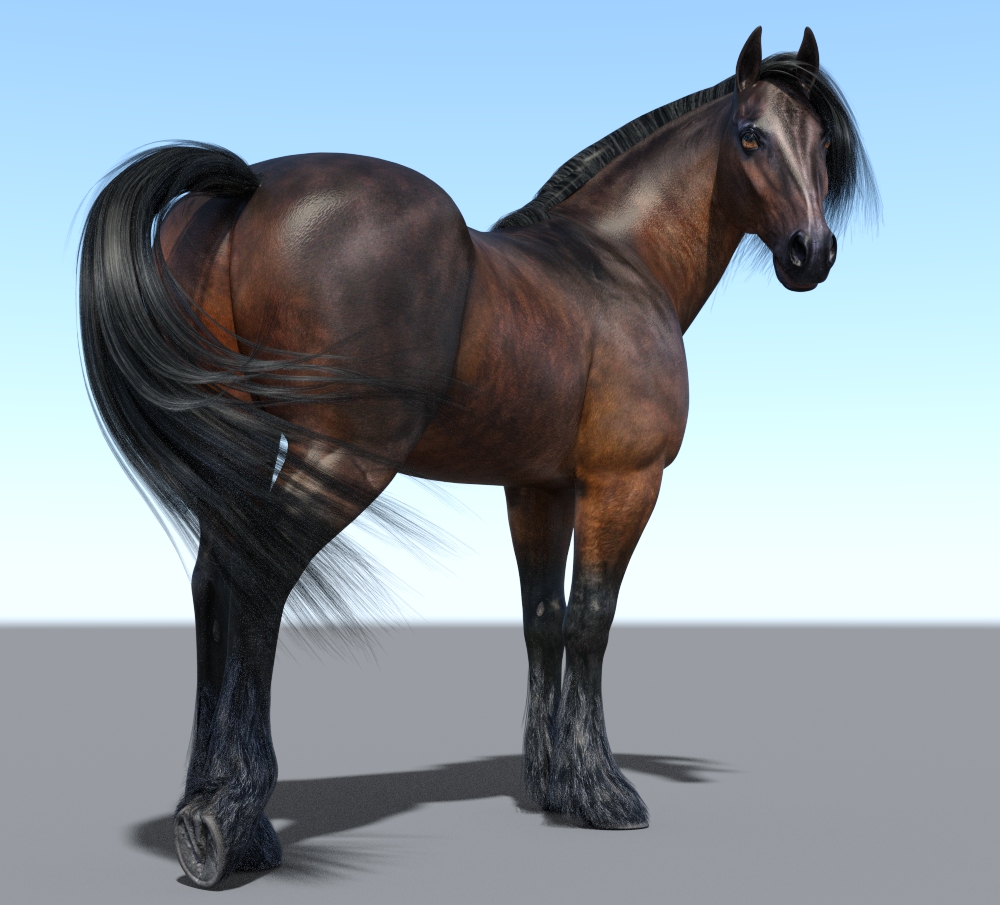
Id like to see Render PNG like that above and then inserted into picture of horses in a corral to see if I could pick it out. I mean, that image is very very good!Added some Diffuse Roughness and Backscatter just to simulate fur.
The transmaps I had to save out in Grayscale or go into the Surfaces Pane and click on the Thumbnail and select Image Editor and change the "Image Gamma" value from 0.00 to 1.00. Meaning DS will now treat the transmap as a grayscale image. See how the hair is now fuller. When changing the Image Gamma it will apply to that map no matter if on multiple horses.
Lowered the Normal and Bump maps
Adjusted Gloss
View attachment 28480
Added some Diffuse Roughness and Backscatter just to simulate fur.
The transmaps I had to save out in Grayscale or go into the Surfaces Pane and click on the Thumbnail and select Image Editor and change the "Image Gamma" value from 0.00 to 1.00. Meaning DS will now treat the transmap as a grayscale image. See how the hair is now fuller. When changing the Image Gamma it will apply to that map no matter if on multiple horses.
Lowered the Normal and Bump maps
Adjusted Gloss
View attachment 28480
Hey Szark!
I totally! value your input. First though I would like to say I haven't updated that texture set to SF or Iray yet for one
All that said I am SO open to suggestions from you on how to make this kind of shine a clean/well groomed horse has. I mean it! Any help is appreciated!
Laurie
I think it looks fine,but this breed/coat type is known for kind of a guerello/grullo type look with lights and darks so... not real sure it's painted Highlights on there.did you think the coat needs to be more shiny?
Last edited:
Szark
Awesome
@Laurie The problem with getting that look is two fold. One we are dealing with flat maps and not fur this is why I am trying Backscattering (Velvet type of light reaction). I will have more time later to test out some ideas. Even though I have been using Iray since the Beta I am still learning how the shader works in relation to what channels work with what. But I am getting better at it.
Regarding updates. Personally if the updates include new maps and shader setting I would ask a small fee to compensate. I would pay it.
@NapalmArsenal I thought that myself until I looks at the tail diffuse maps but that might get fixed with Laurie's updates.
Regarding updates. Personally if the updates include new maps and shader setting I would ask a small fee to compensate. I would pay it.
@NapalmArsenal I thought that myself until I looks at the tail diffuse maps but that might get fixed with Laurie's updates.
Szark
Awesome
Id like to see Render PNG like that above and then inserted into picture of horses in a corral to see if I could pick it out. I mean, that image is very very good!
There you go in PNG format not sure if will look good though
Thank you
Szark
Awesome
This is Default Harry and Harry with Sparky's Skelehorse displacement. Its a bit too sharp to use as is (also you don't want the spine like this) but for your own use you could play with it to suit your needs. (Thumbnails, click to view larger)
View attachment 28534 View attachment 28533
Try adding some Gaussian Blur to the displacement map to lessen the sharpness.
Szark
Awesome
@CWRW I think I am getting close but not perfect but close IMO.
The Photo reference shows me the photo was taken with a High ISO etc given the sun in behind the camera and yet the sky behind is blown out. So the sheen isn't going to show what Iray would look like at default settings. That is just my opinion.
From what I can see Backscatter isn't going to work as I hoped.
However using Top Coat Anisotropy to spread out the sheen seems to make it better.
Anisotropy Rotations won't work for 3DL (Uber Surface) or Iray given the direction of the the hair (particularly the mane and Tail) on the diffuse maps are in different directions this also applies to the coat. The reason why this is needed is that each hair is a surface on it own and therefore will spread out the gloss along the hair. But you can adjust the rotation to suit the cam angle and get sort of close as shown in image 2 below. I used a value of 0.35 to rotate the direction of the gloss.
From all the work I have done in Iray I could wager on for the sheen to work properly it would need a grayscale map that looks like hair, i;e; a new Bump/Normal maps that simulates hair. We can control Top Coat weight via a Bump or Normal map which adds more variation in gloss.
Here is the initial result. Default Iray Sun/Sky
Szark thanks so much for messing with this! I think you now start to see the various issues I have run into with especially updating these coats Plus the added fun of trying to have the same look in 4 very different render engines to boot
 I will def. mess with your ideas you've posted and see how that goes!
Szark
Awesome
have you asked how this HiveWire Thoroughbred - A HiveWire 3D Creation by CGCubed, Christopher Creek Art, and CWRW was achieved in Iray 3rd, 4th and 5 th images.
I am think he used both Gloss channels with maps that more like fur. But I am only guessing
I am think he used both Gloss channels with maps that more like fur. But I am only guessing
Last edited:
have you asked how this HiveWire Thoroughbred - A HiveWire 3D Creation by CGCubed, Christopher Creek Art, and CWRW was achieved in Iray 3rd, 4th and 5 th images.
I am think he used both Gloss channels with maps that more like fur. But I am only guessing
LOL yes I did the coats and the promo images for that one


