• Welcome to the Community Forums at HiveWire 3D! Please note that the user name you choose for our forum will be displayed to the public. Our store was closed as January 4, 2021. You can find HiveWire 3D and Lisa's Botanicals products, as well as many of our Contributing Artists, at Renderosity. This thread lists where many are now selling their products. Renderosity is generously putting products which were purchased at HiveWire 3D and are now sold at their store into customer accounts by gifting them. This is not an overnight process so please be patient, if you have already emailed them about this. If you have NOT emailed them, please see the 2nd post in this thread for instructions on what you need to do

Reinstalling DS, converting things to Dawn and Diva and my experiments along the way

Miss B

Drawing Life 1 Pixel at a Time
CV-BEE
I don't have Poser open at the moment, but if you select the item of clothing, then go to the Figure menu, and about 5 or 6 down says Conform To. Choose that and a window will pop up so you can select what to conform it to. The clothing will definitely conform to the character that way.

That said, however, I know that some folks will select the clothing piece in the Library and drag it onto the character, instead of loading it, and that will/should automatically conform the piece of clothing to the character. I don't usually do that because I use the External Library in my browser, but out of curiosity, I did try it, and it worked.

Try both those methods, and see which one you like better.
 

Pendraia

Sage
Contributing Artist
I was doing the first and it wasn't working. I might try the second and if that doesn't work I'll try with a different item of clothing.
 

Pendraia

Sage
Contributing Artist
Still not working. I've given up for today. For some reason when conformed the clothing is showing up behind Dawn instead of on Dawn. When I inject Alexis into Dawn it becomes even worse. I'm going to play in DS. I need something to work...
 

Miss B

Drawing Life 1 Pixel at a Time
CV-BEE
Has Dawn been moved from the default position when she's loaded into the scene? That would cause the clothing to be behind her.

Also, you didn't mention if it's Alexis' clothing that comes with her, or one you're creating for her.
 

RAMWolff

Wolff Playing with Beez!
Contributing Artist
Load the garment into the scene, load Alexis, resize and translate the garment to as close as you can get, in the Fitting room make sure and don't have the zero options checked for the garment but have them checked for Alexis. Rotate and make sure there are no poke throughs around the body and then fit it to her using the button, when your done use the Create button and make sure and turn off the Add Morphs option as it can sometimes crash Poser, you can add those in later on.
 

RAMWolff

Wolff Playing with Beez!
Contributing Artist
For dynamics I can't be of any help except the pre-fitting advice I mentioned above!
 

Pendraia

Sage
Contributing Artist
@MissB , I thought of that and deleted and reloaded the figure with the same issue.

It's Alexis's camisole and briefs that come with her. I've tried loading them with Alexis loaded and also without. No Luck.

@Ram, I can't get the garment to load on the figure and you want me to resize stuff in the fitting room? rofl ...I can just see the mess I'd make of that.
 

Pendraia

Sage
Contributing Artist
Okay with Miss B's help I have worked it out. It helps if you load the correct figure! I was loading Dawn 2 which I hadn't realised I had a Poser version for...rofl.

Poser makes me stupid obviously...rofl
 

Miss B

Drawing Life 1 Pixel at a Time
CV-BEE
YES!! That would definitely cause issues. I think all CA's got a copy of Dawn 2 so they can make goodies for her when she finally makes the scene. ;)
 

Pendraia

Sage
Contributing Artist
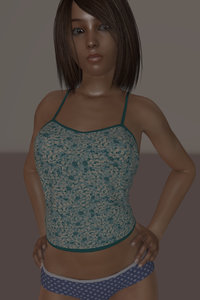
So I managed to render but little Alexis has white eyes. Is that because it's set to Superfly? And what is the fix? Do I use Superfly or the old renderer?
I'm not having a good day...lol. Have to laugh though...
Alexis with white eyes.png
 

RAMWolff

Wolff Playing with Beez!
Contributing Artist
Not sure what her set up is but in the Material room the eye surface transparency needs to be adjusted I'm guessing. Glad between you and Miss B you got the conforming figured out.
 

Pendraia

Sage
Contributing Artist
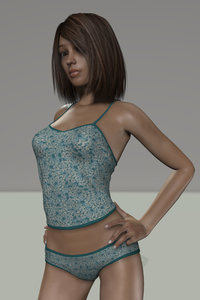
Thanks! Okay...you say that like I know how to change the transparency in there. I've switched to firefly and no longer have white eyes.

How do I add a bump or displacement map in the material room?

How do I save the renders as jpeg?

no white ey copy.jpg
 

RAMWolff

Wolff Playing with Beez!
Contributing Artist
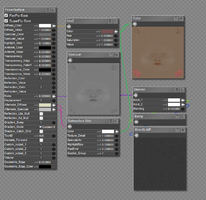
So this is one of the cool things, browse to your bump map folder, make sure you have the correct material zone selected, drag and drop that image file into the advanced area of the Material room with the nodes. There you will have your Root, either Poser Root Node or the Physical Surface root node and your bump and normal map nodes are there. See the screen grab below.... Self explanatory ...

As for saving out an image there are a couple of places ....

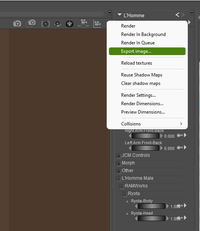
If you have the Renders Panel visible, docked or not, you can right click on that and Export Image or export from the side panel next to the camera controls. See the other screen grab below....
 

Attachments

  • Poser Surface Node Example.png
    Poser Surface Node Example.png
    221.6 KB · Views: 170
  • Export Image.png
    Export Image.png
    26.1 KB · Views: 161

Miss B

Drawing Life 1 Pixel at a Time
CV-BEE
Glad to see you're getting things to work.

Here are a couple of screenshots that should help you add textures to the items.

First I would suggest you go to the Face Camera so you can get in closer to Alexis and be able to see the Camisole and Briefs better.

I've numbered each step, and will try and list them here for you to follow.

1) Go into the "Material" Room by clicking on the Material Button at the top.

2) If you don't automatically see the Advanced setup, click on the Advanced Button. Often it defaults to Simple when first being used.

3) I indicated where the Bump and Displacement nodes are set up on the PoserSurface node.

4) To set up the Bump node, click on the black circle and drag out to the right, and it will say New Node, and you pick the one you want, in this case a 2D textures > image_map. This will pop up what you will see in the second screenshot below.

5) Click on the link that says "None" and it will pop up a small window with a Browse button, and if you click it, you can go look for where you have your Bump map saved. Then do the same for the Displacement map as well.

6) Last, but not least, at the top of the Material Room panel you'll see where it says "Material / Shirt". Be sure to remember to select it, as the Camisole has a Top Trim and a Bottom Trim, so you would need to do steps 4 and 5 again for each.

OK, I hope this helps.

PoserMaterialRoom-1.jpg


PoserMaterialRoom-2.jpg
 

Pendraia

Sage
Contributing Artist
Thank you both! I will give it a try tomorrow as I've moved off the computer and doing other things. Hopefully I won't make a mess of it.
 

Miss B

Drawing Life 1 Pixel at a Time
CV-BEE
Oh, and before I forget, the settings for the Bump and Displacement maps on the PoserSurface node may have to be played with to get just the right amount of Bump and/or Displacement. What you see in the second screenshot above is a default setting.
 

Miss B

Drawing Life 1 Pixel at a Time
CV-BEE
Thank you both! I will give it a try tomorrow as I've moved off the computer and doing other things. Hopefully I won't make a mess of it.
You're quite welcome Pen. Just take your time, as it may take a couple of tries until you see exactly what you want.
 

Pendraia

Sage
Contributing Artist
Your instructions have certainly helped Miss B. I really need step by step and images as often I'm not sure where to find things.
I have added the bump map and I'm doing a render to see if it is sufficient, what would you recommend setting the bump map at?

@RAMWolff thanks for the info on the render panel as I would never have thought to look there. I checked file and looked for save but didn't realise they use export for images.
 

Miss B

Drawing Life 1 Pixel at a Time
CV-BEE
Hmmmm, not sure about an actual Bump map setting, as I haven't set up anything of my own where I used a Bump map . . . at least not in clothing.

Check out the render you did and see if it looks too strong, or hardly strong at all. Then try adjusting the settings a little at a time until you see something you like. That's probably the best way to do it.
 
Top