-
Welcome to the Community Forums at HiveWire 3D! Please note that the user name you choose for our forum will be displayed to the public. Our store was closed as January 4, 2021. You can find HiveWire 3D and Lisa's Botanicals products, as well as many of our Contributing Artists, at Renderosity. This thread lists where many are now selling their products. Renderosity is generously putting products which were purchased at HiveWire 3D and are now sold at their store into customer accounts by gifting them. This is not an overnight process so please be patient, if you have already emailed them about this. If you have NOT emailed them, please see the 2nd post in this thread for instructions on what you need to do
You are using an out of date browser. It may not display this or other websites correctly.
You should upgrade or use an alternative browser.
You should upgrade or use an alternative browser.
Redistributing Poser Dynamic Hair without the base figure - a solution
- Thread starter Cliff Bowman
- Start date
Great, just downloaded.
Cliff Bowman
Adventurous
Greetings and salutations. It must look like I've abandoned TrueHair - or at least this thread! Nothiong could be further from the truth. So, apart from dealing with Real Life, what have I been up to?
A certain amount of testing has been going on, along with more work on the manual and "Prompting" versions of some functions. For example, there are now versions of !LoadTrueHair and !MAT_AllDynHair that let you select a specific file to load. Here's their icons:
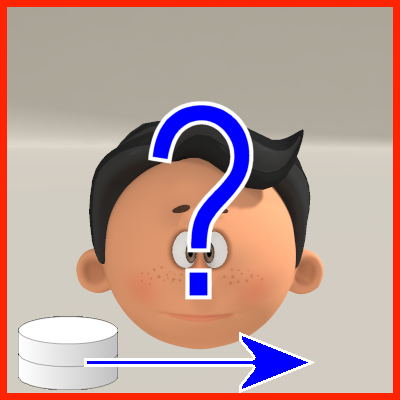
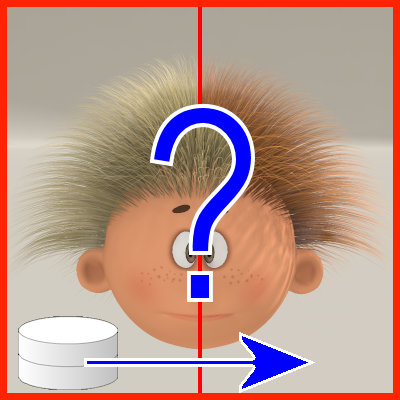
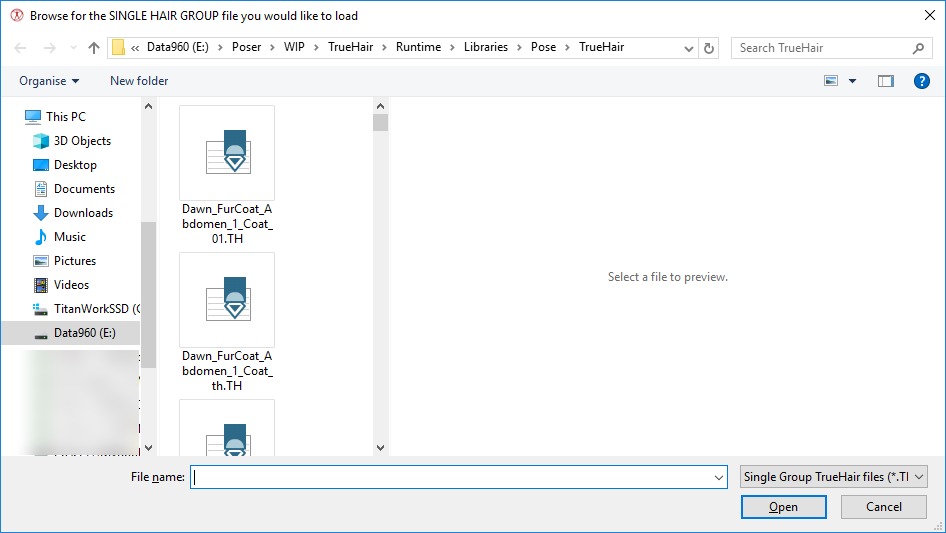
The "storage" icon with an arrow is meant to indicate "from storage to current scene" while the question mark means "prompt user". Let me show you the dialog boxes that pop up looking for files too, while I'm here:
Ah - I've just caught up with myself - documenting !MAT_AllDynHairPicker is where I am at the moment in the manual, so I don't have a screen capture of it yet. I'll use that as an excuse to post more later, I think.
I know I've been reluctant to write these extra versions of functions that prompt the user, but I think they're just going to be so much easier for some people to use. Provided I can keep things to a minimum (I am still desperately trying to avoid TrueHair looking as complicated to users as the Hair Room does, at any stage). Writing them and documenting them is definitely putting the release date back, but I think it's going to be useful to have the package be as "FULL" as possible right from the start.
Cheers,
Cliff
A certain amount of testing has been going on, along with more work on the manual and "Prompting" versions of some functions. For example, there are now versions of !LoadTrueHair and !MAT_AllDynHair that let you select a specific file to load. Here's their icons:
The "storage" icon with an arrow is meant to indicate "from storage to current scene" while the question mark means "prompt user". Let me show you the dialog boxes that pop up looking for files too, while I'm here:
Ah - I've just caught up with myself - documenting !MAT_AllDynHairPicker is where I am at the moment in the manual, so I don't have a screen capture of it yet. I'll use that as an excuse to post more later, I think.
I know I've been reluctant to write these extra versions of functions that prompt the user, but I think they're just going to be so much easier for some people to use. Provided I can keep things to a minimum (I am still desperately trying to avoid TrueHair looking as complicated to users as the Hair Room does, at any stage). Writing them and documenting them is definitely putting the release date back, but I think it's going to be useful to have the package be as "FULL" as possible right from the start.
Cheers,
Cliff
Cliff Bowman
Adventurous
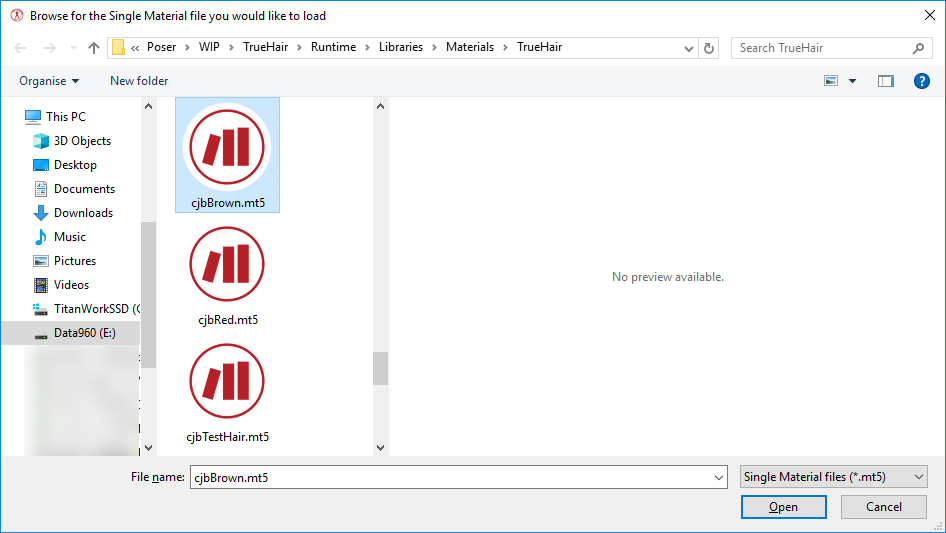
In another part of the manual I'm writing about how the hair can look different in different versions of Poser - particularly how following my tutorials whilst using different lighting can have a distinct effect. My Poser 10 crashed trying to do a simple render, so here's the !MAT_AllDynHairPicker dialogue box and Poser 9 + Poser 11 Pro examples of "How the same thing looks different with different copies of Poser lights".
Cheers,
Cliff
PS yes, I AM writing different parts of the manual at the same time. That way I can keep typing while an image renders... usually.
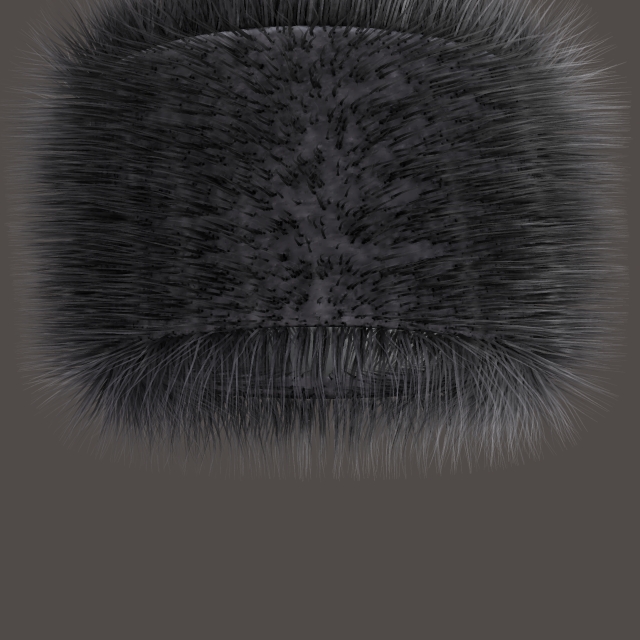
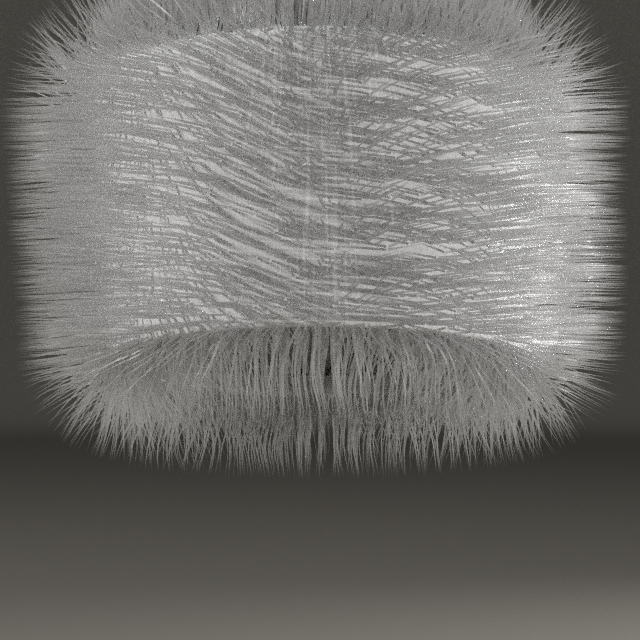
Cheers,
Cliff
PS yes, I AM writing different parts of the manual at the same time. That way I can keep typing while an image renders... usually.
Cliff Bowman
Adventurous
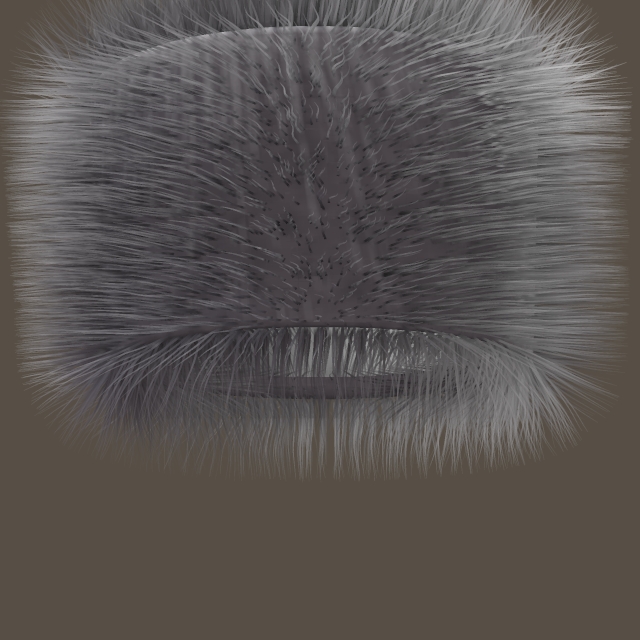
For completeness - Poser 10 default lighting and render settings.
Cliff Bowman
Adventurous
I am a staunch believer in the idea that computer are here to do all the grunt work for us. I also have some issues getting the materials "just right" for hair, especially with SuperFly. So... time to implement an old technique to get the computer to help me to hone the materials. This is one occasion where the Animation feature of Poser can come to my rescue, as I can get Poser to render a bunch of options to display to me and I can go do something else while it is rendering.
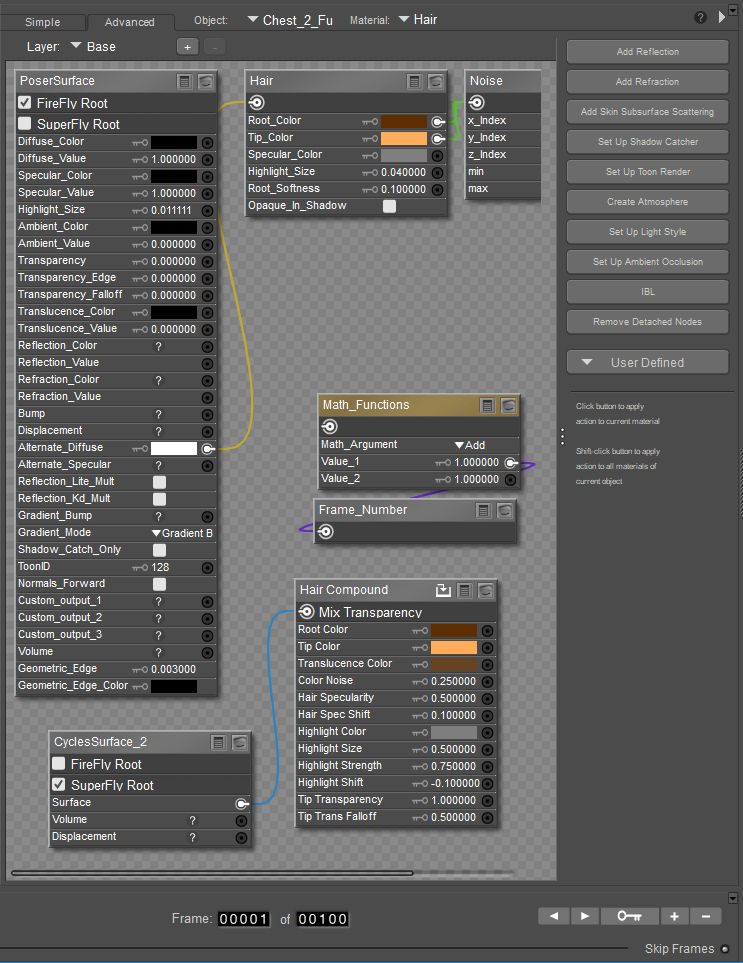
First up, I start off with a material cribbed from the Poser 11 materials, as so, and set the number of frames for my animation to 100. Don't worry that this seems like a lot of frames, we won't be rendering all of them (though if you have the computer power to hand to do so, please feel free). I'll also add a "Variable" called "Frame_Number", as follows:
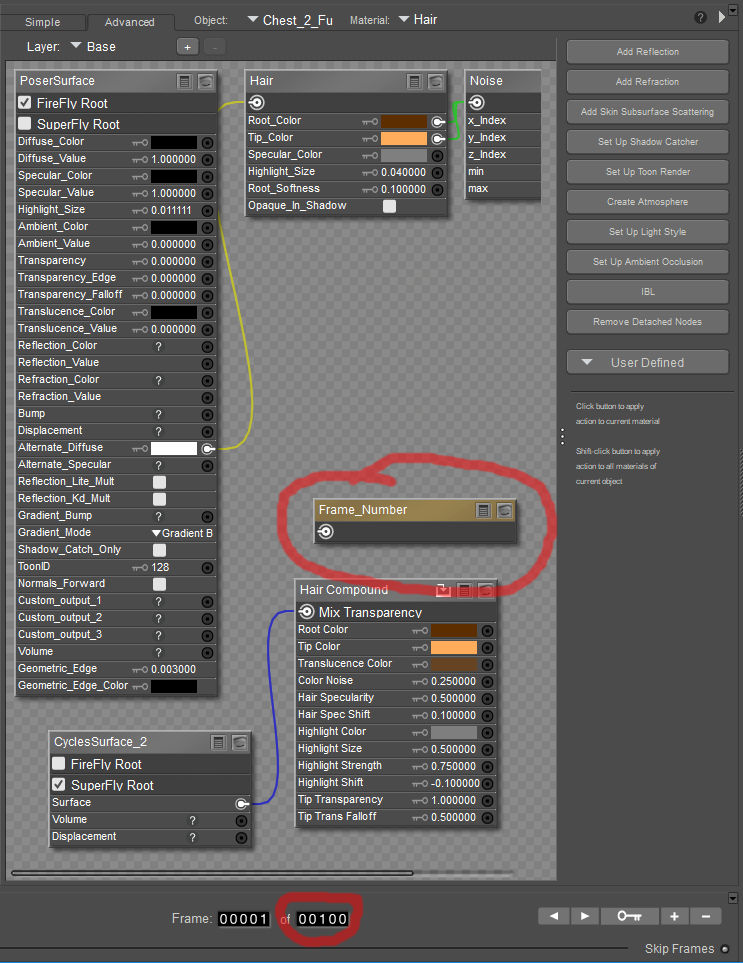
Now annoyingly while the User Interface displays frame numbers as 1 to the maximum (in this case 100) the Material Room doesn't start counting at 1 - it starts at 0. So it counts from 0 to 99. Let's add 1 to the frame Number by connecting to this math node, thus:
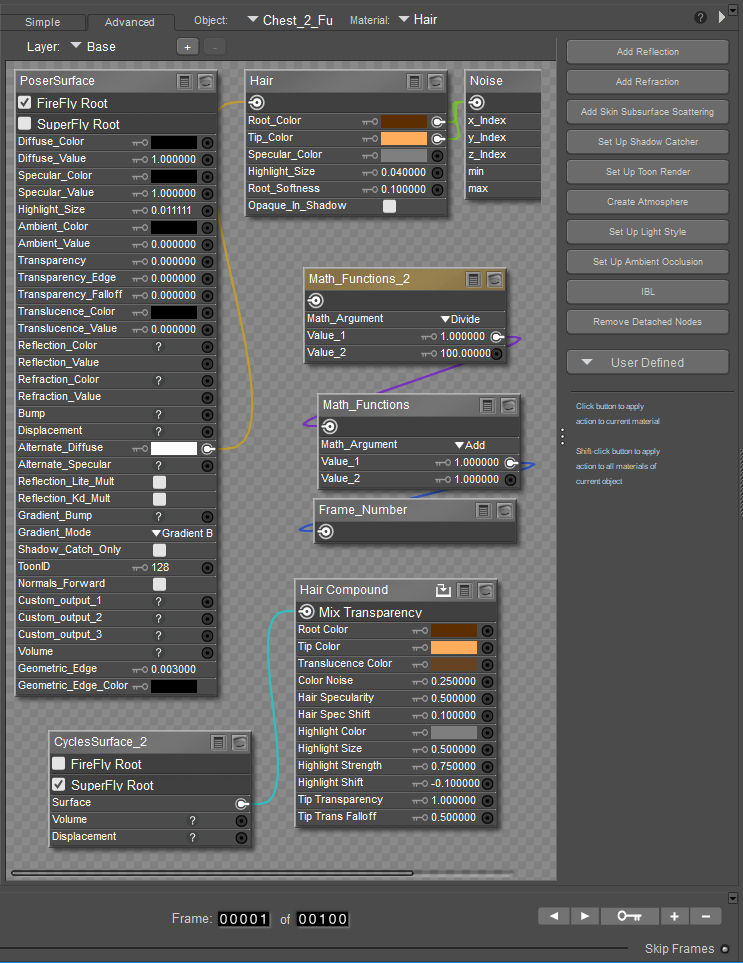
Now ideally I want to produce a number in the range 0.01 to 1.00, not 1 to 100 - so we'll just divide our current result by a hundred to produce the next step:
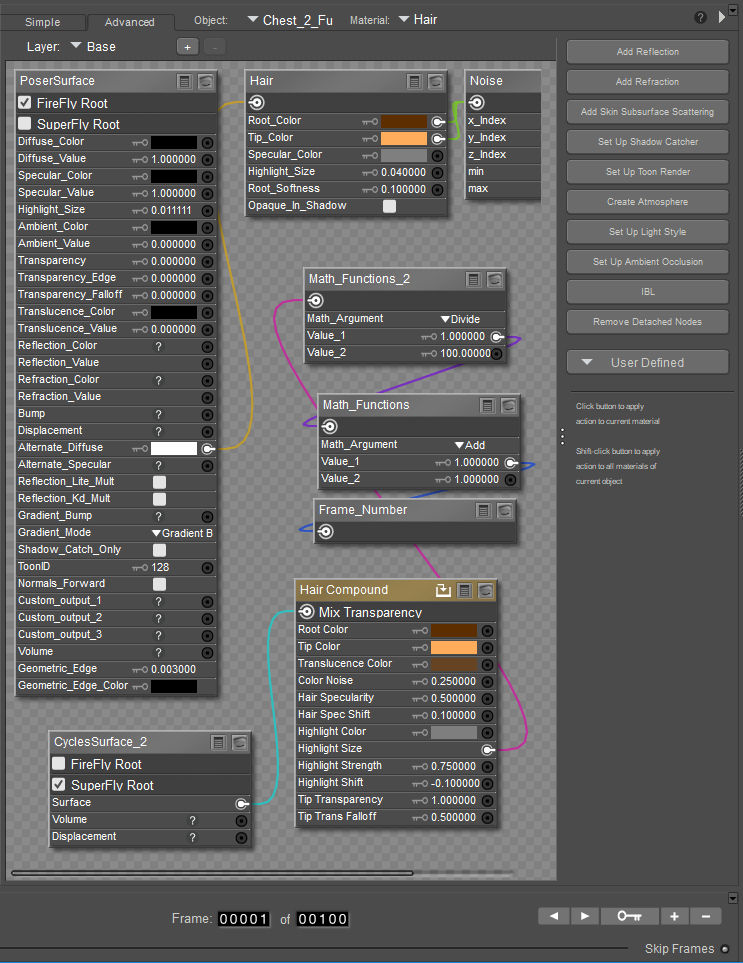
And finally I'll hook it up to a value on the material setup to affect - in this instance I want to try variations on the "Highlight Size", so I'll hook our result up to that and then get to rendering.
First up, I start off with a material cribbed from the Poser 11 materials, as so, and set the number of frames for my animation to 100. Don't worry that this seems like a lot of frames, we won't be rendering all of them (though if you have the computer power to hand to do so, please feel free). I'll also add a "Variable" called "Frame_Number", as follows:
Now annoyingly while the User Interface displays frame numbers as 1 to the maximum (in this case 100) the Material Room doesn't start counting at 1 - it starts at 0. So it counts from 0 to 99. Let's add 1 to the frame Number by connecting to this math node, thus:
Now ideally I want to produce a number in the range 0.01 to 1.00, not 1 to 100 - so we'll just divide our current result by a hundred to produce the next step:
And finally I'll hook it up to a value on the material setup to affect - in this instance I want to try variations on the "Highlight Size", so I'll hook our result up to that and then get to rendering.
Cliff Bowman
Adventurous
Now, 100 frames was a fairly arbitrary number - I could have chosen 10, I could have chosen 10,000 - but I don't REALLY want a hundred frames to look at, so I'll use another feature to reduce the frame count to 10 - I'll skip some frames! Choosing "Make Movie..." from the "Animation" menu brings up this dialogue box, where I can set various options like, in this case, rendering only every 10th frame.
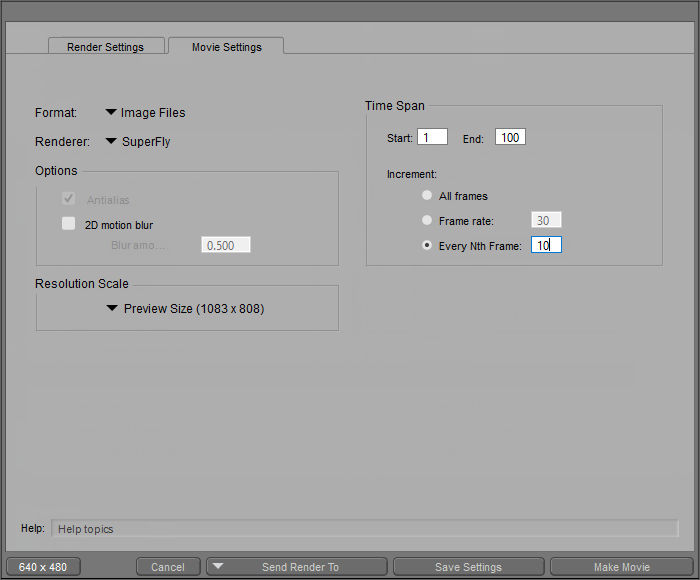
You might well render why I'd set up a 100 frame animation if I'm only intending to render 10. Well - the simple reason is that perhaps after rendering I'll think that none of those 10 frames is QUITE what I am looking for. Perhaps what I want is somewhere between frames 11 and 21. No problem - I'll just re-render frames 12 to 20 rendering every frame, and Poser will serve up some finer-grained results.
It might have been smarter of me to set up a longer animation - 1000 frames, or 1000000 frames, as I can determine how many frames actually get rendered - but I figure the variation from 100 frames will be sufficient for now. There has to be a LITTLE room for the human to do a bit of work, after all!
I set this rendering before starting to post about it and since I'm using a few (admittedly old) computers I already have 5 frames back to look at.
Cheers,
Cliff
Cliff Bowman
Adventurous
I'll use the same technique on multiple parameters, one at a time, hoping to improve my hair texture. Here's the first few frames of this initial experiment, showing that there is an effect - but that I might do well to try something other than the highlight size! Maybe the strength is more important?
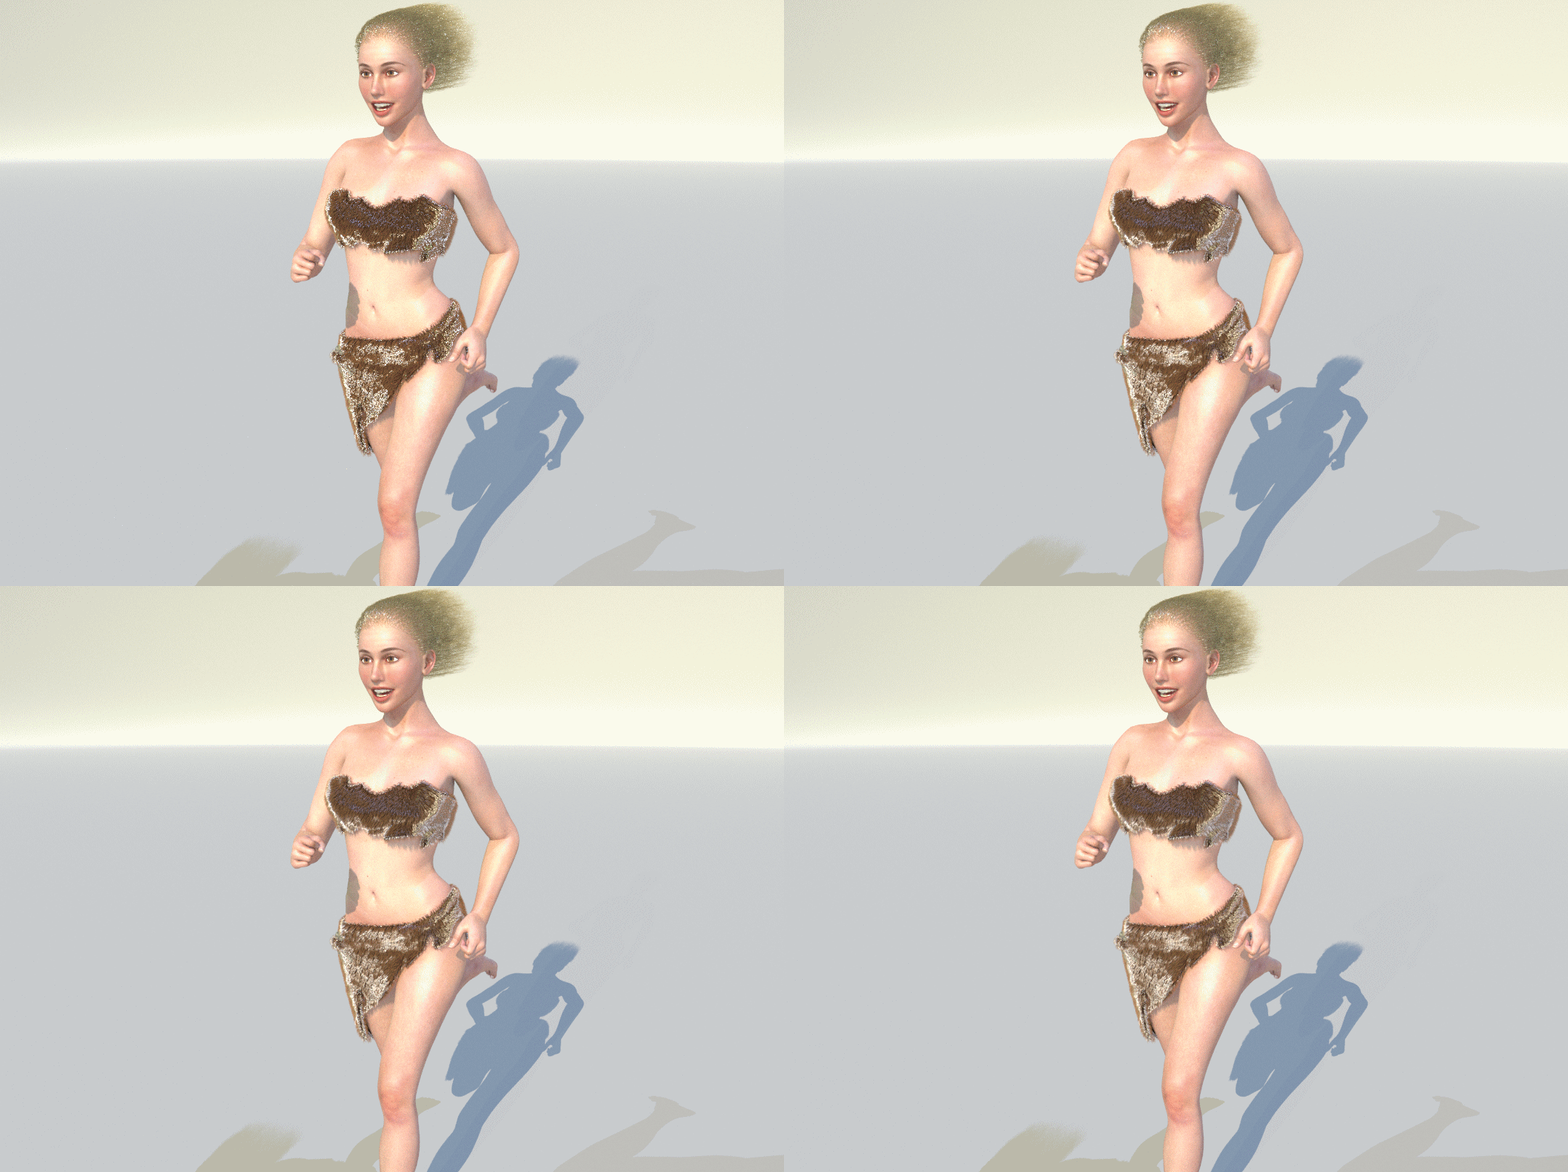
Oh - if anyone's wondering, I'm using the "Savage Outfit" (Savage Outfit for Dawn - A Ken1171 Designs-Art_of_Mind Collaboaration at HiveWire 3D) as the base for the fur in this instance.
Now - while that renders I can go and do something else. Maybe even go to bed and let it render while I'm reading, or sleeping, or whatever I choose
Cheers,
Cliff
Last edited:
Cliff Bowman
Adventurous
Sadly, Titan (my desktop PC) carped out (Blue Screen Of Death) on startup this moring, so I'm going to restore a previous backup and hope that helps. This will eat in to the time available to work on TrueHair today 
However, last night's 10 frames of testing "Highlight Strength" were much more helpful.
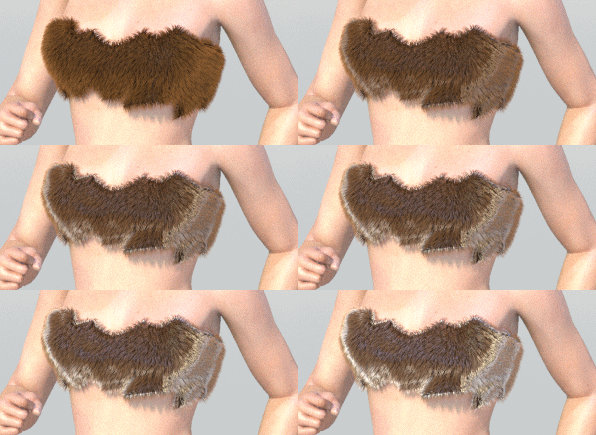
Because of the silly dance that I did setting up the animated nodes I should be able to calculate a value by taking the frame number and dividing by a hundred - here I'm looking at the first few rendered frames (frames 1, 11, and 21) and thinking they look MUCH better than later ones. I'm feeling 0.01 to 0.11 are likely to be my favourite values, but I may use about 0.2 or even 0.3 while I test other values so that I can clearly see what effect the other values are having on the fur. but that won't be this morning, possibly not even today, as I need to get Titan feeling healthy!
Cheers,
Cliff
PS the previous value for "Highlight Strength" was 0.75 - I definitely think I'm on to an improvement here!
However, last night's 10 frames of testing "Highlight Strength" were much more helpful.
Because of the silly dance that I did setting up the animated nodes I should be able to calculate a value by taking the frame number and dividing by a hundred - here I'm looking at the first few rendered frames (frames 1, 11, and 21) and thinking they look MUCH better than later ones. I'm feeling 0.01 to 0.11 are likely to be my favourite values, but I may use about 0.2 or even 0.3 while I test other values so that I can clearly see what effect the other values are having on the fur. but that won't be this morning, possibly not even today, as I need to get Titan feeling healthy!
Cheers,
Cliff
PS the previous value for "Highlight Strength" was 0.75 - I definitely think I'm on to an improvement here!
erk....! and here is me trying to get RID of the specularity on the gorilla fur...this is my combo - True Hair and manual adjustment of Tiny's hair for the Gorilla ... so HAPPY that Cliff pulled me kicking and screaming into the Hair room!!!!!!!!!! I'm LEARNING again!!
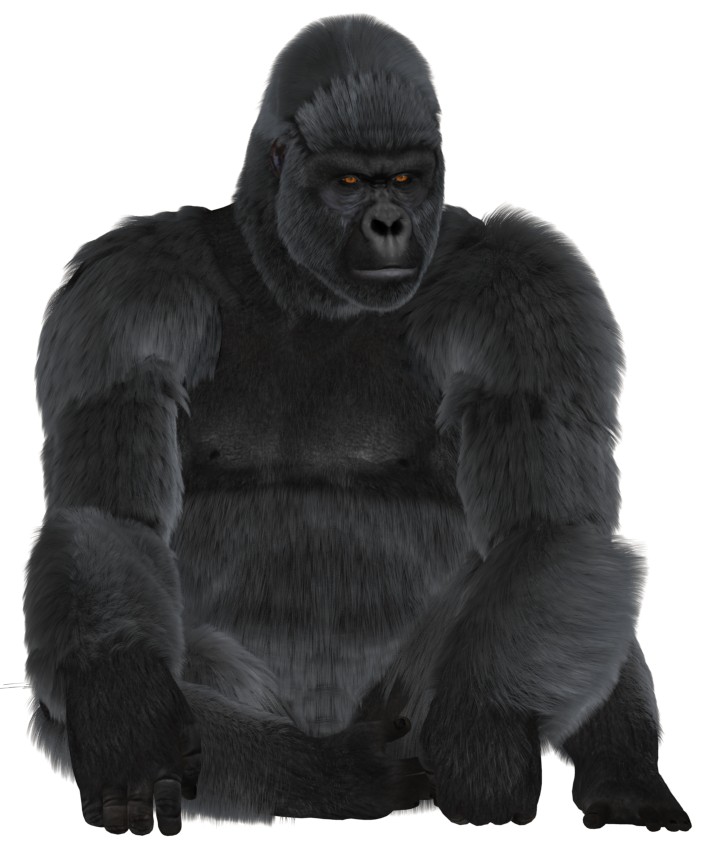
This is a WIP.... (by the way, Cliff/Tiny, some verts seemed to have trailed OFF AND OUT from the lower left side.... how odd??)
this is A WIP still, but way happier with a more hair gorilla in Poser!!!!!!!!!!!!! 2014......... Only post is in the crotch area where the
hair groups came together oddly, and it seemed a bit uh.... R rated!? So just cloned hair there.... still working on this, want to take
the spec, DOWN to get a bit more black-ish gray guy...and find out how to get rid of the 'divots' where the groups meet...
PS painstakingly TURNED OFF CAST SHADOWS on every hair group as it made no visible difference, and rendering really sped up nicely!!
Cliff said he'd make a toggle for that setting...along with turning off 'visible in ray trace' - which he said speeds up rendering, etc. too!
and just THINK of the hairy dogs we can have IN POSER once our HW dog comes out!!! wooo hooo!!
Cliff said he'd make a toggle for that setting...along with turning off 'visible in ray trace' - which he said speeds up rendering, etc. too!
and just THINK of the hairy dogs we can have IN POSER once our HW dog comes out!!! wooo hooo!!

Cliff Bowman
Adventurous
Ca
Actually that should already be there in the pre-release preview you have - both have their own icons:
CastsShadows:
 VisibleInRayTrace:
The only place they don't work at present is in the "Copy" and "Paste" routines - but that is already fixed my end, so should be with you next time I put a package together.
Cheers,
Cliff
PS painstakingly TURNED OFF CAST SHADOWS on every hair group as it made no visible difference, and rendering really sped up nicely!!
Cliff said he'd make a toggle for that setting...along with turning off 'visible in ray trace' - which he said speeds up rendering, etc. too!
and just THINK of the hairy dogs we can have IN POSER once our HW dog comes out!!! wooo hooo!!
Actually that should already be there in the pre-release preview you have - both have their own icons:
CastsShadows:
The only place they don't work at present is in the "Copy" and "Paste" routines - but that is already fixed my end, so should be with you next time I put a package together.
Cheers,
Cliff
Cliff Bowman
Adventurous
erk....! and here is me trying to get RID of the specularity on the gorilla fur...this is my combo - True Hair and manual adjustment of Tiny's hair for the Gorilla ... so HAPPY that Cliff pulled me kicking and screaming into the Hair room!!!!!!!!!! I'm LEARNING again!!
You're most welcome! did I mention that one analogy I have for TrueHair is as a gateway drug to the Hair Room? Trying to make specularity look "right" can be a pain, which is why I tend to throw some math at it and let Poser do the grunt work of working through some options for me, while I eat, be with family, or sleep. No-one needs horrid sharp "sparkles" in their hair - unless it's a Christmas/Birthday celebration scene!
Wow - that is one seriously furry looking gorilla! I don't think I've seen one look better.
This is a WIP.... (by the way, Cliff/Tiny, some verts seemed to have trailed OFF AND OUT from the lower left side.... how odd??)
That does look strange. Without seeing better I'd have to say that I've only seen that when I have had something unexpectedly caught up in a hair group - where mesh gets bunched up hair/fur can get "strangled" and poke out in odd ways.
In the end it's all about making pretty pictures, and the easiest path to doing that is the right one. In some instances that might mean trimming the Hair Group and re-rendering, or it might mean hand cloning a few hairs, or it might mean snipping some hairs away from the figure. It's all about the end result - the image you're trying to get to. I tend to obsess in a very "purist" way about trying to get things to actually RENDER the way I want them to be without post-work. I'm just lazy that way - I treat my machines like slaves*
Cheers,
Cliff
* PS not really. I love my machines. No... what are you doing? No! I love...
Cliff Bowman
Adventurous
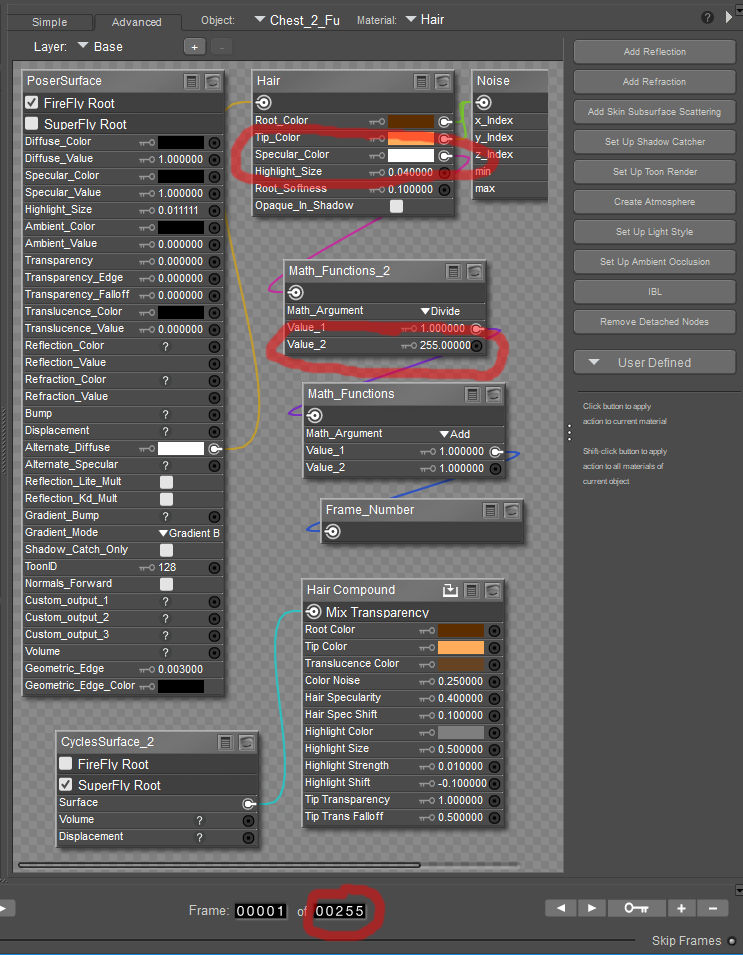
I've been reminded that I need to check how my Firefly materials are working, and... well, the specularity is too high. Fore Firefly materials the colour is set by an RGB value, and it's set to 127,127,127.
Partly because I'm having trouble getting Poser work done today rather than try 64,64,64 and then seeing if that's still too sharp and adjusting again, I'm just going to set an animation going again. As the top value I'm aiming for is 255 (as in 255,255,255) I have changed the number of frames from 100 to 255 and adjusted the value I divide by, and set the colour to 255,255,255 adjusted by my math. Should work out OK and get me close to my final specularity value while I do other things (like post this!).
Cheers,
Cliff
PS I expect 64,64,64 WILL be about what I want - but I'll know for sure after running this, and I'll do just about anything to promote using under-utilised aspects of Poser - like using animation to work on materials!
Partly because I'm having trouble getting Poser work done today rather than try 64,64,64 and then seeing if that's still too sharp and adjusting again, I'm just going to set an animation going again. As the top value I'm aiming for is 255 (as in 255,255,255) I have changed the number of frames from 100 to 255 and adjusted the value I divide by, and set the colour to 255,255,255 adjusted by my math. Should work out OK and get me close to my final specularity value while I do other things (like post this!).
Cheers,
Cliff
PS I expect 64,64,64 WILL be about what I want - but I'll know for sure after running this, and I'll do just about anything to promote using under-utilised aspects of Poser - like using animation to work on materials!
Cliff Bowman
Adventurous
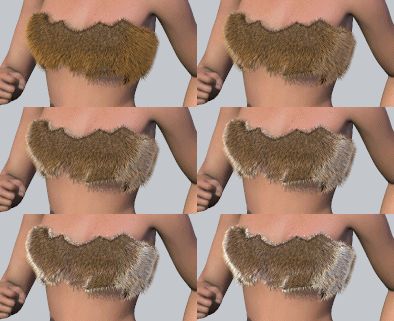
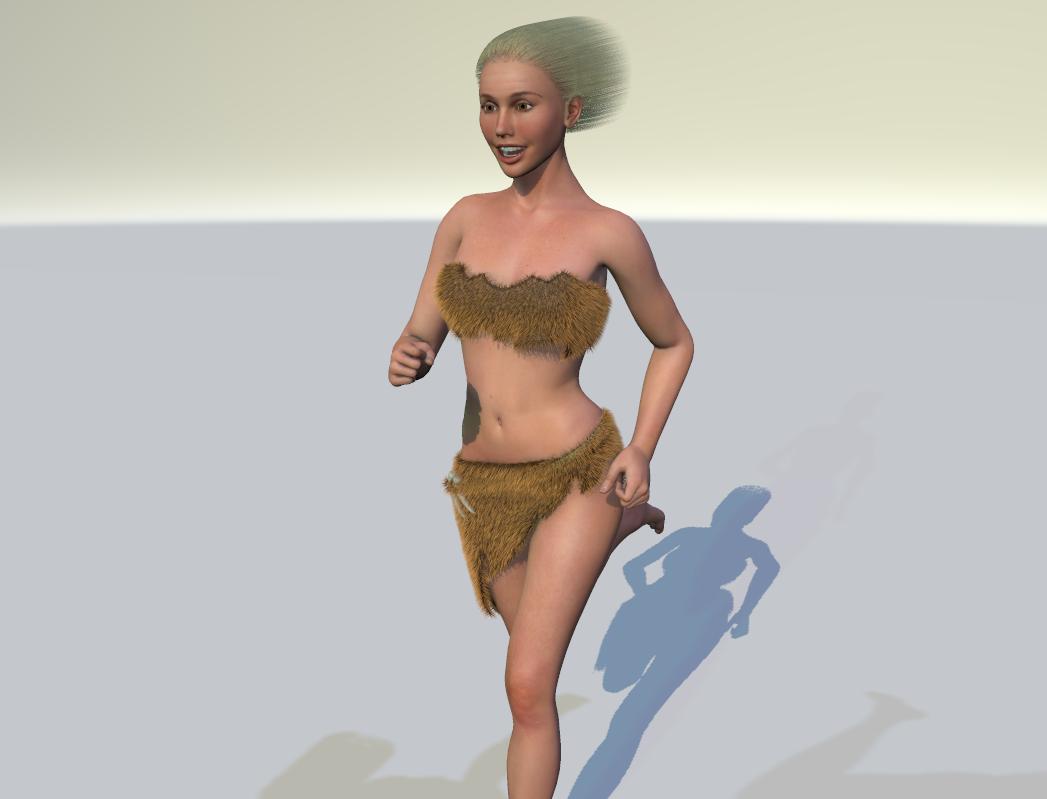
Huh - I'm looking for Specularity to provide some interest - some "shape" or "depth" to the hair, without blowing out completely. I figured that I would want a value of about 64,64,64 rather than the 127,127,127 tha tI had - turns out that, according to my animation, 41,41,41 is more the subtle look that I am after - for a Firefly version of my scene. It makes the fur bikini look more interesting than a dull flat colour would, without making it look like cheap polyester.
Cheers,
Cliff
Cheers,
Cliff
Actually that should already be there in the pre-release preview you have - both have their own icons:
woops they were not together, so missed seeing it....
OK... took time to 'rest' from the Gorilla...did art...then decided to jump over to my old cottontail bunny model...this is a wip render
JUST BEFORE I got the 'white screen of death in poser'.... and have to start over...still I feel that his body hair looks nice and 'wild scruffy-ish'!
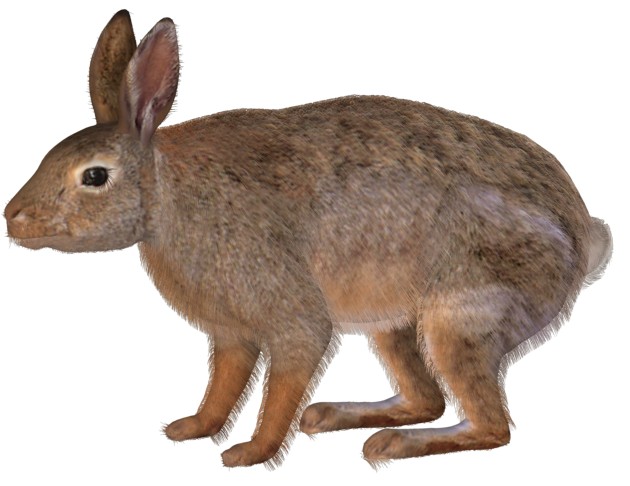
actually my pz3 still opens, it only crashes when I try and calculate any one hair group... probably made it too dense? BUT
I only clicked density + ONE time... anyway, I kinda like how accidentally my big dark eye (which is not a separate body part)
looked like black eyelashes! Got more work to do on legs, etc... tho I have to start over now...still I am LEARNING!
I did make an mt5 to put my map back on...and too, if I get the hair nice, I can give the whole rabbit with his fur on away FREE...'cause he's my model!
JUST BEFORE I got the 'white screen of death in poser'.... and have to start over...still I feel that his body hair looks nice and 'wild scruffy-ish'!
actually my pz3 still opens, it only crashes when I try and calculate any one hair group... probably made it too dense? BUT
I only clicked density + ONE time... anyway, I kinda like how accidentally my big dark eye (which is not a separate body part)
looked like black eyelashes! Got more work to do on legs, etc... tho I have to start over now...still I am LEARNING!
I did make an mt5 to put my map back on...and too, if I get the hair nice, I can give the whole rabbit with his fur on away FREE...'cause he's my model!
Cliff Bowman
Adventurous
That's looking great! Maybe his claws could do with some love and attention?
LOL at the eyelashes - they look so cute/deliberate!
Glad you're having some fun with this. I appear to be having some non-TrueHair related issues, be back soon
Cheers,
Cliff
LOL at the eyelashes - they look so cute/deliberate!
Glad you're having some fun with this. I appear to be having some non-TrueHair related issues, be back soon
Cheers,
Cliff
Cliff Bowman
Adventurous
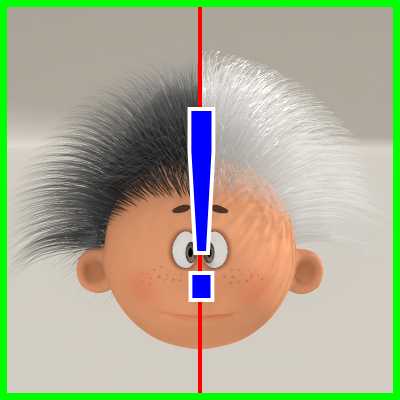
OK - filled out a bit of code and updated some manual recently, but today sees the introduction of the first new thumbnail in a while - for pulling hair to one side:
I'm hoping what it does is fairly self-evident.
While I'm having some hardware/OS issues it feels like I'm getting back on track - I'm going to have to start looking at submission guidelines soon (what size promos should be made to and so forth).
Cheers,
Cliff
I'm hoping what it does is fairly self-evident.
While I'm having some hardware/OS issues it feels like I'm getting back on track - I'm going to have to start looking at submission guidelines soon (what size promos should be made to and so forth).
Cheers,
Cliff
