I have been showing some of this at the galleries here at HW, so you might have seen some results already. If not, the Scatter Tool is a new plugin for Poser that scatters a prop over the Poser ground plane. Each copy can have variations in scale and rotation, so they don't look all the same. As long as it's in the same session, the tool will also keep track on each object, so they are placed without falling on top of each other. This is the interface so far. Simple but effective.
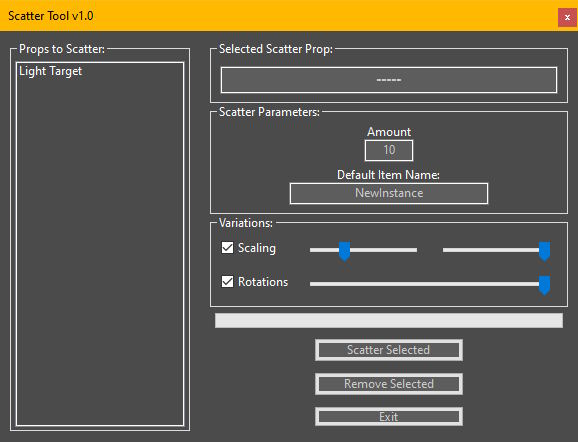
The main parts are:
* The props list on the left: it will list all props currently loaded into your scene. Figures, lights, and other types of objects will not show in this list. It will also not include props that have already been scattered by the tool (to avoid clutter). If you have loaded new props after launching the tool, you can double-click this list to refresh it. When you select a prop from this list, it will become the current item to scatter, and its name will show up at the "Selected Scatter Prop" area.
* Scatter Parameters: Here is where you choose how many copies you want to scatter from the currently selected prop. The "Default Item Name" is a prefix that will be added to each copy, so they don't interfere with the existing objects from your scene. This name is also used by the "Remove Selected" button. Once you start a session, you shouldn't change this.
* Variations: This is the part where we configure how much scale and rotations variation we want to have in general. Both options can be toggled on/off with the checkboxes. When Scaling is enabled, you can control 2 sliders that represent the minimum (left slider) and maximum (right slider) scale variations. If min and max values are the same, all scattered items will be of that specific size. If min=0 and max=100, the smallest items will be tiny, and the largest will be of the actual (current) item size. You can scale objects in advance to make that the largest size.
Rotations only happen in the Y axis, meaning items can only be twisted around. I could expand this to have 3 sliders, so we could control rotations in all directions, but in practice, I have only found it useful to rotate in the Y axis. The slider goes from zero to 350 degrees. It doesn't go to 360 because that would be the same as no rotation at all.
* Progress bar: This is located just below the variations section, and it informs the scattering progress as it happens.
* Scatter Selected: This button scatters your selected prop, using whatever parameters and variations you have selected. Once you press the scatter button, you can press it again to repeat the operation as many times as you want, until you have the desired number of items in your scene. However, when you press the "Remove Selected" button" (explained below), it will remove ALL copies at once.
One nifty thing is that the tool will automatically configure your prop by resetting the pivot points so they are centered and aligned correctly for the scattering process. It is common for props to have the pivot point centered to the object, or at a random place in some cases. None of this would work with the Scattering Tool, but all of that is automatically fixed by the tool when you press the scatter button. However, keep in mind that props that were saved to the library with translations and/or rotations cannot be fixed automatically. In an ideal world, content creators would not create props that way, but it happens.
* Remove Selected: This button removes all instances of the currently selected prop from the scene. This is done based on the prop name. All props with the same name will be considered the same, and you can easily rename props to make them different, even if they are the same prop. The tool will ignore the numbers automatically added to the end of the name when we add a 2nd copy of the same prop to the scene. It will only look at the "base" name before the suffix numbers.
To remove a different object, first select it at the props list, and then press the remove button. ALL copies of that object will be removed at once. Please note that ONLY the scattered objects created by this tool will be removed. The original ones will stay on the scene, so you can scatter them again.
For example, if you load 2 cubes and name them as "BoxOne" and "BoxTwo", the Scatter Tool will consider them as different objects that can be scattered separately. This is useful when you want to use different morphs and/or textures on them.
Now let's see some examples of what we can do with this tool.
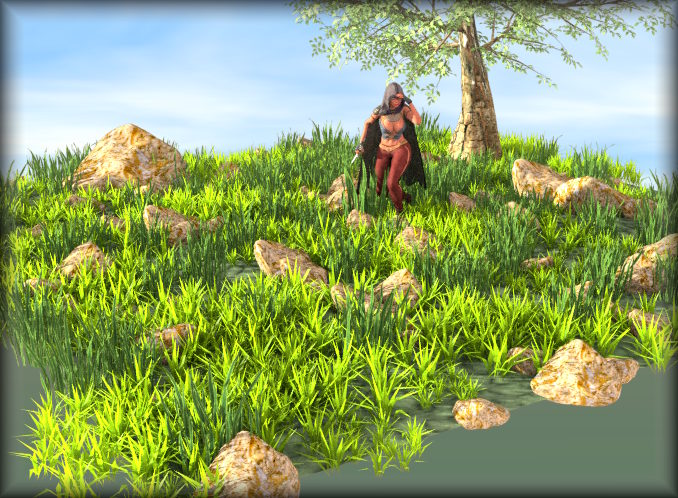
A) Grove: Created with 2 grass patches, and 1 rock. The tree was added manually afterwards. I have scaled up one of the rocks afterwards to make it stand out more.
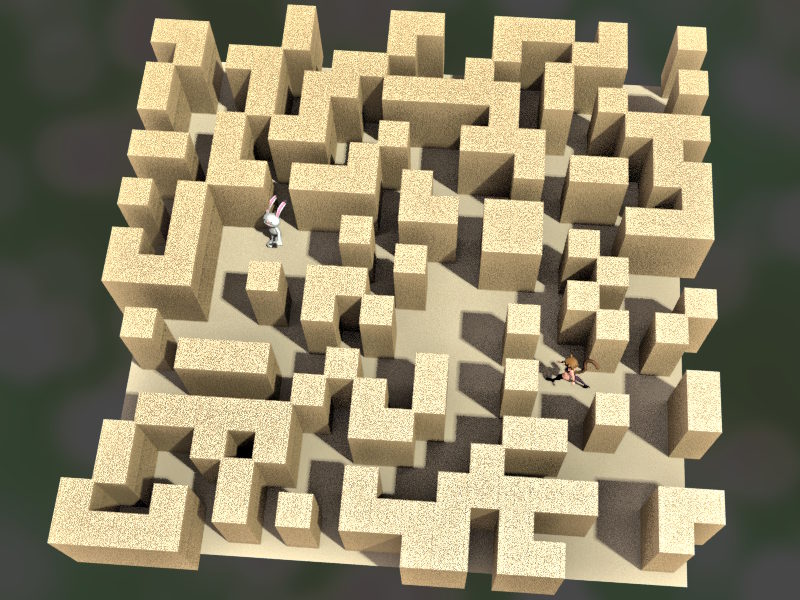
B) Maze: This was created with just a single cube, the Poser primitive from the props library. I have scale it up and then stretched it upwards to make it taller. If we set it the right size, the blocks merge and look like seamless walls. Variations were disabled here.
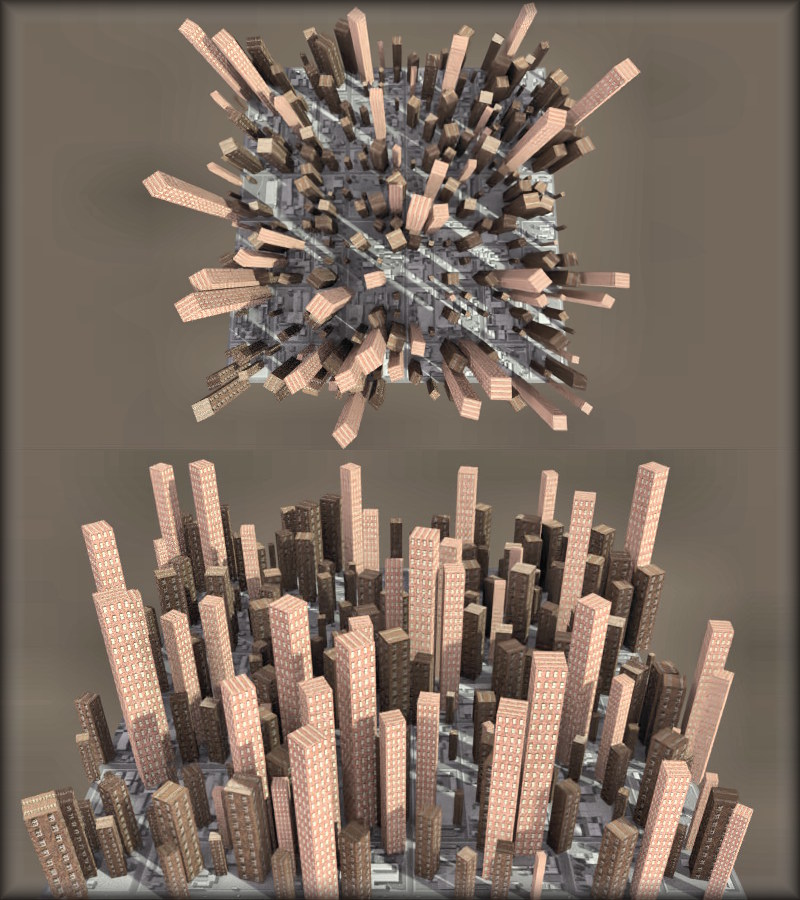
C) Urban city: This has used 2 cubes, each with a different texture and scaled in different sizes to look different. In this example I have only used 2 cubes, but it would look more diversified if I used more. This is where it becomes important that every item will fall at a different place, so they don't overlap (this happens automatically).
D) Morphed terrain: In this example. I have used Poser's built-in Morphing Tool to sculpt some hills and valleys on the default ground plane, and then notice how the scattered objects follow the morphed surface. They stick to the surface, and this happens automatically.

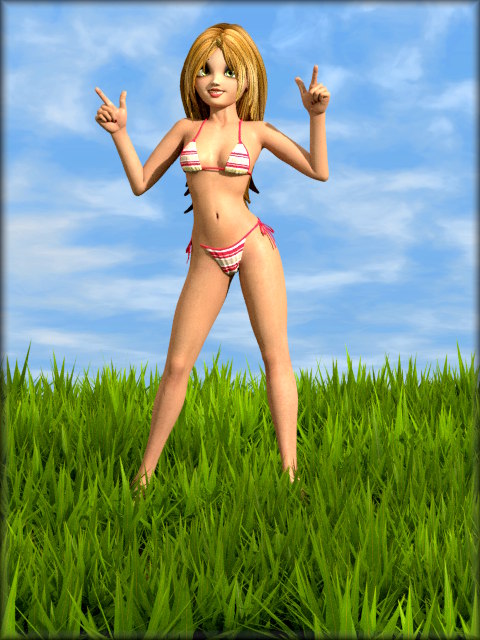
E) Grassland: This scene was created using just 1 single grass patch. Variations help making each look different, giving it a more natural look.
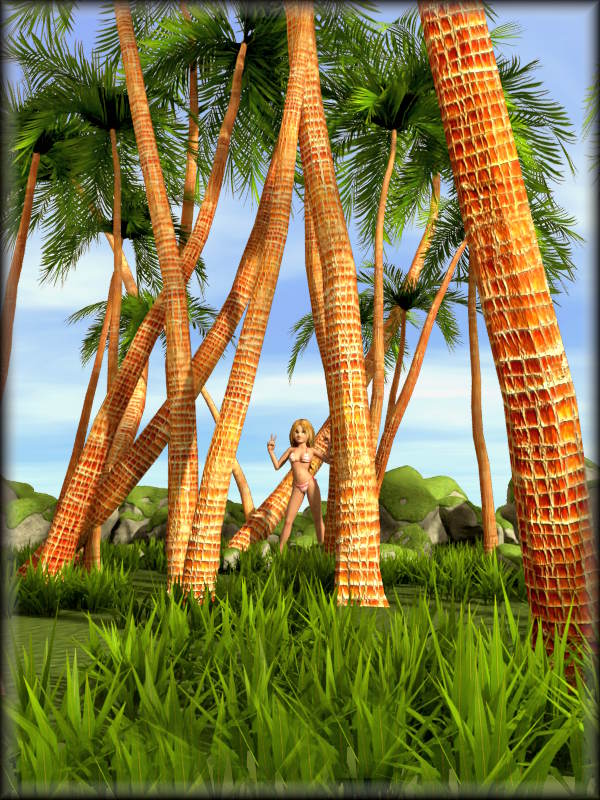
F) Make your own: This scene has used 1 grass patch, 1 rock, and 1 tree. It's basically whatever you want. Create complex scenes in seconds! ^^
The tool is still under development, and I would like to add more features, like the ability to align scattered objects to morphed surfaces. As it is, it follows the surface but does not align to it. I am not sure how to do this, or if Poser can actually provide enough information to do it, but it would be nice if I could add this.
The main parts are:
* The props list on the left: it will list all props currently loaded into your scene. Figures, lights, and other types of objects will not show in this list. It will also not include props that have already been scattered by the tool (to avoid clutter). If you have loaded new props after launching the tool, you can double-click this list to refresh it. When you select a prop from this list, it will become the current item to scatter, and its name will show up at the "Selected Scatter Prop" area.
* Scatter Parameters: Here is where you choose how many copies you want to scatter from the currently selected prop. The "Default Item Name" is a prefix that will be added to each copy, so they don't interfere with the existing objects from your scene. This name is also used by the "Remove Selected" button. Once you start a session, you shouldn't change this.
* Variations: This is the part where we configure how much scale and rotations variation we want to have in general. Both options can be toggled on/off with the checkboxes. When Scaling is enabled, you can control 2 sliders that represent the minimum (left slider) and maximum (right slider) scale variations. If min and max values are the same, all scattered items will be of that specific size. If min=0 and max=100, the smallest items will be tiny, and the largest will be of the actual (current) item size. You can scale objects in advance to make that the largest size.
Rotations only happen in the Y axis, meaning items can only be twisted around. I could expand this to have 3 sliders, so we could control rotations in all directions, but in practice, I have only found it useful to rotate in the Y axis. The slider goes from zero to 350 degrees. It doesn't go to 360 because that would be the same as no rotation at all.
* Progress bar: This is located just below the variations section, and it informs the scattering progress as it happens.
* Scatter Selected: This button scatters your selected prop, using whatever parameters and variations you have selected. Once you press the scatter button, you can press it again to repeat the operation as many times as you want, until you have the desired number of items in your scene. However, when you press the "Remove Selected" button" (explained below), it will remove ALL copies at once.
One nifty thing is that the tool will automatically configure your prop by resetting the pivot points so they are centered and aligned correctly for the scattering process. It is common for props to have the pivot point centered to the object, or at a random place in some cases. None of this would work with the Scattering Tool, but all of that is automatically fixed by the tool when you press the scatter button. However, keep in mind that props that were saved to the library with translations and/or rotations cannot be fixed automatically. In an ideal world, content creators would not create props that way, but it happens.
* Remove Selected: This button removes all instances of the currently selected prop from the scene. This is done based on the prop name. All props with the same name will be considered the same, and you can easily rename props to make them different, even if they are the same prop. The tool will ignore the numbers automatically added to the end of the name when we add a 2nd copy of the same prop to the scene. It will only look at the "base" name before the suffix numbers.
To remove a different object, first select it at the props list, and then press the remove button. ALL copies of that object will be removed at once. Please note that ONLY the scattered objects created by this tool will be removed. The original ones will stay on the scene, so you can scatter them again.
For example, if you load 2 cubes and name them as "BoxOne" and "BoxTwo", the Scatter Tool will consider them as different objects that can be scattered separately. This is useful when you want to use different morphs and/or textures on them.
Now let's see some examples of what we can do with this tool.
A) Grove: Created with 2 grass patches, and 1 rock. The tree was added manually afterwards. I have scaled up one of the rocks afterwards to make it stand out more.
B) Maze: This was created with just a single cube, the Poser primitive from the props library. I have scale it up and then stretched it upwards to make it taller. If we set it the right size, the blocks merge and look like seamless walls. Variations were disabled here.
C) Urban city: This has used 2 cubes, each with a different texture and scaled in different sizes to look different. In this example I have only used 2 cubes, but it would look more diversified if I used more. This is where it becomes important that every item will fall at a different place, so they don't overlap (this happens automatically).
D) Morphed terrain: In this example. I have used Poser's built-in Morphing Tool to sculpt some hills and valleys on the default ground plane, and then notice how the scattered objects follow the morphed surface. They stick to the surface, and this happens automatically.
E) Grassland: This scene was created using just 1 single grass patch. Variations help making each look different, giving it a more natural look.
F) Make your own: This scene has used 1 grass patch, 1 rock, and 1 tree. It's basically whatever you want. Create complex scenes in seconds! ^^
The tool is still under development, and I would like to add more features, like the ability to align scattered objects to morphed surfaces. As it is, it follows the surface but does not align to it. I am not sure how to do this, or if Poser can actually provide enough information to do it, but it would be nice if I could add this.
Last edited:

