-
Welcome to the Community Forums at HiveWire 3D! Please note that the user name you choose for our forum will be displayed to the public. Our store was closed as January 4, 2021. You can find HiveWire 3D and Lisa's Botanicals products, as well as many of our Contributing Artists, at Renderosity. This thread lists where many are now selling their products. Renderosity is generously putting products which were purchased at HiveWire 3D and are now sold at their store into customer accounts by gifting them. This is not an overnight process so please be patient, if you have already emailed them about this. If you have NOT emailed them, please see the 2nd post in this thread for instructions on what you need to do
You are using an out of date browser. It may not display this or other websites correctly.
You should upgrade or use an alternative browser.
You should upgrade or use an alternative browser.
RAMWorks Upcoming & Live Products at Renderosity
- Thread starter RAMWolff
- Start date
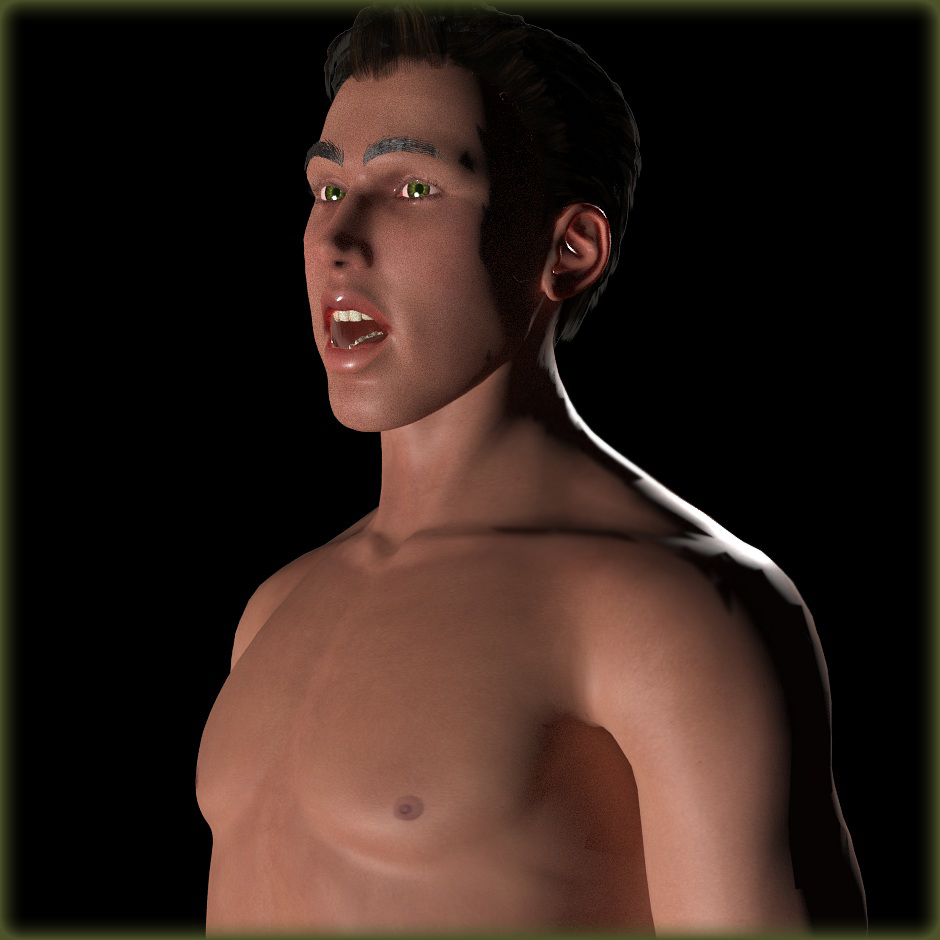
So been working away at understanding Poser's material room. My newest adventure was getting to know the Physical Surface Root node. FINALLY have a nice version of Bruno's skin looking quite yummy. The mouth is open so I could check on details like his teeth, tongue and so one. Reflective quality to the Cornea, Nails and Teeth were also beaten into submission! LOL
Now if I could just figure out how to get my ugly eyebrows to work along with the expression morphs, head shapes and brow movement dials. I did a tutorial that I'll post below. If anyone has any knowledge for me to try to get them working correctly please please please chime in.
The brows were a pair I made in ZBrush a good long while ago, Dusk 1's release time) (I'm using them as a testing figure before delving into a really nice set for Dusk!
Thanks so much!
PS, getting a handle on the Materials Room is becoming a little more intuitive and I have to say I'm in love with the Physical Surface root node. So much easier than the older Poser material root node. I'm still getting my head around the SSS and the Specular settings and what to connect to them to bump up their abilities. It's usually a math node which I'm still pretty much in the dark with... here is a set up from the skin.
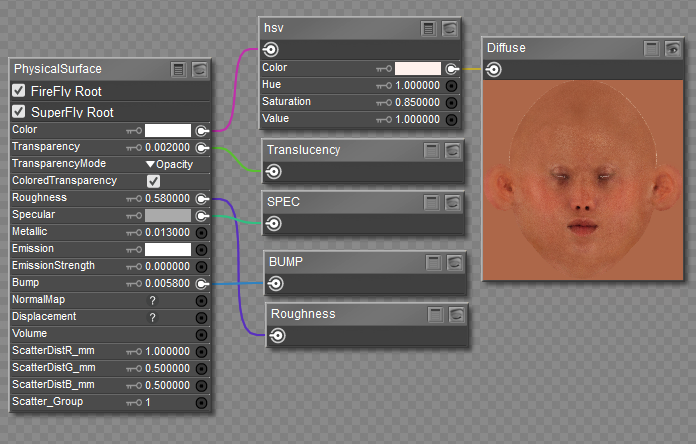
I have to say I'm in love with the Physical Surface root node.
So did I. That's basically my root node for everything nowadays, though the meaning of that "specular" color still eludes me from time to time. If it uses Roughness/Metallic, then what is specular doing there? That makes no sense. I was told that is actually some kind of IOR (index of reflection), and it has some fresnel effect attached to it, but then, why is is a color?
SSS works just like you did in there. The ScatterDist parameters are measured in millimetres, but what if my Poser units are in inches, which I think is the default? One thing I've noticed is that setting it to 1 for human skin adds tons of noise to the render, which takes much longer to render. Sometimes it's just no worth it.
I'm curious about the "Scatter Group" setting. I mean what does that do, if anything?
That's for creating different SSS groups using that index, but I don't know how to use it. ;p
Specular color is never in color unless your doing something weird. I've always been told to use gray values. At white it's good for metals but for skin use a light gray to tone it down.
I was told not to change the default mid-grey value for human skin. They said it's the average best value for Fresnel effect. But your guess is as good as mine.
parkdalegardener
Adventurous
I'm curious about the "Scatter Group" setting. I mean what does that do, if anything?
When using Firefly to render SSS in material zones next to or on top of each other there is a blueing effect. Putting the SSS into separate groups alleviates this. I have not run into this issue when using Superfly/Cycles nodes. Yet.
Example is Skinface in one scatter group and lips in a separate group to keep the lips from turning blue.
parkdalegardener
Adventurous
That's for creating different SSS groups using that index, but I don't know how to use it. ;p
I was told not to change the default mid-grey value for human skin. They said it's the average best value for Fresnel effect. But your guess is as good as mine.
Specular color is never in color unless your doing something weird. I've always been told to use gray values. At white it's good for metals but for skin use a light gray to tone it down.
Specular is always a data value. That is why it is not a colour value and instead greyscale. PBR rendering is based upon the idea that the item being rendered is composed of numerous triangles that represent the surface of the object. When light rays hit an object they become absorbed, transmitted, or reflected. With polished metal the angle of incidence is equal to the angle of reflection. There is no absorption or transmission only reflection. The grey in the specular chip represents that micropoly scatter an average surface reflects. If I recall correctly it is not mid-grey but actually somewhere around 10%. White is zero. No micropoly scattering of light. That is why the chip should be white for metals.
When using Firefly to render SSS in material zones next to or on top of each other there is a blueing effect. Putting the SSS into separate groups alleviates this. I have not run into this issue when using Superfly/Cycles nodes. Yet.
Example is Skinface in one scatter group and lips in a separate group to keep the lips from turning blue.
So finished with the product update for Tina so far. Got her all done now to redo the older attempts in Poser to get Tommy ready for Poser.
Here are some examples for Superfly and Firefly renders of her makeups.
There will be 6 MU's and 9 Fantasy MU's, lots of eye colors and nails too!
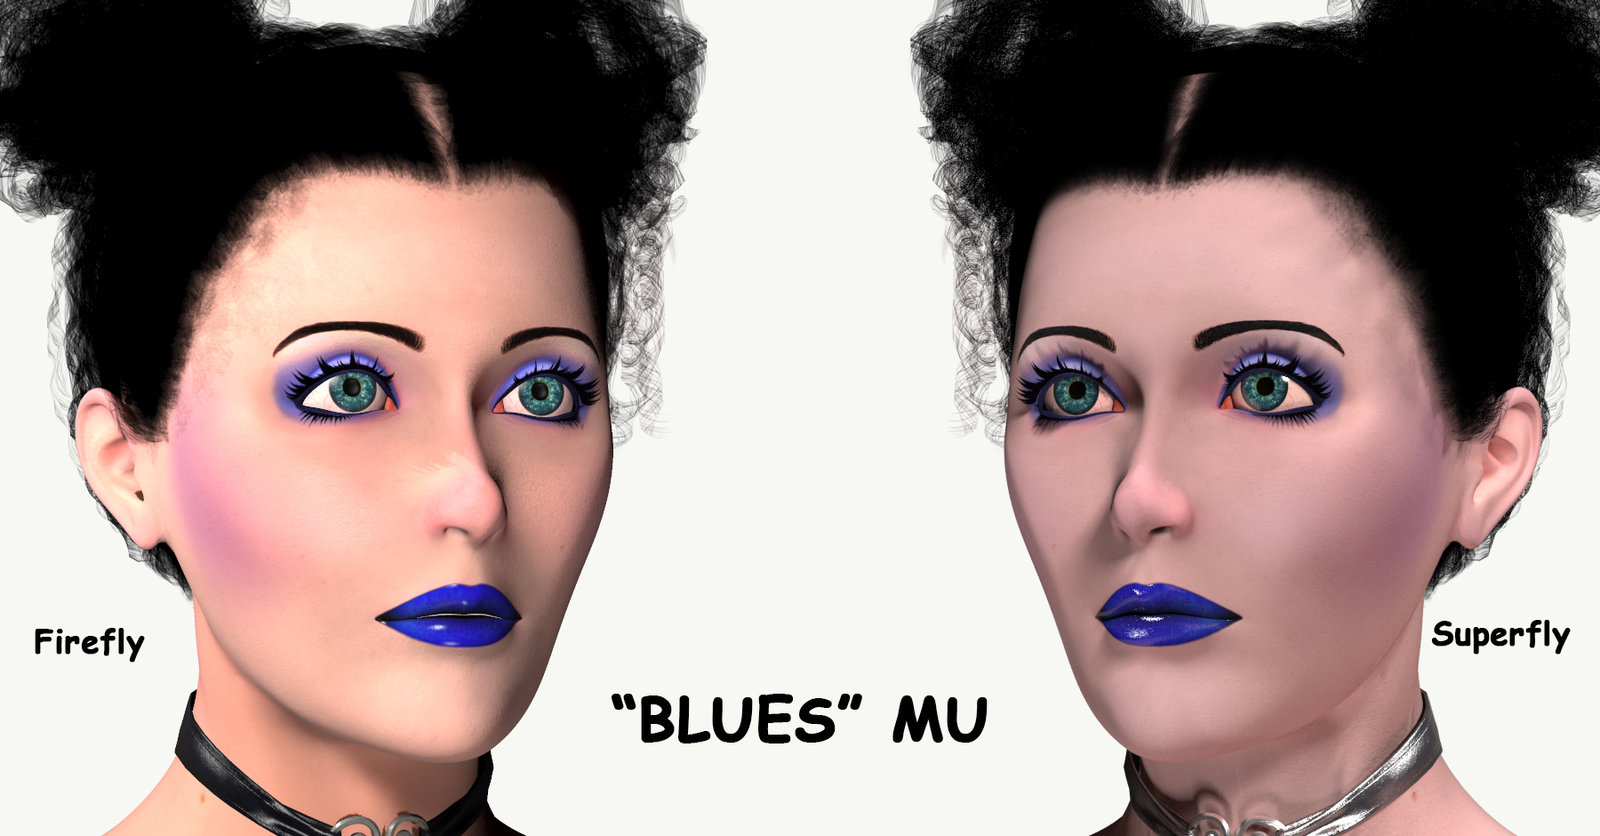
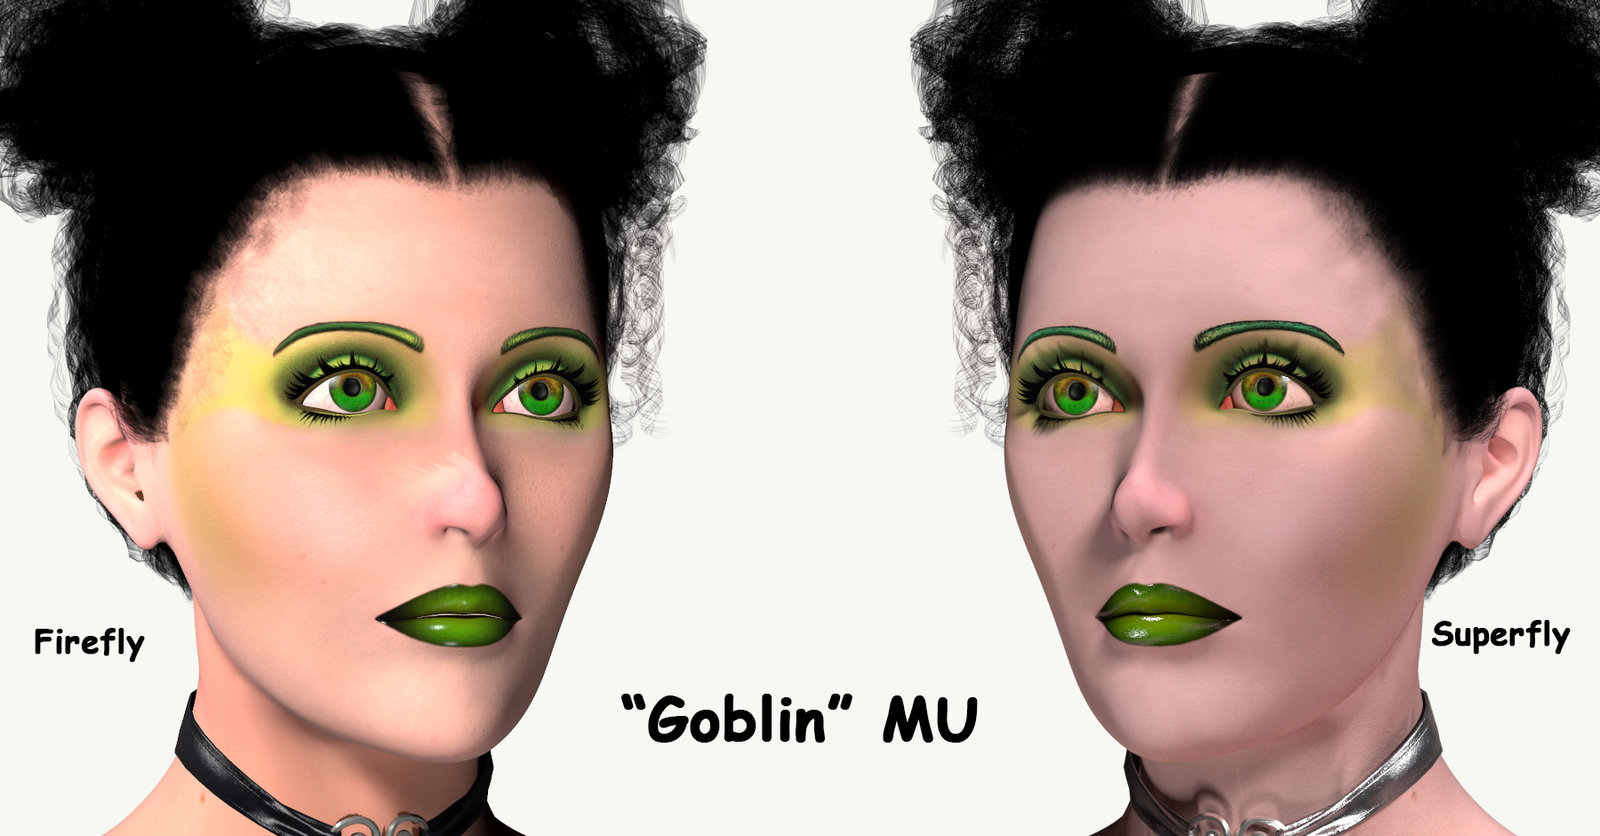
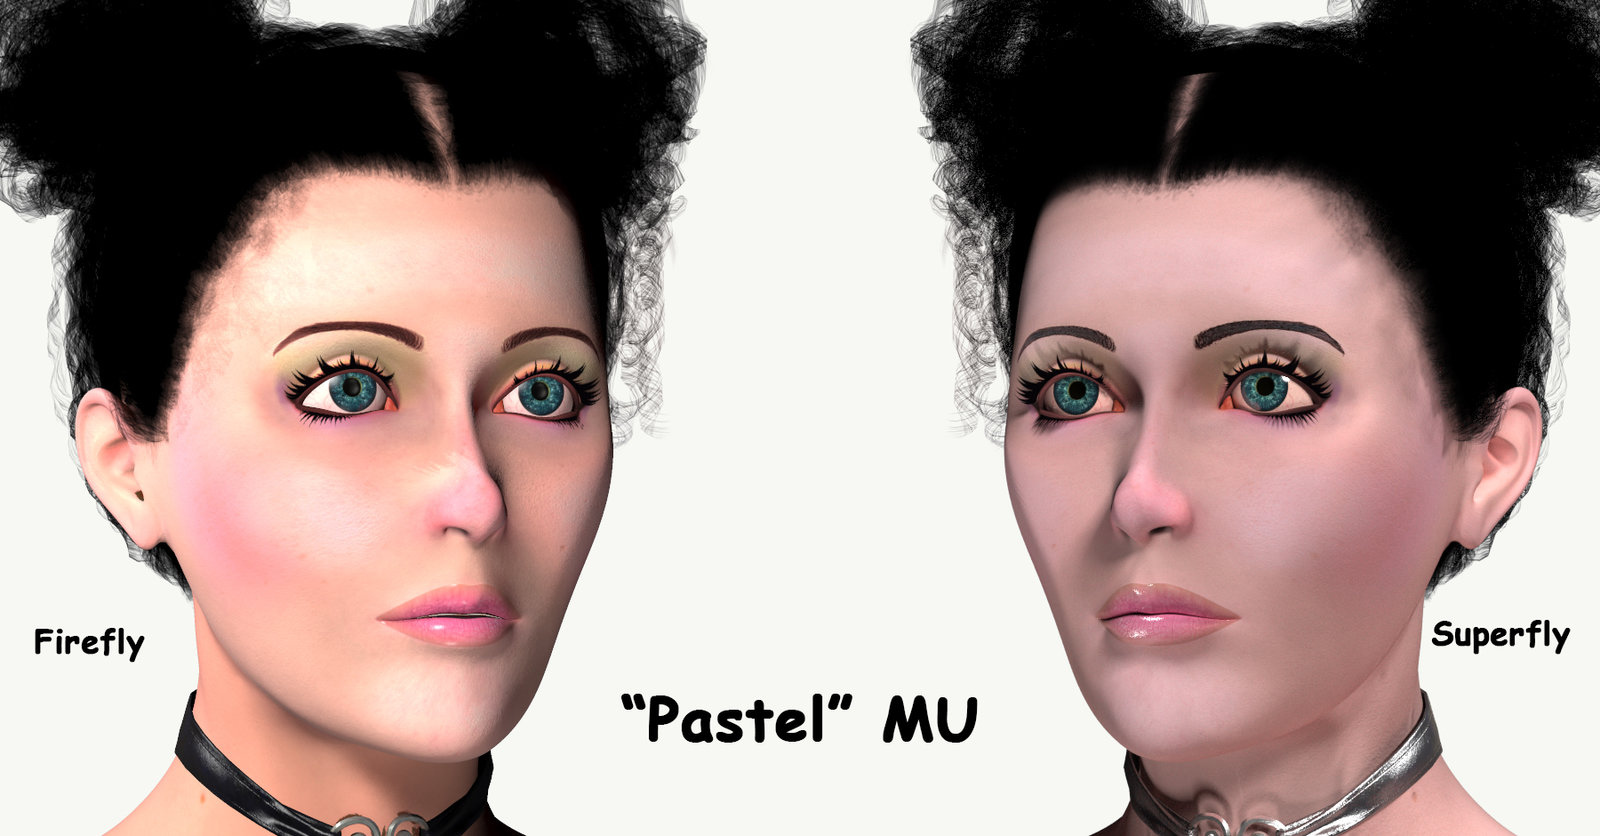
Here are some examples for Superfly and Firefly renders of her makeups.
There will be 6 MU's and 9 Fantasy MU's, lots of eye colors and nails too!
Yes, she has quite a bevy of styles. The Blues is part of the regular make up but you can switch the lips out for another color which will soften the entire effect. I didn't do separate lip style folder but I guess I really need to for more options!
I wanted to renew the Training Gear pack for Dawn and have it currently reloaded in Poser 11 setting it up! Originally I had it in the testing area at 'Rosity but the nice beta tester gets back to me and shows me all these issues so I told her forget it, I'll work on it and resubmit later.
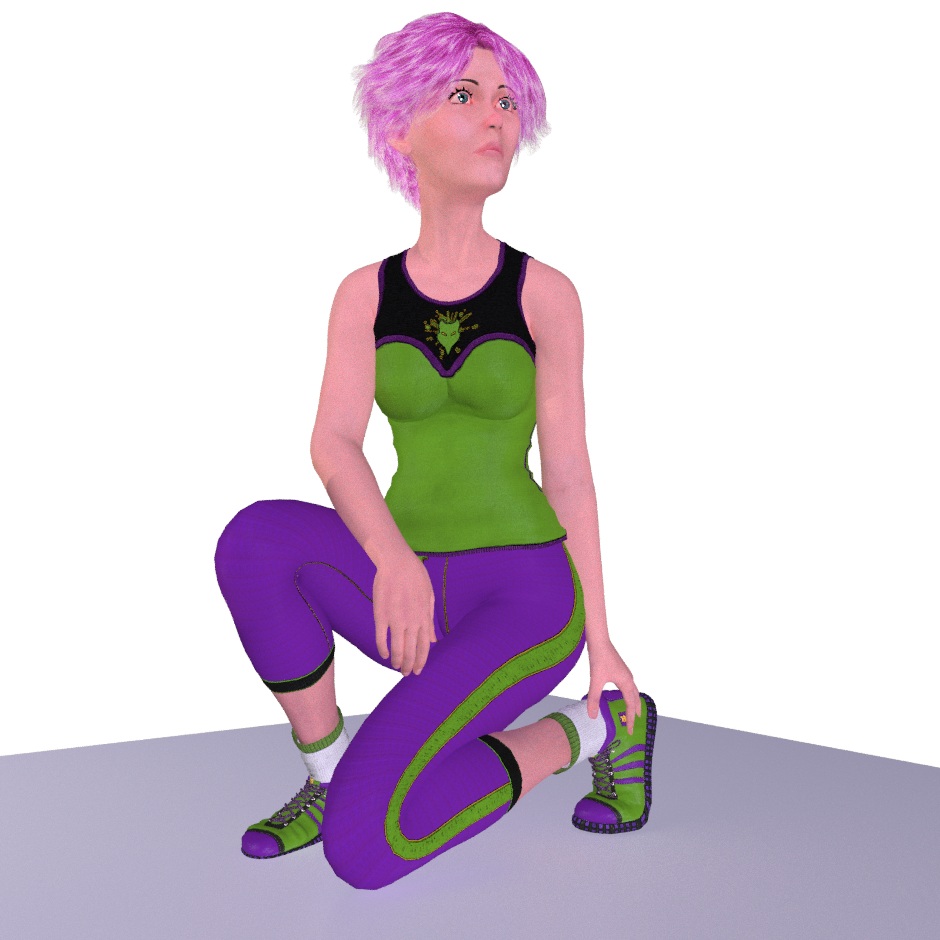
So today I'm finalizing Tina's (Character for Dawn) settings and needed a cute outfit for promo's, and low and behold the Training Gear set came to the rescue. I tried Ken's Bunny suit (as in Playboy) but there is something weird going on with how it conforms (he informed me that there was some weirdness with the breast/chest area that causes that) and the other really cute sundress from Steve over at 3DUniverse. No go with that one either, neither will conform properly but my Training Gear set DOES, perfectly!
So my original maps for the set had a HUGE Wolff Trainer logo on the top as well as on the pants. OVERKILL anyone? So I spent an hour in Photoshop removing all the logo info from the Diffuse maps (the color maps) and the internal maps like Normal, Specular and the others (the maps that make the clothing look more realistic) so that was fun. Once I got a workflow going it came together nicely. So now the top looks more simple but still cute.
So then I started applying various poses Tina and I really don't see any reason to freak myself out over poke throughs, which were brought to my attention via the beta tester. So I guess when when my beta team looks over the pack they will HOPEFULLLY not find much to report in that way. The trick with clothing like this is to make sure you have expand morphs so you "tic tic tick" on the slider to get just the right amount of expansion so none of Tina's digital skin starts popping through the clothing. I've applied about 5 poses so far and only had ONE I have to really pop up the expansion for and that was the socks around the front ankle area.
The first of the many maps for it are mostly in place (I have a pair of Toe socks, wrist and heads bands to set up still but those are easy peasy to set up)
So here is Tina, in a nice pose that would normally be VERY telling of poke throughs. Not a one!
The figure morph is mine done in ZBrush and the hair prop is freebie by 3Dream that comes with Poser 11 and 12, so I'm going to included quite a few color mats for it, this is the Pinky one! I love it!
Thanks for looking.
Great job!
My pack for Dusk SE is up as of this morning in the Renderosity store.
I'm so happy and relieved to see this finally up and available.
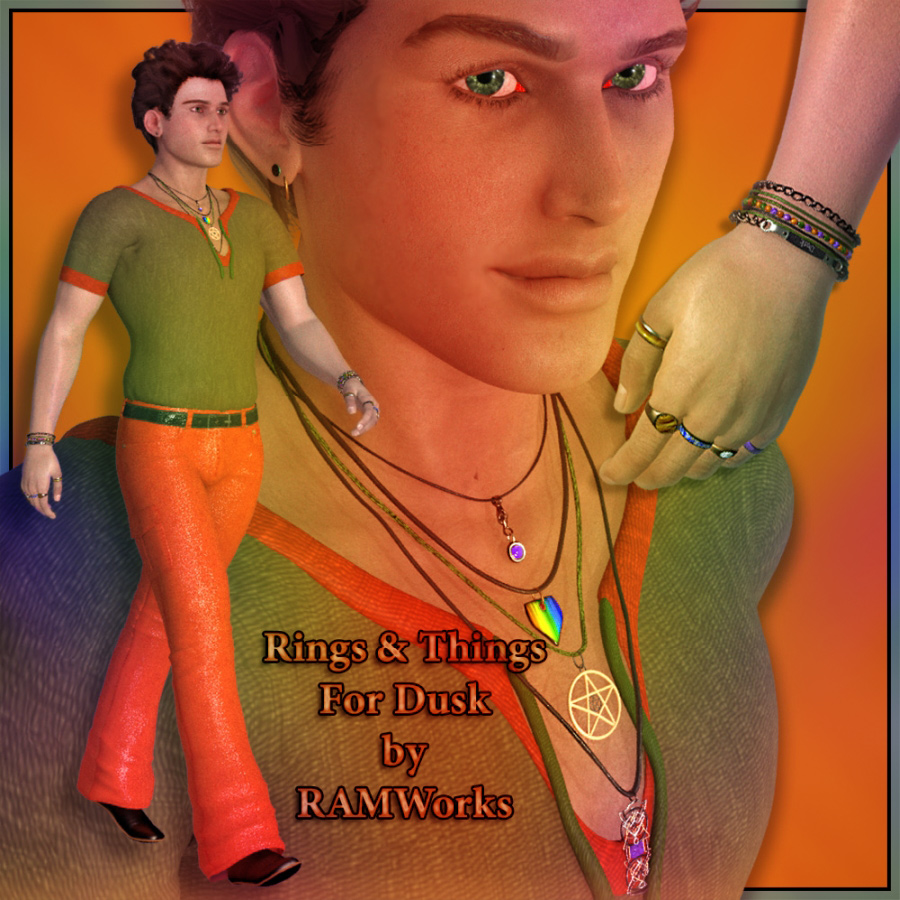
Necklaces ended up with about 100 morphs between all 4 of them.
Rings are conforming so they don't slide around the hand when it's posed and unless you morph Dusk into ridiculous shapes the rings hold their shape just fine when the hands are posed. 5 rings for each finger.
3 bracelets for the left and right wrists
A couple of simple earrings (Dobs and Double Rings and a combo of the Dob/Double Rings that load together for each ear lobe.
Allot of material options! Metals, Leathers, Stones and Jewels set up for the jewelry These are all shaders except for a couple of areas: the ID Bracelet name plate and Necklace 02 shield. Note, while the shaders are set up for the jewelry they can, of course be used on other things but keep in mind I can't guarantee that the will look good on larger props or clothing!
Quite a few material zones to do your own thing with as well.
Rings & Things for Dusk SE
Please take the time to read the ReadMe for more info!
PS: I have a version of this in the works for Dusk 2.0 when I finally get rigged version to work from!

Thank you so much for your support.
Enjoy and happy rendering!
Richard RAMWolff/RAMWorks

I'm so happy and relieved to see this finally up and available.
Necklaces ended up with about 100 morphs between all 4 of them.
Rings are conforming so they don't slide around the hand when it's posed and unless you morph Dusk into ridiculous shapes the rings hold their shape just fine when the hands are posed. 5 rings for each finger.
3 bracelets for the left and right wrists
A couple of simple earrings (Dobs and Double Rings and a combo of the Dob/Double Rings that load together for each ear lobe.
Allot of material options! Metals, Leathers, Stones and Jewels set up for the jewelry These are all shaders except for a couple of areas: the ID Bracelet name plate and Necklace 02 shield. Note, while the shaders are set up for the jewelry they can, of course be used on other things but keep in mind I can't guarantee that the will look good on larger props or clothing!
Quite a few material zones to do your own thing with as well.
Rings & Things for Dusk SE
Please take the time to read the ReadMe for more info!
PS: I have a version of this in the works for Dusk 2.0 when I finally get rigged version to work from!

Thank you so much for your support.
Enjoy and happy rendering!
Richard RAMWolff/RAMWorks

Last edited:
Working on a Dawn to Dusk "Johon" add on for Dawn 2. No outright nudity going on here so hopefully Alisa won't yell at me! LOL I also created new normals, bump and specular maps to tighten up the diffuse maps and created a male face with new eyebrows and scruff.

No other place to post this so here goes.
I've been in the hospital for the last 5 days with pneumonia and a bacterial blood infection.
They had me on days and days of IV antibiotics to clear it out. Apparently I got some bacteria on my skin that traveled into my blood stream probably from some small cut I had that I wasn’t aware of. It was scary. Hospitals are no fun. Constantly checking vitals. Lights, beeps and nurses in and out of my room poking and prodding at me. I’m diabetic so they switched me from Metformin to Insulin. They kept trying to get it to stabilize but because of how whacked out my body was that was a challenge for them.
I’m home now, got home yesterday afternoon. It was my 64th BDay so I’d say that was the best BDay present I could have received to be home in my own space. Now the healing begins. I'm just up after 10 hours of needed sleep without interruption. I'm hoping SO MUCH that I can resume work next week SLOWLY but for now I need a lot of rest and getting life back to some normalcy.
I lost 32 lbs. in about 2 weeks so I have weight to put back on and energy to regain so I can get back to life.
Sadly my clients have to wait but most, if not all, are more concerned about my health than their hair so I think I’ll be OK but once I start work again I’ll have to gauge how much I work, like maybe 2 cuts a day or 1 color and cut a day. Can’t overdo it.
There seems to be a lot of folks out there this year with pneumonia. I’m hearing more about that then COVID. Weird. Stay safe, if you feel run down, cough allot and lethargic please go get seen as you don’t know what it could be. You don’t want to end up in hospital. It’s no fun plus ...
The food is horrid, at least at San Mateo General! I got ONE good meal that I have to say was delicious on the last evening I was there! The rest I would pick up the plate cover, look at and want to hurl and put it back down. I survived on protein shakes that my friend Eliezer brought to me and they did have peanut butter and crackers so I ate those. Some fruit cups and some diabetic safe juices and coffee and water. Breakfast was usually a double heap of scrambled eggs, cheese, fruit and coffee (not horrible). Eliezer on my first two days brought me some fast food I was craving so that tied me over in the afternoon. And he would stay and talk with me for about 1/2 hour. So it was nice to visit with him.

