• Welcome to the Community Forums at HiveWire 3D! Please note that the user name you choose for our forum will be displayed to the public. Our store was closed as January 4, 2021. You can find HiveWire 3D and Lisa's Botanicals products, as well as many of our Contributing Artists, at Renderosity. This thread lists where many are now selling their products. Renderosity is generously putting products which were purchased at HiveWire 3D and are now sold at their store into customer accounts by gifting them. This is not an overnight process so please be patient, if you have already emailed them about this. If you have NOT emailed them, please see the 2nd post in this thread for instructions on what you need to do

Poser Lights?

Miss B

Drawing Life 1 Pixel at a Time
CV-BEE
I use the Main and/or Face camera(s) most often, neither of which, I believe, are in the Perspective view.

The only reason I don't like multi viewports is I can't see my scene well enough. I suppose I could switch back to the single viewport after I get the lights positioned. Hmmmmm, something to think about. Thanks for the tip Seebee. :)
 

Seliah (Childe of Fyre)

Running with the wolves.
CV-BEE
Contributing Artist

Yeah, you had... I had forgotten where that had been posted to in the time between then and now getting this to where it's actually making headway. There's some folks on this thread that also were not on Nataani's thread back around when you posted that, too. When I started this thread, originally, it was just trying to find a solution to getting a good light rig for development work (which I do have that solution now) - and then the thread just kind of branched out from there, it looks like.
 

Seebee

Member
Aha !!
See what you started :)
A rolling stone, maybe.
But the enthusiasm here is very magnetic.
Nice thread, Seliah.
And it's a very interesting and friendly one.
 

Gadget Girl

Extraordinary
Contributing Artist
Okay I have a question, possibly about lights in general. I got the MidBoreal light pack that people were talking about, and it's great, but I do have a question. I never know whether I should be using the lights with Ambient Occlusion or without. Does it matter if my materials have ambient occlusion?
 

seachnasaigh

Energetic
I never know whether I should be using the lights with Ambient Occlusion or without. Does it matter if my materials have ambient occlusion?
If rendering with IDL engaged (Poser 9+), ambient occlusion is done by the IDL; don't add AO in materials.
Ambient occlusion is inherently done by Superfly, don't use AO nodes in materials.


I only looked through special lights in DS, like when I added a top light to see how it' shining on an object, especial a character's hair. For me it was the ease of positioning them where I want them.

In Poser, it's rare if you see a light in the workspace area, so it's hard for me to judge exactly where it is and what it's aimed at. True, I often turn them off one at a time, but that doesn't always give the right prospective.
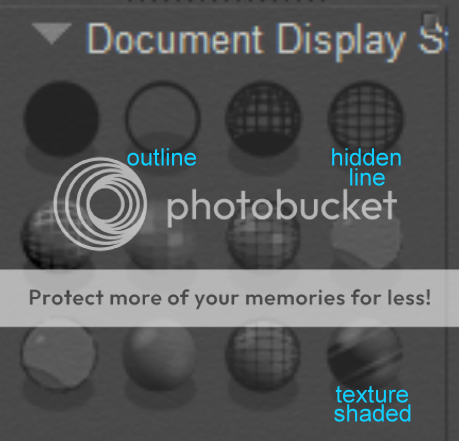
We've already covered shadow cams, which let you look through the light, but for positioning a point light within a lamp, try setting the display style* to outline and switch the camera view to an orthogonal view (e.g., top); that will allow you to precisely position the light in X,Z. Now switch camera view to front or side, and position the camera in Y. Switch back to texture shaded display style.

The combination of outline display style and an orthogonal camera view is also great for getting feet placed on the floor.
The hidden line display style is the cat's meow for seeing when one mesh penetrates another.

* display style buttons are those icons which look like billiard balls:

Notes: This screen capture matches P8-P10; P11 has an extra display style at the very end after texture shaded, it overlays wireframe onto the texture shaded view.
 

Gadget Girl

Extraordinary
Contributing Artist
If rendering with IDL engaged (Poser 9+), ambient occlusion is done by the IDL; don't add AO in materials.
Ambient occlusion is inherently done by Superfly, don't use AO nodes in materials.

Thanks. That's exactly what I wanted to know.
 

seachnasaigh

Energetic
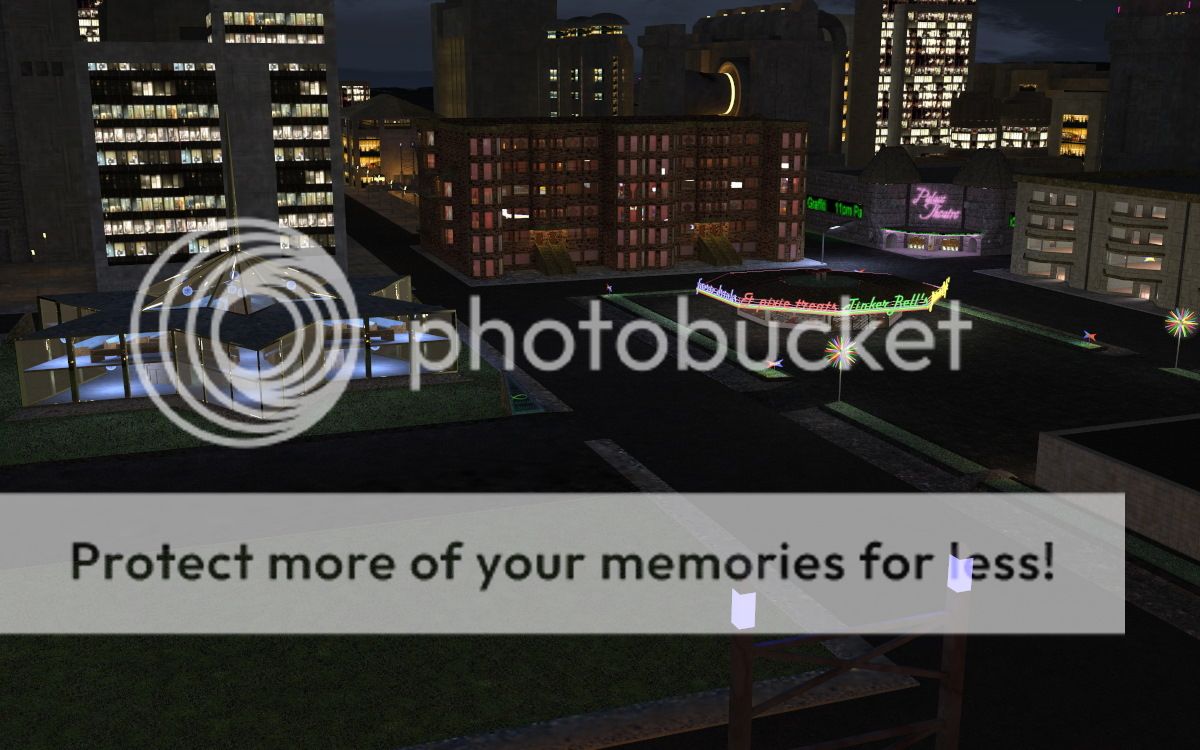
Self-lit buildings rendered in Firefly (IDL engaged, works in P9 SR3.1 and later):

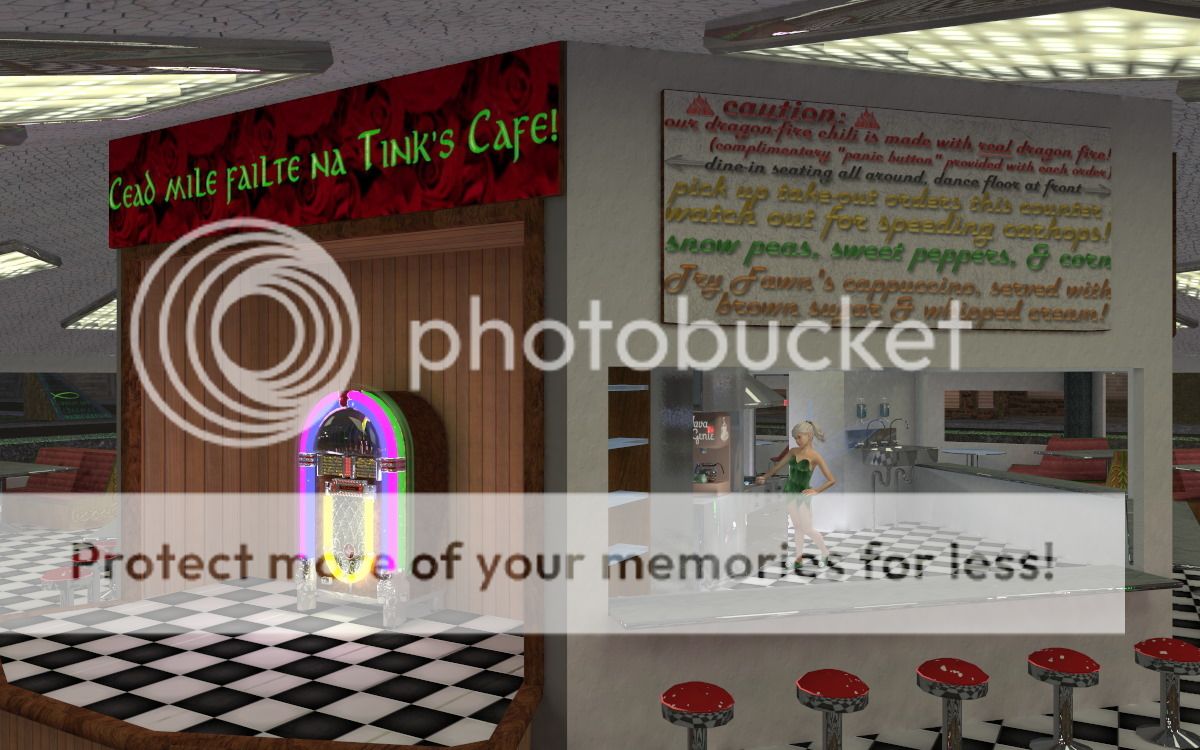
The Cafe' interior is lit by the fluorescent ceiling panels...


Well, I suppose I should put together a P9+ Firefly illumination pack for the Dystopia city blocks.:rolleyes:
 

MHundertmark

Inspired
Hello all, good to know that I'm not the only one struggling with the lights in Poser. I'm currently using P10 on a Mac. The biggest pain I have is that the preview light is totally different from the render light. Does anybody know how to make the preview and the actual render light look the same, when switching tabs? Cheers Mike
 

Carey

Extraordinary
Hello all, good to know that I'm not the only one struggling with the lights in Poser. I'm currently using P10 on a Mac. The biggest pain I have is that the preview light is totally different from the render light. Does anybody know how to make the preview and the actual render light look the same, when switching tabs? Cheers Mike
Ah the old , I want my preview to look the same way a render does, wouldn't that be great.. Yes, Poser needs more control over lighting, maybe I am not saying that loud enough, POSER NEEDS MORE LIGHTING CONTROLS, I feel I must say that louder as Smith Micro is a little deaf at times.. One thing you might not know about, you can make the poser lights larger, which really helps when your trying to figure out where they are..It also helps in placing them...Also use those little points of lights, use lots of them, in fact I encourage you to go nuts with them use them to high light the eyes, add red to the ears and cheeks, even the nostrils, after all who has black nostrils? highlight the teeth, the hair, yea just plain go nuts with them...lol Add negative lights, yes, by all means. You can have the worse posed render of all times and still make thing "pop" and gets lots of comments on your render due o the lighting.

Course keep in mind I am a frustrated actor always looking for a way to be Shakespearean or some kind of dark lord, course the term "going crazy" is entirely subjective and I prefer the term "having fun with light"...lol
 

Miss B

Drawing Life 1 Pixel at a Time
CV-BEE
Welcome to the HiveWire forums MHundertmark, and yes Poser lighting has often been the bane of my existence while working in 3D.
 

MHundertmark

Inspired
I believe I found a way to get a better grip on the situation. While driving and thinking about the problem a memory came back from the time I started taking pictures with digital cameras. I had not thought about the white balance setup in the camera and had a picture with different colours of light, although my eyes have seen everything in white. With that in mind I though about light layers and different kind of light (diffuse & direct). Okay, so I deleted all the lights, made sure that there are no hidden automatic loaded things in the materials and made the background and the ground black. Render = everything is black in preview and render. Then I placed V3 and created one light. As always it was pointing somewhere and I had no clue where it was shining at. Couldn't see the thing. So I went to the controls and checked it's a spotlight, narrowed the beam, rotations to zero, x,y,z to zero and bang I could see the light on the floor. Like switching on a maglight at night. I pointed the beam at the hand and started to move the light up and in an angle. By doing that I recognised that it moved away from the hand and I couldn't see it again, little bugger. Anyway I managed to get the it right and changed the light from spot to infinite and with 10% I got a faint light on the V3. Mhhh - I thought how about one of these lights E/W/N/S - so I duplicated them and put them at 90/-90/180/-180 - 10% each and boom. I was getting there. Diffuse light okay. Then I added three spotlights, narrow beam low intensity and I felt in control of the light like in a photo studio. Great thing is, if I take the gamma off, exposure to 1 the preview and the render are the same. No more wasting time with rendering to see what I'm doing. Unfortunately, so far this setup only works on new projects and not if I load old ones. But, it's a great step forward.
 

Carey

Extraordinary
I believe I found a way to get a better grip on the situation. While driving and thinking about the problem a memory came back from the time I started taking pictures with digital cameras. I had not thought about the white balance setup in the camera and had a picture with different colours of light, although my eyes have seen everything in white. With that in mind I though about light layers and different kind of light (diffuse & direct). Okay, so I deleted all the lights, made sure that there are no hidden automatic loaded things in the materials and made the background and the ground black. Render = everything is black in preview and render. Then I placed V3 and created one light. As always it was pointing somewhere and I had no clue where it was shining at. Couldn't see the thing. So I went to the controls and checked it's a spotlight, narrowed the beam, rotations to zero, x,y,z to zero and bang I could see the light on the floor. Like switching on a maglight at night. I pointed the beam at the hand and started to move the light up and in an angle. By doing that I recognised that it moved away from the hand and I couldn't see it again, little bugger. Anyway I managed to get the it right and changed the light from spot to infinite and with 10% I got a faint light on the V3. Mhhh - I thought how about one of these lights E/W/N/S - so I duplicated them and put them at 90/-90/180/-180 - 10% each and boom. I was getting there. Diffuse light okay. Then I added three spotlights, narrow beam low intensity and I felt in control of the light like in a photo studio. Great thing is, if I take the gamma off, exposure to 1 the preview and the render are the same. No more wasting time with rendering to see what I'm doing. Unfortunately, so far this setup only works on new projects and not if I load old ones. But, it's a great step forward.
Okay, okay and where is the result????? lol For figures I use indirect lighting either from the right or left to start
 

MHundertmark

Inspired
This program is killing me. Looks like it was just a happy accident and I can't reproduce it. However I saved one version and take it now as a starting point. Tried yesterday night an animation. Wanted to switch on the lights one after the other - to show the effect of the diffuse light. What a nightmare. Poser starts after a while to move the values of the eight lights around without any sense or reason. So I started today again, different setup. Hope it will work. Rendering time should be a day :-D I'll show you possibly on Monday. Have a nice weekend.
 

MHundertmark

Inspired
I believe I found one of the problems. Light 1 is loading with an IBL and is blowing out the colours. So now I start will all lights out. Do you have the same issue with that the actual view and the preview and render look different? Like here?

all three.jpg


Here is the final render for testing the light in the dark:

Dark test.jpg

I then added a spotlight.

I made a small movie with actual screenshots of changing the lights step by step. Poser is behaving really crazy as things go dark although it should not. Unfortunately, I can't show you the movie as the file is to large.

With knowing now how to add a spotlight I tried this (Hair needs adjustment):

French Maid.jpg


So then I added surrounding light layers and got this (loaded the wrong tmap for the brows):

New lights.jpg


Do you know the maximum file size for a movie?
 
Last edited:

Carey

Extraordinary
I believe I found one of the problems. Light 1 is loading with an IBL and is blowing out the colours. So now I start will all lights out. Do you have the same issue with that the actual view and the preview and render look different? Like here?

View attachment 45281

Here is the final render for testing the light in the dark:

View attachment 45282
I then added a spotlight.

I made a small movie with actual screenshots of changing the lights step by step. Poser is behaving really crazy as things go dark although it should not. Unfortunately, I can't show you the movie as the file is to large.

With knowing now how to add a spotlight I tried this (Hair needs adjustment):

View attachment 45283

So then I added surrounding light layers and got this (loaded the wrong tmap for the brows):

View attachment 45285

Do you know the maximum file size for a movie?


I don't have much luck with IBL lighting or HMRI or any of those others, I use Mainly IDL lighting, Course I like dramatic scenes with pronounced lights and darks...I think that lighting scheme gives me more control over placement and effect and rely on IBL lighting as low light global lighting...
 

MHundertmark

Inspired
I really had to laugh hard yesterday as I found out that I can actually make the light sources visible when I change the display prefs. I also use a cloth plane now to make the light beams visible and get a better understanding where the source is shinning on.
 
Top