• Welcome to the Community Forums at HiveWire 3D! Please note that the user name you choose for our forum will be displayed to the public. Our store was closed as January 4, 2021. You can find HiveWire 3D and Lisa's Botanicals products, as well as many of our Contributing Artists, at Renderosity. This thread lists where many are now selling their products. Renderosity is generously putting products which were purchased at HiveWire 3D and are now sold at their store into customer accounts by gifting them. This is not an overnight process so please be patient, if you have already emailed them about this. If you have NOT emailed them, please see the 2nd post in this thread for instructions on what you need to do

HiveWire 'Depth of Field' Render Challenge: CLOSED

Pendraia

Sage
Contributing Artist
Winners are now announced...
We received some very creative entries for our "Depth Of Field" contest. Thanks to all who participated!

The judges have come to their decision, and it's now time to announce the winners of the Depth of Field Challenge...

And the winners are:

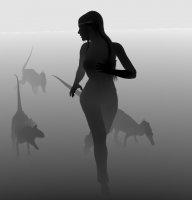
Pickpockets - Zaarin


Cavaletti - Rae134


Unicorns bring good luck - Luannemarie


Christmas Magic - Luannemarie


Congratulations to all the winners...


*******************************************

Join our HiveWire 'Depth of Field' Render Challenge
and extend the depth of your knowledge.


Show us what you can create using depth of field.

Renders must include the following:
  • Must be a DOF image that makes use of at least one Hivewire figure (Dawn, Dusk, Luna, Harry, the Gorilla, etc)
Submitted Images must meet forum guidelines
  • 1600 x 1600 pixel maximum image dimensions
  • 1MB max file size for images
  • 10MB max file size for video
Maximum of 3 entries can be entered.

You must abide by the HiveWire 3D Terms Of Service.​

This thread is for chatting about the challenge and for posting your progress, meaning you can post your images here to show us how you are doing before you finalize your render.

When you have decided your image is final post here with the words Finished Render at the start of the post. We will collect the finished renders, assign them a number and your title and transfer them to the actual Contest Thread for blind judging. No artist information will be shown in the actual contest thread.

Categories and Prizes
1st Place
2nd place
3rd place
Honorable Mention
Render Challenge closes at midnight, July 26, 2016(MST)
Please post your final renders here in this thread.
At the start of the post put Finished Render and the Title of Your Image.

Judges: Pendraia, Dawn(Lully)


Tutorials:
Easy Depth of Field in Poser
how to fake depth of field in Photoshop
Easy Depth Of Field Effect In Photoshop

Ds Creative 06

The tutorial is on Page 48, and covers three pages.

You can jump directly to page 48, by clicking on where the page number displays at the bottom, below the magazine. You click once, then type in the page number and hit enter, and it will jump the magazine to the correct page.


Issuu also has zoom functions, as well as full-screen functions, so you can zoom the magazine in as close as you need to in order to read it if needed.


The first item is a slider on the far left. This is for zooming in and out on the magazine.
The second item is the page numbers. Click the arrows to progress, or click on the numbers to type in a specific page number.
The magnifying glass is the search function.
The next item will toggle between having a "slideshow" of page previews at the bottom, or NOT having it.
The page icon next to that will toggle between single page or two pages view.
The double arrows on the far right will toggle between in the window, or a full-screen view of the magazine.
:bee::bee::beehive::bee::bee:
 
Last edited:

Satira Capriccio

Renowned
CV-BEE
Contributing Artist
When using Photoshop to do your depth of field, create additional additional (mask) renders with the background objects hidden. Use those "mask" renders to create your mask layers instead of having to draw selections around what you want to remain in focus.

In Poser, you can uncheck the Visible in Camera on each figure/props properties tab and those objects will be invisible in the render. But they will still be used for creating shadows.
 

3dcheapskate

Busy Bee
Wonderful challenge ! I'm assuming after reading the OP a couple of times that the DoF can be either rendered or postworked ?

(Personally I far prefer postwork DoF. The main reason is that it's so easy to tweak, whereas if you do DoF in the render and you want to make a slight adjustment... how many hours did your render take?)
 

3dcheapskate

Busy Bee
Wonderful ! Here's a few more useful DoF links, mainly for Poser users. About a year ago I discovered something new (to me) about the Poser Atmosphere and started a thread at Renderosity entitled "How Do You Use The Poser Atmosphere ?"
About half way down the first page Boni posted a bunch of useful links about DoF in Poser. I also posted information about how to do a depth map render in Poser (the 1 and 2 in that post are alternative ways to do it) and bagginsbill added a note that the then-current Poser Pro (PP2014?) had a built in 'depth map' option on the render settings making it child's play.
 

Gadget Girl

Extraordinary
Contributing Artist
Oh, this sounds interesting. I know almost nothing about DoF except what it is. I may enter just as a learning exercise. I think this is a very cool kind of challenge.
 

Miss B

Drawing Life 1 Pixel at a Time
CV-BEE
Wonderful ! Here's a few more useful DoF links, mainly for Poser users. About a year ago I discovered something new (to me) about the Poser Atmosphere and started a thread at Renderosity entitled "How Do You Use The Poser Atmosphere ?"
About half way down the first page Boni posted a bunch of useful links about DoF in Poser. I also posted information about how to do a depth map render in Poser (the 1 and 2 in that post are alternative ways to do it) and bagginsbill added a note that the then-current Poser Pro (PP2014?) had a built in 'depth map' option on the render settings making it child's play.
Thank you for the links. The more information available, the easier it will be for folks to find a way to accomplish DoF that works for them. :)
 

3dcheapskate

Busy Bee
LOL - I just had a vision of a 'Small, Far Away' scene. But I don't have any cows. Probably just as well...

(just in case there's somebody who doesn't understand that...
)
(didn't expect that to embed the video)
 

3dcheapskate

Busy Bee
Okay, I just loaded Dawn up in PP2014 to see what would transpire. She found a nice pair of hipster jeans and an elfy corset, and then nicked some of Vickys hair so I'm getting a sort of hippie chick vibe (no shoes necessary)... "Flowers In Our Hair" starting running through my head (and thus my entire runtime)...

(
- no direct link this time! Oh dear, it doesn't seem possible to post a YouTube URL without it being embedded!)


She tried a few poses and the jeans fitted really nicely, so she started jogging along and dancing with the music...

...and a few dinosaurs, disturbed by the noise, started trotting along behind...

(I'm being dragged off by the boss, so I'll post what I've got so far - make of it what you will...)

DawnChase2x3.jpg
 
Last edited:

3dcheapskate

Busy Bee
Well, it looks as if I posted two identical postworked DoF versions in my rush - the middle image should obviously have been this, with Dawn in focus and the dinosaurs not:

FG.jpg

Having Dawn as the focus was the most obvious choice (which is why it should've been the middle image, right after the straight render) and I think it looks rather good. Maybe if the depth of field was slightly bigger and one the nearer dinosaurs was also in focus ?

Even looking at the raw render the eye (well, mine anyway) is drawn to Dawn. So why not twist things around a bit and have the depth-of-field centred on the last dinosaur? (That's the third image of the triptych) At this point I realized that the last dinosaur shouldbe wearing a walkman and singing "Where have the flowers gone, sun children?" and Dawn would be calling out, "Come on boy, keep up!"

And then I found myself wondering- are these dinosaurs small, or are some of them far away? So I'm now imagining an expansive scene with the dinosaurs roughly the same size in the picture, but... yes, you've got it!
 

3dcheapskate

Busy Bee
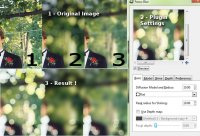
Edit timeout on the previous post, so here's the depth map render I used in GIMP with the Focus Blur plugin (after much searching I eventually tracked down the plugin on the GimpChat forum,in a 2010 post - the link's in the OP of the "How Do You Use The Poser Atmosphere ?" thread already mentioned in post #5 here if anybody needs it. I'm fairly sure it's kosher!) to do the postworked dof.

Render 3.jpg
 

3dcheapskate

Busy Bee
Nice one Bill !

This next render was totally inspired by this challenge, even though without a Hivewire figure it wouldn't satisfy the entry criteria - so I definitely reserve the right to replace Vicky with hippie chick Dawn! This started with a vague recollection of a great depth-of-field picture by Aeon Soul, which I eventually tracked down on DeviantArt here - Choice

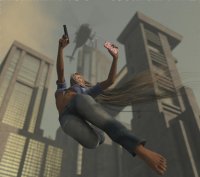
I'm going to copy that I thought, but I'll do it in such a way that nobody'll notice! Rather than a long sci-fi dock, why not point the camera upwards from street level between tall buildings? The render on the left was the basic setup in PP2014 -I'd just watched the video in GadgetGirl's "Showing character through poses" thread over on the Content Development forum here, so I was trying to pay attention to the 'line of action', 'negative space', and all that creative type stuff. I added a helicopter gunship to reinforce the line of action (that sounds good!) and a nice long hairstyle posed to give a sense of movement. Since hlicopters have rotating blades I also used motion blur, but the only thing that's moving in the scene is the rotor blade - 0 to 45 degrees between frame 1 and 2, shutter open 0.0, shutter close 1.0. After a test render I decided to try Poser's built in depth of field. I set the camera to f2.8 and set focus distance to match her navel.

I admit that I was gobsmacked by the result !

(Note: I'm just playing with ideas and posting anything that strikes me as being relevant to this theme. If anybody wants to use any of these ideas, please do so - I see this challenge in part as a shared learning exercise! :D )

VickyGuns1.jpg
 
Last edited:

3dcheapskate

Busy Bee
WooHOO! Thanks to this challenge I've just discovered that the GIMP Focus Blur plugin can also create bokeh, which are actually part and parcel of depth of field! From the current Wikipedia 'Bokeh' article :

"...Bokeh occurs for parts of the scene that lie outside the depth of field...Bokeh is often most visible around small background highlights, such as specular reflections and light sources, which is why it is often associated with such areas. However, bokeh is not limited to highlights; blur occurs in all out-of-focus regions of the image..."

and then a bit later, in the section on emulation:

"...To a first approximation, defocus blur is convolution by a uniform disk, a more computationally intensive operation than the "standard" Gaussian blur; the former produces sharp circles around highlights whereas the latter is a much softer effect..."

I've always used Gaussian blur with the Focus Blur plugin, because I've never found any explanation of all the settings. So I wondered if the 'shine' stuff in the plugin might be related to bokeh? I left the diffusion model at 'Flat', increased the radius from 5 to 10, and set 'Peak Radius For Shining' to 10, same as the radius (default is 0 I think).

Wow !

bokeh.jpg

Of course, it should only be applied to out of focus areas, so you need to use it in conjunction with a depth-map render - not sure of the details yet...
 
Last edited:

3dcheapskate

Busy Bee
And here it is applied to the image of a leaping Dawn (she's taken over from Vicky, stealing her hair in the process. I used a value of 20 for the two radii, and also used the depth map (created by the PP2014 auxiliary render data setting):

bokehToo.jpg

This probably isn't the best image to test the bokeh on, but it indicates that when using a depth map as well, the radius of the bokeh depend on how out of focus the area is. E.g I focused on her navel, the windows bottom left are not as far away as the beacon just under the helicopter
 

Miss B

Drawing Life 1 Pixel at a Time
CV-BEE
I like that Bokeh addition to the DoF. It adds nicely to the blurred area.
 

Miss B

Drawing Life 1 Pixel at a Time
CV-BEE
I don't see why it would be a problem Lyne. Clicking on it takes us to your media library, where we can get it when we gather up the final renders for the judges.
 

3dcheapskate

Busy Bee
Finished Render - "Princess Monica"

I Do DOF all the time, via post work ... :)

I assume it's ok to add my entries via my media gallery here?

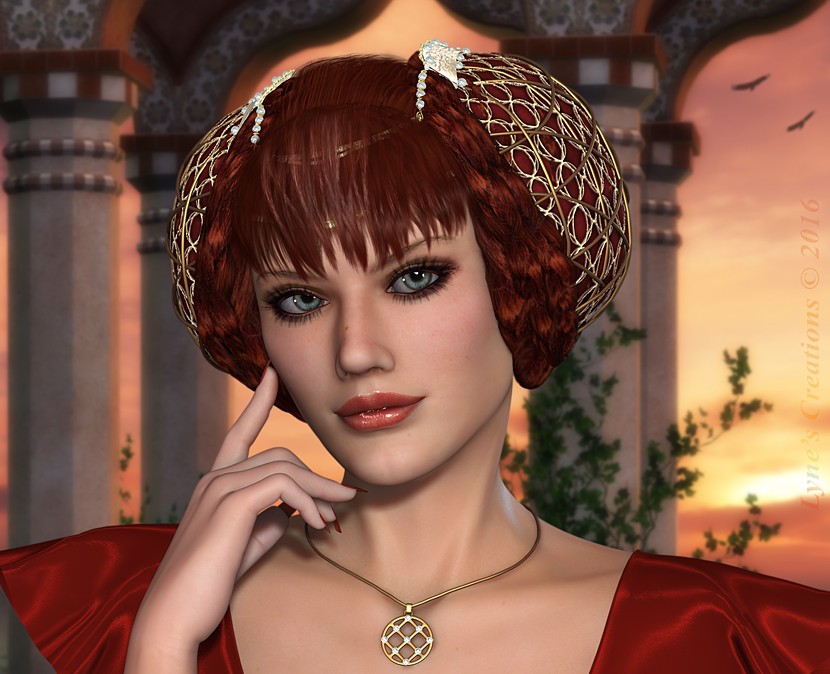
Great picture Lyne! Classic use of dof for a portrait - something that all the photography books tell you about, but that I never, ever managed to do!
In terms of technique you've already said it's postwork. Assuming that you don't mind sharing (of course if there are any personal trade secrets in there I wouldn't expect you to divulge them!) - did you use a rendered depth-map, a rendered foreground mask, or some other method (e.g. manual selection) to define the in/out of focus areas ? What tool(s) and settings did you use to blur the out-of-focus areas (I'd assume you used Photoshop, which I don't have a clue about, but I'm sure that other folks use).
 

3dcheapskate

Busy Bee
Looking at my dof images in post #13 and #15 I noticed that the Poser built-in DoF doesn't have the transparency (hair) problem that shows up if you use a Z Depth render and do the DoF in postwork. To get a depth-map for postwork that respects the transparency I think (and this is just a guess - I'll try it out later) that two additional renders would be required - one would be a transparency mask (a normal render with all the lights off and any distant background behind the transparency switched off) and the other would be a Z Depth render with the transparent object switched off.

Anyway, I was surprised that the Poser in-built DoF is not as slow as I recall it being. Maybe that's because I'm using PP2014, and the last time I tried it I was probably using Poser... 6 ? I'd noticed that the helicopter was very grainy (I usually go to Render Settings > Automatic, slide the slider to halfway between Draft and Final, switch to Manual and select 'Acquire From Auto'). I read something since this challenge started that said to increase 'Pixel Samples' and/or decrease 'Min Shading Rate' on the render settings to reduce the graininess, so I increased Pixel Samples from 6 to 12 and halved Min Shading Rate from 1.0 to 0.5.

Here's the latest - it's the version with Vicky, so not suitable for this challenge, but it's another step in the process of understanding DoF. :

VickyGuns2B.jpg

Another small addition - I also used the Poser Atmosphere Depth Cue with bagginsbill's distance falloff correction (I should post that over in the Poser Shaders forum - I've added a placeholder thread that I'll update after posting this) and a large half-distance to provide a subtle atmospheric effect.
 
Top