• Welcome to the Community Forums at HiveWire 3D! Please note that the user name you choose for our forum will be displayed to the public. Our store was closed as January 4, 2021. You can find HiveWire 3D and Lisa's Botanicals products, as well as many of our Contributing Artists, at Renderosity. This thread lists where many are now selling their products. Renderosity is generously putting products which were purchased at HiveWire 3D and are now sold at their store into customer accounts by gifting them. This is not an overnight process so please be patient, if you have already emailed them about this. If you have NOT emailed them, please see the 2nd post in this thread for instructions on what you need to do

Easy Shader For Creating A Height Map Render Of Your Scene

3dcheapskate

Engaged
Very simple shader that'll give you a height map (as opposed to depth map) render of your scene, with everythink at ground level or below (Y coordinate zero or negative) rendering black, and anything above ground level rendering in a height-dependent shade of grey,with the height for white being a parameter in the shader. If it's not one of bagginsbill's it's inspired by him.
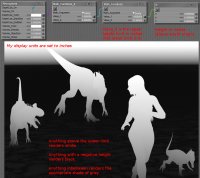
heightMap.jpg

You don't need to turn lights off or adjust anything else, just set the material as shown and render.
Using a height map render (possibly in conjunction with a depth map render) in postwork opens up a new world of ground-foggy possibilities...
 

3dcheapskate

Engaged
Just as a cross-reference, I posted a year ago on the Renderosity "How Do You Use The Poser Atmosphere ?" thread about a couple of methods of doing a DEPTH-map render for anybody who's not clear on that (in PP2014 you can do an automatic depth-map using Render > Render Settings > Auxiliary Render Data (at the bottom of the right hand 'Options' pane) and ticking 'Z Depth'. When you save your render, an additional image will be saved with the same name plus a ' Z' suffix - that's your matching depth map!)

My HEIGHT-map shader above is indeed based on (i.e. a shameless rip-off of! ;o) ) bagginsbill's DEPTH-map shader, as implemented by Miss Nancy here*

*that DEPTH-map shader is, I believe, only intended for use when rendering from the FRONT camera (I think the problem they were working on was creating bump/displacement maps from a render). Since the P-node is in WORLD coordinates the shader will ONLY work if the camera's Z-axis is parallel to the world Z-axis. But for a HEIGHT map we want the Y value from the P node regardless of our camera's position and orientation.
 

3dcheapskate

Engaged
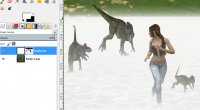
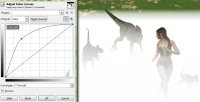
Back to the height-map shader - here's a simple way to use it. I loaded my main render into GIMP, then created a new solid white layer (my fog). I added an alpha mask to this fog layer and loaded my height-map render into the alpha mask. I then inverted the colors of the mask:
Fog1.jpg
 

3dcheapskate

Engaged
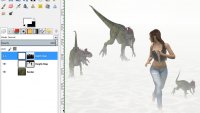
And then doing a similar with with the depth-map render as well (i.e. adding another white layer and using the inverted depth-map render as a layer mask):
DepthAndHeight.jpg
 
Top