Cool, I have CS5 loaded on this computer so should be the same.
Make sure the outside of your area is truly white (that way you can select ignore white in "Tracing Options" in below steps and it be empty unlike my sample attached which has greys inbetween the "empty" areas

)
Open or place your png (or any other raster file like Jpg etc), select it, go to "Object" (in top bar) and scroll almost to the bottom to "Live Trace", select " Tracing Options".
This will open up a dialogue box with many options. Depending on what you want to do will of course depend on the settings and also how big your photo is. Most of the time the stuff on the right doesn't need to be altered unless you need finer details. The stuff on the left is pretty self explanatory (if you don't know just ask and I'll try and help

). Click Trace when you're ready. Expand when its finished tracing so you can access the different paths (you prob don't want this if you using 256 colours but its handy for limited colours)
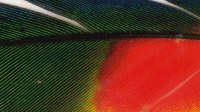
The first sample attached, I made it 200% so you could see the details more and saved it as a jpg.
My settings on the left were changed so the colour was 256, and on the right I halved the default and ignored white.
Looks pretty much like a raster feather.

(thumbnail, click to view details)
The second sample is the same except I made it 6 colours (which of course has less details, sometimes this is a good thing. Also sometimes you don't need 256, somewhere in between works, just a matter of playing).
Looks more cartoony
