• Welcome to the Community Forums at HiveWire 3D! Please note that the user name you choose for our forum will be displayed to the public. Our store was closed as January 4, 2021. You can find HiveWire 3D and Lisa's Botanicals products, as well as many of our Contributing Artists, at Renderosity. This thread lists where many are now selling their products. Renderosity is generously putting products which were purchased at HiveWire 3D and are now sold at their store into customer accounts by gifting them. This is not an overnight process so please be patient, if you have already emailed them about this. If you have NOT emailed them, please see the 2nd post in this thread for instructions on what you need to do

Method in the madness

Hornet3d

Wise
Me too.


All I can say is that I didn't think of it as a lot of work, and the results were worth it, don't you think? If folks are interested I could backtrack over the method I used. I bought Streets of London at the same time (I think there must have been a sale on!) but I didn't have any immediate plans for using it and it remains unconverted; that could form a useful test subject. In fact I've converted quite a few other DAZ assets since then - mostly clothing rather than props - and I think the process could be relatively simple if you're willing to install DAZ Studio. You would hardly have to know how to use it.

I put off buying Streets of London for quite a while but finally purchased as I saw it as a must have really. It was some time ago and I do not remember exactly how I got it to work in Poser but I do remember thinking it was a lot easier than expected and that, had I have known, I would have purchased it a lot sooner.

I guess I could do the same with his other products but to be honest I tend to buy from the likes of Petipet and Jack Tomalin as they still have Poser versions and so they work straight out of the box.

Old London HW.jpg
 

English Bob

Adventurous
I looked back in my order history, and I see I bought Chinatown and Streets of Old London at the same time, for less than $20 total. That was some sale! :) I wouldn't pay full price for something that I knew in advance would need further work, but both those sets came with OBJs (Stonemason added them later due to demand on the forum, I seem to recall) so the risk wasn't too great. There was a good chance that I'd be able to use them, it was just a question of the amount of work that would be needed.

As it turned out, he'd set up his OBJ files with MTL files that looked for textures in a subdirectory off where the OBJs themselves are stored (i.e. different from the way Poser stores them in separate parts of the Runtime structure). If you look in the MTL file with a text editor to find the expected path, then place the texture files in the right folder, the OBJs will import with all the maps properly attached which saves a lot of time. I think I had to manually add normal maps and maybe some others which the OBJ format doesn't cope with. After that, scaling was the only remaining challenge. I parented all the imported props to a suitable base and scaled that, meaning everything scaled in unison and importantly, all the building parts remained in the same relationship to each other.

I fully agree that I'd prefer to buy Poser-ready items that I can use straight out of the box. Maybe I'm getting more picky in my old age, or maybe I'm more willing to work on things to make them closer to what I want - probably a combination of both. Nearly every scene I build involves tinkering with materials at the very least, and usually I add morphs or other (mostly) minor geometry modifications too. Although I could build my own models from scratch if I needed to, it's a whole lot easier if I can hack away at something that already exists.
 

Hornet3d

Wise
I looked back in my order history, and I see I bought Chinatown and Streets of Old London at the same time, for less than $20 total. That was some sale! :) I wouldn't pay full price for something that I knew in advance would need further work, but both those sets came with OBJs (Stonemason added them later due to demand on the forum, I seem to recall) so the risk wasn't too great. There was a good chance that I'd be able to use them, it was just a question of the amount of work that would be needed.

As it turned out, he'd set up his OBJ files with MTL files that looked for textures in a subdirectory off where the OBJs themselves are stored (i.e. different from the way Poser stores them in separate parts of the Runtime structure). If you look in the MTL file with a text editor to find the expected path, then place the texture files in the right folder, the OBJs will import with all the maps properly attached which saves a lot of time. I think I had to manually add normal maps and maybe some others which the OBJ format doesn't cope with. After that, scaling was the only remaining challenge. I parented all the imported props to a suitable base and scaled that, meaning everything scaled in unison and importantly, all the building parts remained in the same relationship to each other.

I fully agree that I'd prefer to buy Poser-ready items that I can use straight out of the box. Maybe I'm getting more picky in my old age, or maybe I'm more willing to work on things to make them closer to what I want - probably a combination of both. Nearly every scene I build involves tinkering with materials at the very least, and usually I add morphs or other (mostly) minor geometry modifications too. Although I could build my own models from scratch if I needed to, it's a whole lot easier if I can hack away at something that already exists.

I am not sure with Stonemason products but I know years ago that I used to import OBJs with MTL files into Bryce and then take it to Poser from there and that often worked.

It is extremely rare for any of renders to have content using the default materials the exception being outfits from Hunter3D and CKV-01 for Dawn by Ken 1171 designs, such outfits have a vast array of options so I do use the default materials most of the time. I don't do my own modelling but I do a great deal of kit bashing for outfits and altering of props in Silo.
 

English Bob

Adventurous
I did a little more tinkering with the Streets of Old London. I'm beginning to suspect that I may have mis-remembered the amount of effort I put into importing Chinatown. :)

My idea was to simply export the whole thing from DAZ Studio, using the appropriate scaling; however Poser had trouble importing the OBJ, possibly because it had 512 materials and over 800,000 polys. Poser couldn't find any of the maps, even though I'd taken care to check that the MTL file had good paths in it. It seemed that it was going to ask me where every map was, even though the file browser window was looking right at where the maps had been stored!

I told Poser not to search for any maps and saved the result into the props library. When I looked at the PP2 file with Dimension3D's Poser File Editor, I could see why the maps weren't working - there was an extraneous set of quote marks in every path, for example:
textureMap "Z:\DAZ Studio\DAZ Studio Library\Runtime\Textures\Stonemason\"sov/sovBlackDoor.jpg""
Fortunately PFE has a function to repair those - it must be a common failing. I suppose the job could be done with a text editor which has a macro function.

The repaired PP2 opened fine without asking for any maps to be located - transmaps weren't applied although this should be relatively simple to correct. I've done it for the trees in the image below.

Of course the major problem is that the prop is all one massive group, so none of the buildings can be turned off if I want to get a specific camera angle; and more subtly, the sun light has to be positioned inside the skydome because the whole prop has to use the same shadow setting.

Still, it's a start. An alternative method would involve importing the 96 individual OBJs and scaling them (or scaling and then importing), although initial experiments show that the map location problems don't occur. I think this is how I dealt with Chinatown; however I only used a small section of that in the end.

I'm just thinking aloud here. More research is needed, obviously. If I discover the magic sauce I'll let you know!

Test 1 - DAZ Export.jpg
 

JOdel

Dances with Bees
HW Honey Bear
Sounds a bit like my battle with Winnston1984's IN River Cottage in Studio. I had to dismantle the whole thing and rename face groups, regroup them, and basically rebuild the whole model. But at least now I can turn off the components of a wall to be able to place a camera inside it.
 

Hornet3d

Wise
Sounds a bit like my battle with Winnston1984's IN River Cottage in Studio. I had to dismantle the whole thing and rename face groups, regroup them, and basically rebuild the whole model. But at least now I can turn off the components of a wall to be able to place a camera inside it.

One of my first frustrations in 3D art was the renders that were just a black or grey but otherwise rectangle. When I discovered that cameras could see through walls in preview but not at render time it helped but I was still left with the problem that, often, my ideal placement for the camera had a wall in the way.
 

English Bob

Adventurous
Sounds a bit like my battle with Winnston1984's IN River Cottage in Studio. I had to dismantle the whole thing and rename face groups, regroup them, and basically rebuild the whole model. But at least now I can turn off the components of a wall to be able to place a camera inside it.
The rebuild can become a full-scale project in its own right, I know. I try to see it as a break from the original task. ;) As long as the modelling and texturing is good, I think it's easier to modify a pre-existing asset than it is to build your own.

I did the render above in a hurry, late at night, and I can see other material problems now I look at it in the light of day. I have a recollection that, although the MTL file format can contain up to 512 materials, Poser has difficulty dealing with that many. I'll probably have to revert to importing individual OBJs.
 

English Bob

Adventurous
One of my first frustrations in 3D art was the renders that were just a black or grey but otherwise rectangle. When I discovered that cameras could see through walls in preview but not at render time it helped but I was still left with the problem that, often, my ideal placement for the camera had a wall in the way.
The raytrace preview window has been a big help to me ever since I discovered it! As well as checking for invisible walls, I also use it to estimate lighting levels (in conjunction with BB's Light Meter prop), and setting up reflections, e.g. when a character is looking in a mirror.
 

Miss B

Drawing Life 1 Pixel at a Time
CV-BEE
I just discovered the Raytrace Preview window, which I never knew existed before. I was testing with an IDL light set, and in normal Preview mode, I was seeing some strange spots on the character, that weren't there when rendered, and Satira, who I was testing for, told me about the Raytrace Preview window, and sure enough, the spots were gone.

I don't usually use IDL lights when testing, so on the rare occasion I set up an indoor scene with IDL, NOW I know how to check if I see any strange spots on a character or props in the scene in the general Preview mode. I'm not sure if this existed with Poser 9, but in all the years I've been playing in Poser 11, I've never seen it in the Windows menu list before. Live and Learn.
 

JOdel

Dances with Bees
HW Honey Bear
I don't think Studio has that. The IN River Cottage is a lovely model, but out of the box, it's a solid structure. It's evident from the promos that it takes some wrangling to get a shot of the interior. All the promos are done with a fairly wide angle camera, because you can't get the camera far enough back to do a normal view without having it buried in a wall, unless you shoot through a window.

This was some years ago, so I was just fighting with it in the geometry editor.
 

Miss B

Drawing Life 1 Pixel at a Time
CV-BEE
I've had the same issue with a Poser product I bought at Renderosity last year, I think, and even though there's a promo render of the camera view I wanted to use, I can't get it into the room, and there's no way to collapse the wall so I can. ~shakes head~
 

Hornet3d

Wise
I've had the same issue with a Poser product I bought at Renderosity last year, I think, and even though there's a promo render of the camera view I wanted to use, I can't get it into the room, and there's no way to collapse the wall so I can. ~shakes head~

What I find more confusing is that I have had a scene where I could not get the camera where I wanted in the room without lowering the focal length and getting distortion however I later found the product came with cameras included that did the job for me. I meant to look deeper into this but got side tracked. This has reminded me to go back and have a deeper look......if only I can remember the scene I was using.
 

English Bob

Adventurous
I don't usually use IDL lights when testing, so on the rare occasion I set up an indoor scene with IDL, NOW I know how to check if I see any strange spots on a character or props in the scene in the general Preview mode. I'm not sure if this existed with Poser 9, but in all the years I've been playing in Poser 11, I've never seen it in the Windows menu list before. Live and Learn.
This is definitely one of those [insert new Poser feature that I wasn't even aware existed] to which I was referring earlier in this thread.
It's in PP2014, as for Poser 9, it's either not there or I never noticed it. I don't know about you, but I tend to go straight for the features that I already know are there, and hardly ever even glance at the rest of the menu. :D

I use IDL a lot. It's even possible to light a scene using nothing but IDL, in which case your normal preview will be dark. The raytrace preview is handy there, although I often use a Bagginsbill trick to create a non-rendering light (in the material room, leave its color as white, but set the diffuse and specular colors to black).

I've had the same issue with a Poser product I bought at Renderosity last year, I think, and even though there's a promo render of the camera view I wanted to use, I can't get it into the room, and there's no way to collapse the wall so I can. ~shakes head~
I remember another Bagginsbill trick which got around this using a 'perspective zoom lens' which lets you position your camera inside the room, but still keep the perspective of being a long way off. I couldn't get on with it at the time because I couldn't see what I was doing, but now I've discovered Raytrace Preview it might be more usable. I'll have to dust it off again.

What I find more confusing is that I have had a scene where I could not get the camera where I wanted in the room without lowering the focal length and getting distortion however I later found the product came with cameras included that did the job for me. I meant to look deeper into this but got side tracked. This has reminded me to go back and have a deeper look......if only I can remember the scene I was using.
I'd be interested in this if you do find the secret (although see my reply to Miss B above). Sometimes removing a wall isn't the answer, because you want to see its reflection in something that is visible in the scene - say a mirror hanging on the opposite wall.
 

Miss B

Drawing Life 1 Pixel at a Time
CV-BEE
Good points sir. I'll be watching this thread to see what else you discover. ;)
 

English Bob

Adventurous
Going back to the OBJ import question, I think I have a method now. It isn't the way I imported Chinatown, but it probably should have been! My saviour in this case, as in many others in the past, was PhilC - I found a Python script he wrote called OBJ Import Plus, which enables you to import a big list of files, and also scale them at the same time. Perfect. I don't know where I got it from, possibly it was a freebie from Phil's old site. Redistribution isn't allowed, but I still see him on Facebook occasionally so I could ask nicely. ;)

Compare this render with the previous one and you can see that it's handled the materials a lot better. On the previous attempt, the building at top left, and the one to the right of the arch, were allocated maps according to the well-known algorithm 'pick one at random and stick it on there'. Of course by this method, all the props are separate so I can make individual buildings invisible, turn off shadows on the skydome alone, and use only the buildings I want for a particular scene which will present a much lighter load.

Incidentally, and before I forget, the scale factor to use for Stonemason's OBJs is 0.41%. (Why? Because DAZ's default scale is 1 PNU = 1cm, Poser's is 1PNU = 8 ft.)

Test 2 - PhilC OBJ Import Plus.jpg
 

MEC4D

Zbrushing through the topology
Contributing Artist
I don't think Studio has that.
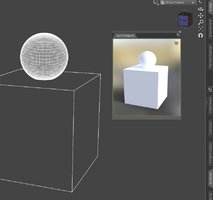
It do for a very long time , but for 3DL it was only manual , now with Iray and Filament it is also Realtime preview window and very handy when you render animations, as having it open will speed up rendering animations with iray dramatically and so much faster as it will skip loading each frame with "full scene "to the GPU or CPU and loading just the changes that was made , and you not going to find it in documentation .. I figured it out coupe years ago by accident .
 

Attachments

  • Screenshot 2021-06-12 132550.jpg
    Screenshot 2021-06-12 132550.jpg
    63.2 KB · Views: 149
Top