• Welcome to the Community Forums at HiveWire 3D! Please note that the user name you choose for our forum will be displayed to the public. Our store was closed as January 4, 2021. You can find HiveWire 3D and Lisa's Botanicals products, as well as many of our Contributing Artists, at Renderosity. This thread lists where many are now selling their products. Renderosity is generously putting products which were purchased at HiveWire 3D and are now sold at their store into customer accounts by gifting them. This is not an overnight process so please be patient, if you have already emailed them about this. If you have NOT emailed them, please see the 2nd post in this thread for instructions on what you need to do

Need some help with DAZ Studio iRAY

RAMWolff

Wolff Playing with Beez!
Contributing Artist
Hi,

My pack is about done for my upcoming release but upon trying to make promos I'm seeing some strange behavior with iRAY.....

1) (and yes, I've reported this already) moving and changing lights causes DAZ Studio to freeze up horribly. Sometimes it's only for a few seconds but the last few times have been minutes. Last time I finally gave in after 7 minutes and brought up the Task Manager and killed the program... luckily I had saved the scenes updates before this last freeze happened. So I just removed all the lights and use the HDR which provides good enough lighting BUT

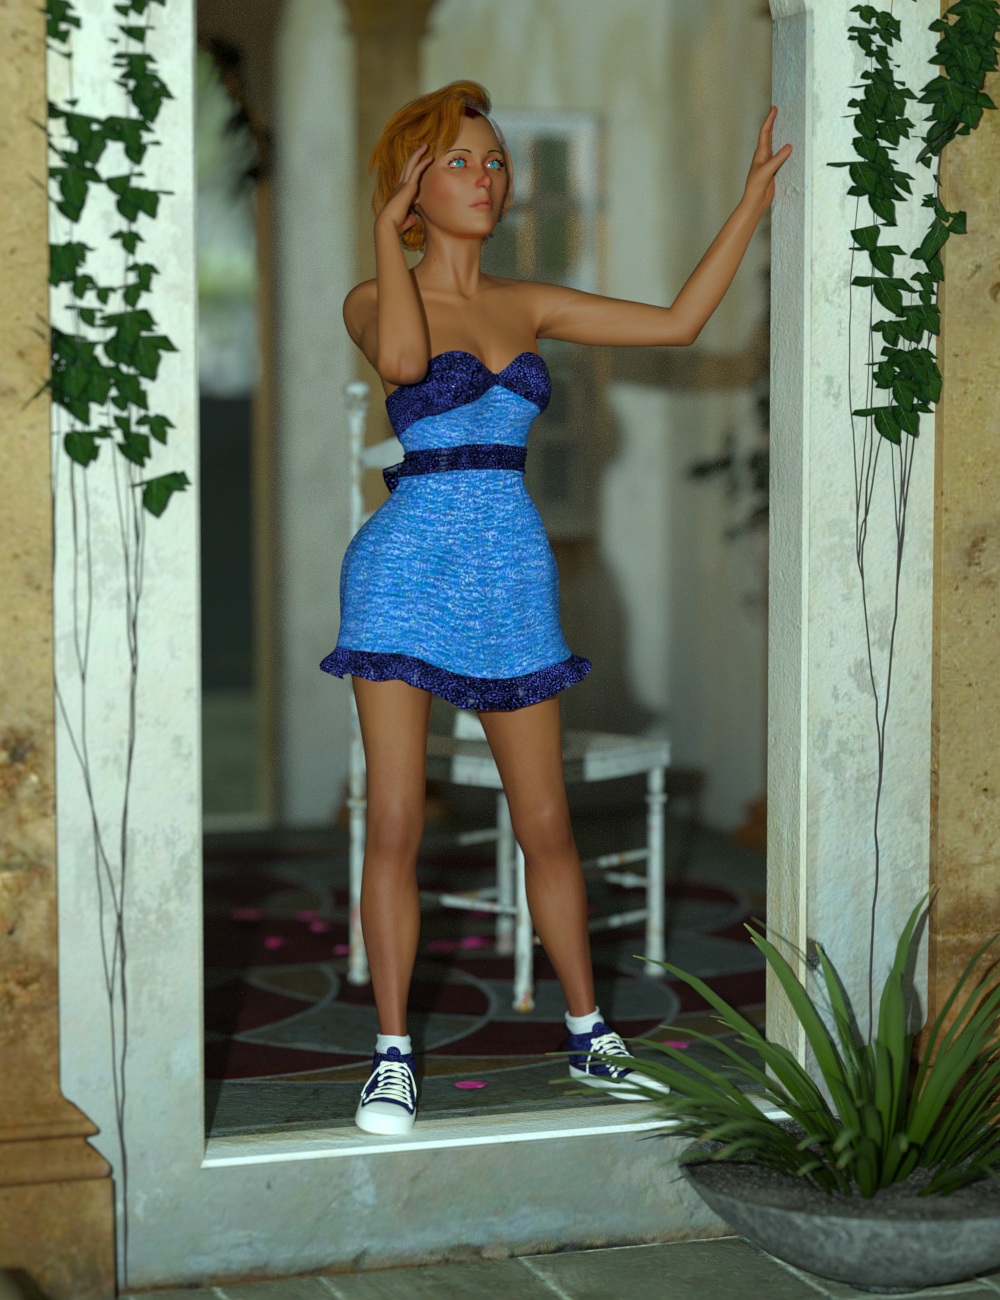
2) The HDR I chose was a pretty well lit one but my skins very very tanned looking. I've looked at the diffuse of the skin, set to pure white so it's not that. I have not much control that I know over the HDR and how bright I can make it but I don't want to wash out the rest of the scene's elements so not sure what to do.

After my report to DAZ I did what I told them I would try to do. I uninstalled DAZ Studio, rebooted and then reinstalled it... did not fix either issue. So I'm kinda stuck. Mercury is in retrograde and as much as I don't want believe in that sort of stuff, I swear when things go bonkers it's always around this time... Grrrrrrrrrrrr
Tina - iRAY Promo 02.jpg
 

RAMWolff

Wolff Playing with Beez!
Contributing Artist
I think I MAY be on to something. Here are my settings and another render.

iRAY Render Settings.png


Tina - iRAY Promo 03.jpg
 

RAMWolff

Wolff Playing with Beez!
Contributing Artist
Yea and DivaMakeup told me she was also experiencing similar issues with this new version of DS so at least it's not just me! Thanks hon!
 

NapalmArsenal

Distinguished
Contributing Artist
Yes, the 2nd setting is much better! Easy way to get it to render lighter is to tweak the ambient setting if it's set to pure black try a really dark grey.

Looking sweet!!
 

RAMWolff

Wolff Playing with Beez!
Contributing Artist
Problem with ambient is that in totally black scenes or lowly lite scenes the skin glows. So I try to avoid anything that's going to cause that. NO this was due to a render settings bit that I wasn't sure how to fix until I sat down and played with the sliders doing test render after test render. Diva agreed with me and since I did file a report with DAZ3D about the constant freezes with DAZ Studio and this mess I hope they look into it and fix it all up for next release.
 

NapalmArsenal

Distinguished
Contributing Artist
Problem with ambient is that in totally black scenes or lowly lite scenes the skin glows. So I try to avoid anything that's going to cause that. NO this was due to a render settings bit that I wasn't sure how to fix until I sat down and played with the sliders doing test render after test render. Diva agreed with me and since I did file a report with DAZ3D about the constant freezes with DAZ Studio and this mess I hope they look into it and fix it all up for next release.
I've been there with the test renders so you have my sympathy and my empathy on that !
 

tparo

Engaged
QAV-BEE
Yes, the 2nd setting is much better! Easy way to get it to render lighter is to tweak the ambient setting if it's set to pure black try a really dark grey.

Looking sweet!!

Using the Ambient setting to get things lighter is a bit old fashioned and not really necessary these days, and as Ram said can cause a glowing effect not always a look what you are after. Ram I believe is using Iray and will get better results if he uses the Iray Uber shader which doesn't have an Ambient setting and auto converting the DS default shader to Iray can result in the ambient settings being read as emissive causing some odd results
 

RAMWolff

Wolff Playing with Beez!
Contributing Artist
I found that by settings most of the skin settings back to default gave me a better effect. So seems there was something going on there. Here are the files, saved out with NO MAPS so if your having issues with your iRAY skin shader looking too weird this will help get you back to something that should work better. This only affects the skin, inner mouth and lacrimals. Works for Dawn, Dusk, Luna .... any Hivewire human...

iRAY Fix.duf.png
 

Attachments

  • iRAYFix.zip
    56.4 KB · Views: 285

kobaltkween

Brilliant
Contributing Artist
Have you compared your settings to real photos? Because I thought most regular mixed daylight & shadow photos were about 300 ISO. And you have to make those work with your f-stop and your shutter speed. I know the first thing I had to do when I started playing with 4.8 was change the physical camera settings, especially for indoors, because they seemed to be wildly off any best practices. I found some charts online when I looked, but now I've forgotten them.

Doing the search again, here's some charts:
Shutter speed and apertures for different weather conditions
https://momswithacamera.files.wordpress.com/2012/02/iso.jpg?w=600&h=900
http://static.boredpanda.com/blog/w...chart-fotoblog-hamburg-daniel-peters-fb-2.jpg
Where to start in manual [mode]

Given my understanding of the scene, you might want to raise your ISO, and that shutter speed might be low. That said, as you can tell from the variations in the charts, it's all about balancing the settings.

Also, if Gamma is for linear workflow, 2.5 is way off in terms of sRGB, which means it's translating the JPG wrong. Which would change colors.
 

RAMWolff

Wolff Playing with Beez!
Contributing Artist
Yea, technical stuff like that makes my head hurt I'm afraid. That's why I depend on light packs and learning from messing with those to get something that I THINK will look OK. I'm glad that HDR's are being used more and more because it takes allot of the guess work out of all that.
 

RAMWolff

Wolff Playing with Beez!
Contributing Artist
Plus the iRAY defaults, in the surfaces tab, are defaults for a reason, they are set up to give the BEST results universally. Some of the shader skin packs I've bought to study have so many weird settings and colors added to them that when I try to use them I end up with some strange looking skin renders so this set up I uploaded above is ALMOST the defaults with just a few tweaks and the skin looks like the skin MAPS I created which is what I want, not tanned or orange of hints of blue or green as I've seen in so many renders out there using these specialized skin shader setups sold at DAZ and elsewhere.
 

kobaltkween

Brilliant
Contributing Artist
Yea, technical stuff like that makes my head hurt I'm afraid. That's why I depend on light packs and learning from messing with those to get something that I THINK will look OK. I'm glad that HDR's are being used more and more because it takes allot of the guess work out of all that.

Plus the iRAY defaults, in the surfaces tab, are defaults for a reason, they are set up to give the BEST results universally. Some of the shader skin packs I've bought to study have so many weird settings and colors added to them that when I try to use them I end up with some strange looking skin renders so this set up I uploaded above is ALMOST the defaults with just a few tweaks and the skin looks like the skin MAPS I created which is what I want, not tanned or orange of hints of blue or green as I've seen in so many renders out there using these specialized skin shader setups sold at DAZ and elsewhere.

I totally understand your feeling. And while I'd say that my experience of the default materials includes flaws and physical inaccuracies that create universal problems (for instance, treating translucence like it's the same as SSS), yes, I know the materials are really good. And I see a lot of excellent light sets for Iray in the dA galleries.

Unfortunately, none of that affects what I'm talking about. While it's true that most of shading is lights and materials, with Iray, properly calibrating the camera itself is an issue.

Iray is a spectral renderer with a physical camera. That means ideally it should behave exactly like a manual SLR. So even given the real world- which is what you'd have if your lights and materials are perfect- you have to get your _camera_ settings right. And that isn't "right" in general. That's "right" as in fits your light and subject.

When I first rendered with Iray, I had oddly shaded skin and lights that needed to be way, way bright. I was like, "What the heck? Awesome renderer, but my skin looks weird and my lights are so extreme I'm sure something's wrong." Then I loaded a full interior scene. I got blow out brights in the light area while shaded areas were way too dark. So I figure I've taken just messing around as far as it can go, and it's time for some actual research. So I check out my render settings, see all the photo settings, and go, "Oh." Now I know just enough about photography from when people used film to know that your basic, common film that everyone used, the one that was in most disposable cameras, was ISO 300. Good from bright sun to light shadow and bright indoors. And that really low light (dark indoors with no flash, night, etc.) uses ISO 1600. So I had a sense of the scale and which way it went. Well, the ISO settings were somewhere in the 100's. That's only good for bright, bright, no clouds or shadows light. But I don't know anything about f-stops or shutter speeds, so I poke around. And that's when I start using charts like the ones I linked to. I tried to get my fstop and shutter speed somewhere reasonable for the ISOs that matched my scene's lighting. They both affect your light like ISO does, but f-stop also affects your depth of field and shutter speed affects motion blur. Which might not be an issue for most renders, but I digress.

I also don't really get Exposure settings, but I suspect it's something like setting your white value and managing your histogram in photography. Which I know zero about. About 13 _seems_ high to me, but I'm assuming a scale where 1 or 2 is a reasonable value.

Just to say, DSLRs still use the same values, but instead of being stuck with one ISO for a whole roll of film, you can change your ISO for each photo. That's part of what cameras do in automatic mode. Figure out the right ISO, f-stop, and shutter speed for what you're photographing. Unfortunately, I don't think there's a way to do that same auto adjusting with a renderer.

I understand being allergic to this stuff. This is part of why I avoid cameras. I really don't get this stuff at all.

Oh, and your gamma correction curve should aways use 2.2, as that's the closest approximation to the true sRGB curve. All non-raw digital images (JPGs, PNGs, TIFFs, etc.) use sRGB color space. Really, renderers should just use proper sRGB equations rather than the gamma approximation, but people used to want to mess with the gamma value. Now, with these highly accurate renderers and most people using GC without thinking about it or even looking at the settings, it makes more sense to let people adjust other settings for artistic effects after accurate shading has been calculated.
 
Last edited:

kobaltkween

Brilliant
Contributing Artist
Oh, and while they _say_ it's just a light/darkness thing, in my experience that's a sort of generalization. Like, it _is_ a light vs. dark thing, but it also shifts hues and changes contrast, etc. Using a different ISO in that indoor scene meant I could have my darks visible and good without blowing out my lights. With more accurate settings to fit my lighting, my figure's skin didn't just get brighter, it became richer and more accurately hued.
 

phdubrov

Noteworthy
Contributing Artist
About real world exposure:
Exposure value - Wikipedia
Better skip all the math to
Exposure value - Wikipedia
For ISO100

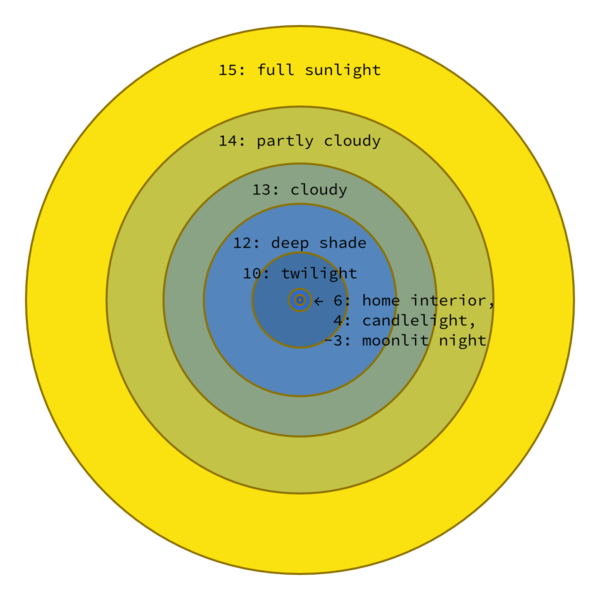
Real-world studio lighting usually about 14-16 too, that's why pro portrait films were 25-50 ISO.
Hint: You can adjust EV value in the process of rendering, without restarting and without progress loss.
If you want to check brightness of you materials, switch to Sun-Sky environment, switch off camera headlamp, set EV according to conditions and make test render.
 

RAMWolff

Wolff Playing with Beez!
Contributing Artist
Well if cameras really play a huge part of a good render there must be someone out there that makes cameras for DAZ Studio, not those physically based ones I see but just the DAZ Studio camera with the correct settings for exterior, interior, darkness and what ever else. Good info.

I just loaded up a blank scene and I created a new camera. I don't see any ISO in there so not sure where I would set that up unless THAT'S under the render settings. Yup, it's under the Render settings. This is why I get so mixed up. I can't keep Who's on First and What's on Second to save my life. :p
 

kobaltkween

Brilliant
Contributing Artist
Right! No, it's confusing. Cameras as in real world cameras, which translate mostly (but not necessarily all) to Iray render settings. Poser cameras give you the f-stop in the camera, but I remember f-stop in DS/Iray being under the render settings (though I could easily be wrong).

I don't know that DS render settings are actually something you _can_ share. I mean, other than just posting screenshots and such. And even then, you'd need them to match a specific light and situation. If you're doing a macro or a close up, and using focal blur the way a lot of Iray renders do so nicely, you have to consider the DoF as well as the light when you set the f-stop. When you set white points and such, you have to consider your subject (skin tone, for instance, in the case of a portrait). If you notice, the advice is all over the place, because it basically comes down to how the photographer wants to balance these properties and make sure the photo has a good distribution of lights and darks.
 
Last edited:

kobaltkween

Brilliant
Contributing Artist
Here's some examples of how the same scene looks different with different settings:
ISO variations from Understand ISO in Photography in 4 Simple Steps
Shutter speed comparison from Indoor portraits with a Christmas tree in the background
Shutter speed & f-stop comparison from 2015 Digital Photography + Photoshop: Intro to Digital Photography & Photoshop

And this page has a whole bunch of comparisons with some good rules of thumb and a chart.
components of exposure: aperture, shutter speed and ISO

The real benefit of rendering stills is that you can actually take your shutter speed pretty low without motion blur being a problem. That said, if you're going for "photo" real, the further you get from real photo settings, the harder it's going to be to duplicate the look. I know I color my sunlight yellow. A longer shutter speed means more color from the light in the scene.

Rendo used to automatically pull the photo settings from metadata and post it. Now they don't seem to. I'm going to see if I can find a gallery that does. IMHO, it's easier to base settings on real life than on someone else's interpretation of real life.
 

phdubrov

Noteworthy
Contributing Artist
You can share both Camera Preset and Render Settings Preset.

There are NON-SYNCHRONIZED f-stop settings both in Cameras and Render Settings.
First affects DOF. Second affects exposition. So IMHO there are no reason to play with f-stops, exposition and ISO in the tonemapper - better control EV directly, at least for stills.
(There are a lot more cool and seldom used options in Cameras - shifts for archrenders and distortions in Lens, Blades settings for bokeh... )

More: DS tonemapper is not linear - you can use and abuse Burn Highlights and Crush Blacks options. (It's like S-curve in Photoshop.)
Vignetting can add more realism.

More: you have Spectral Rendering options that affects colors. Have great effect on skintones, some skin shaders are simply incompatible with this mode i.e. produce very unnatural tints.
 
Top