• Welcome to the Community Forums at HiveWire 3D! Please note that the user name you choose for our forum will be displayed to the public. Our store was closed as January 4, 2021. You can find HiveWire 3D and Lisa's Botanicals products, as well as many of our Contributing Artists, at Renderosity. This thread lists where many are now selling their products. Renderosity is generously putting products which were purchased at HiveWire 3D and are now sold at their store into customer accounts by gifting them. This is not an overnight process so please be patient, if you have already emailed them about this. If you have NOT emailed them, please see the 2nd post in this thread for instructions on what you need to do

Falling Stars - Behind the Scenes

KageRyu

Lost Mad Soul
Contributing Artist


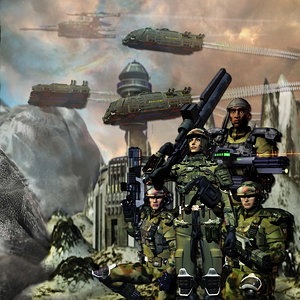
My intent is to have this thread be a development log, of sorts, and behind the scenes look at the now long overschedule animated project "Falling Stars: Chronicles of the Void" Which I began almost 20 years ago. Here I will post shots of elements and projects related to this project that are various stages of work. Some production stills. VFX breakdown shots. I will also post notes and ideas, and the occasional ramblings. Some of what I post will be in an almost tutorial fashion or discussion on theory. I will also post animation tests and character designs and tests. Even though I am using a lot or premade commercial content, I also need to do a lot of kitbashing, and especially texture work, for the various aspects of the project. There is a lot of work I do that never gets seen by anyone because it is just stages to a finished project. I do not want to clutter up the regular image posting threads with a lot of Works in Progress, or unfinished test shots, so my intent is to use this thread to show these. I will still post my finished ship and vehicle builds, character promos, and artistic renders related to this project in other theads, but the work in this thread will be a lot more raw and unfinished in nature.

Of course, fellow Hivewire forum goers and members are welcome to pop in, make comments, and discuss what I post here. Though keep in mind, my hope is to...someday anyway...see enough animation in this project finished to actually publish it. Right now my greatest obstacle is a lack of voice talent to help with dialogue, so I am limiting what is animated to sections with limited or no dialogue by any of the main characters.
 

KageRyu

Lost Mad Soul
Contributing Artist
Perhaps a little background
<<<Warning Infodump>>>
I have always wanted to be involved in media production and/or the arts. Unfortunately my life really didn't take me down that path no matter how hard I tried to steer it that way. The majority of what I know about animation and visual effects is self taught - and while I really wanted to get into practical effects in my youth I never had much chance to practice the applied skills (outside of model kitbashing and terrain building for tabletop wargaming). I did try to get into digital VFX in the early 90's, but after investing everything i had in very expensive first gen technology and still coming up short of what I needed for a full production house it did not go well. By the end of the 90's and early millenium my resources were exhausted, I was getting few gigs even as a freelance graphic artist, and I was trying to save up money to get certified in web design when my life hit serious problems. I had given up on 3D, animation, film making, and media production for a long time after this, and what art I still did was mostly more for fun and hobby level. I shelved a lot of my unfinished stories, and spent most of my time trying to heal deep wounds of my soul.
I did not get into Poser to be a content creator - this was the farthest thing from my mind. One of my friends in the early millennium who I gamed with introduced me to Poser around 2005 or so. He thought it might make a good tool for quick character portraits for the game, but I saw something more. I became interested in Poser for the possibility of using it to create digital actors as in the 90's and early millennium a lot of my projects never took off because i could not find reliable actors or crew. I figured with Poser I could possibly get around this. I started toying around with it, and at first some of what I did was tracking down a lot of Star Trek themed items to add some character scenes to some old animations I had done for a Star Trek fan project that failed to launch. None of these early experiments survived (though the old Lightwave Ship Renders I did are still around). I decided to revisit my attempts to animate after these experiments and tracked down a copy of Poser 4 and the Poser Pro Pack so I can use it in conjunction with Lightwave - though at the time the current version I think was 5, and 6 was coming out. I still did not do a lot in this time. At this time I was still able to draw traditionally, though it was getting more difficult, and so I still wanted to take my own 2D designs into a project.

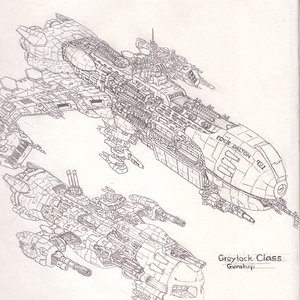
Early Ship Designs for Squad 5
I knew I wanted to do some sort of animated production using Poser (and other digital tools) but did not have any solid ideas in mind. While I have a lot of stories I had wanted to some day make into movies and animated features, I did not want to try adapting any of them as the result of the extensive 3D modelling and texturing and rigging that would need to be done. The real core of what would become Falling Stars started to take shape between 2006 and 2007. Much of the background material, history, concepts, world, and major story elements that I would end up using I was creating and fleshing out for a tabletop game I was hosting at the time. I had started using Poser to kitbash character, aliens, and some creature portraits, and I was using FVCS and GVCS as well as the Sci Fi Construction Set to kitbash together some basic vehile designs, some interior shots of locations, and even some gear. The feel of the game world I was running was very much inspired by the look and feel of the Colonnial Marines in Aliens, with a lot of influences from Anime. The World and setting were a mix of hard sci-fi and more fantastical underlying elements. At one point when I presented a shot of some of the vehicles to the gaming group it was commented that I should make some animations. I decided at that I should, and that all of the backstory and details I had been creating for this darker sci-fi action world would be great material - and so I began the slow process of the Project Falling Stars (though initially I had called it Squad 5 and had intended to focus mainly on one squad of Marines). There is material I used and incorporated from before 2006, some dating back into the 90's, but a lot of these materials were fragments, snippits, and ideas not dedicated to a single project.
Much of 2007 through 2010 was initial animation theory tests, preliminary problem solving, tests, and acquiring sufficient content to get started. Many times I was frustrated at being unable to find needed content items for some things, and many times I thought of abandonging the idea. In this time I also worked on many other projects and short animations to test and practice and try to expand my skills. I was also working a regular job and managing numerous debilitating health issues. I often was working on old computers, machines I had refurbished, and custom built machines off of 2nd generation removed machines due to limitted finances. Most financing I could spare went to software, content, and HD space. I produced a few short clips in 2007 and 2008, and was set to produce more. In 2010 I had some core designs finished and characters kitbashed, a few locations built, and was working on the scripts. A good and close friend of min had become interested in the project and we worked together to procure twin Core 2 Quad computers to act as render nodes, and I was hopeful things would start to move foreward. I was planning numerous short clips that I was not only going to host on Youtube, but I had set up a private shoutcast server I was going to stream over (anyone rember shoutcast?). Most of what I was working on in 2006 and 2007 was being done on an Intel Celeron 833mmx with a whole 1gb of Ram... in late 2007 early 2008 I finished custom Building a Celeron 2.33ghz with 4gb of Ram which served me until 2015 as my primary workstation. All of my work in 2006 and 2007 was done on Poser 4 Pro Pack...and the limits kept frustrating me (combined with limits due to available memory). Everything I envisioned (and still envision) far surpasses the tools I have at my disposal.

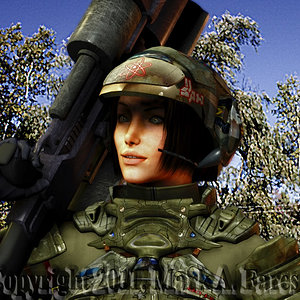
I did some early tests in Poser 4 Pro Pack getting the look I wanted for the Marines and trying different render styles and methods, including doing cell shading in Photoshop. One sequence I tested was render through the Poser Pro Pack host feature in Lightwave, and I was very happy with the results. It was once I finally set up a new workstation (the Celeron 2.66ghz) and purchased Poser 7 Pro that I finally made a number of leaps in progress and settled on using the Various MOS sets for the marines armor and look. I render a quick render of a V3 character in MOS gear and through a photo backdrop behind it and through it up on the Facebook Page I had created for the project and in my profile (back when I still used Facebook and Facebook still allowed business pages linked to accounts). It actually generated a fair bit of interest and seemed to fool a few people who were not into 3D in my friends list wanting to know who she was and where I took the photo. While this reassured me and invigorated me, there was still a long way to go, and a lot of work to do - like cleaning existing logos and text off of the MOS sets and creating my own. by 2010 I was confident in the project and expecting real progress. I generated promotional art and images, made a few clips, was set about to design and setup work...

Early Promotional Poster

Then, all of the setbacks started. So many setbacks. Health issues. Legal Issues related to health and housing. Format changes... Hardware Failures... More Hardware Failures... Family Troubles... File corruption... Death in the family... more legal troubles... more hardware failures... moving... etc... etc... constantly falling through Mandela loops... My favorite coffee shop going out of business... Coke discontinuing Mellow Yellow... Palladium Books losing the license for the Robotech RPG... the whole Rings of Power fiasco... not having a Popeyes where I moved to... desertification... the ice caps melting... global warming... Socks vanishing in the wash... overwhelming existential sense of annui regarding transsubstantial spiritual evolution in a closed universe...
 

KageRyu

Lost Mad Soul
Contributing Artist
Speaking of setbacks, I can't post and share what I wanted to today because I came across more frame corruption and a few corrupted PZ3 with some development work I was doing... so...

Formats and Setbacks
One setback I have struggled with over time is constantly changing video Formats. Ideally, I would love to render and composite in the largest frame sized possible (4K or larger for Film quality), however, I am limited in access to technology and resources, and render power (I am funding this project entirely out of my own pocket, from my limited disability income - and a few contributions from generous persons in various 3D forums and groups). As a result of limits of the technology I have access to, I often have to render and edit in a targeted, less than Ideal resolution. Initially, since my goal was to see this make it to television in some way, I settled in targetting my render resolutions for North American Broadcast quality NTSC D2 (752x480). While many of these early clips and renders were experiments, and proofs of concept, there were a few I had hoped to be in somewhat final form and reusable.
Unfortunately, not long after I started rendering, the whole switch to digital was forced on North America, and with it 2 formats of HD became the standard with NTSC D2 and lower becoming defunct. This meant a lot of clips that would be to small to use in final projects, and lots of rerenders and format changes. With that in 2010 I began trying to render to a target resolution of 1280 by 768 Hybrid to support WXGA and 16:9 letterboxed. By 2015 this format was nearly defunct with most North American Streaming video being 1080p (aka Full HD or 2K). So again, lots of rendered material would not really be suitable for final use, which meant readjusting to prepare for rerenders and more planning and trickery to overcome the limits of technology at my disposal. Fast forward to now, where more and more people want 4K and there is development on 8k coming down the pipe and I am just stumped. I am not even sure I can produce for 4K with any hope of ever getting anything done - let alone if textures for some of my content will hold up.
I realize now, though, this really shouldn't be as big a setback as I am taking it as because I still have so much work to do before much can go to final render. I am still doing a lot of the design and build work on characters, costumes, sets, and so much visual design work on logos and interfaces. I shouldn't be stressing about final render format. On the other hand, I need to get clips to show off to try to generate interest in the project, either to try to raise money for better equipment, or recruit talent for dialogue. For now I am going to plan for full HD release, and hold the course while I try to get production back on it's feet (still trying to mitigate and recover the massive losses from the HD corruption this past year).
I guess I will focus on Building vehicles and sets, and designing textures, logos, displays, VFX, costumes, and characters. There is plenty of that to be done after all.
 

KageRyu

Lost Mad Soul
Contributing Artist
Early Design and Development
<<<More Infodump>>>
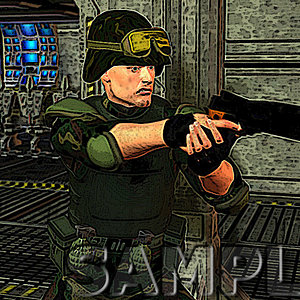
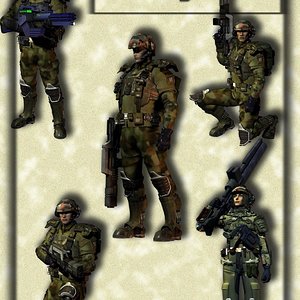
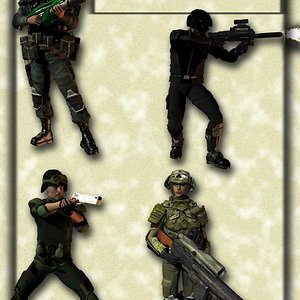
Early on when I started moving down this road and settled on this sci-fi project I had to figure out how and what I needed in terms of assets for the various characters. As I have not the skills or time to do all my own modelling (or texturing) I would need third party commercial content. So collecting I went. Early on I had limitted content, and changed the look for the marines several times. Once I had some basic costumes I was happy with I then sat down and started working on custom morphs or finding existing characters to use. I initially wanted a few variations of uniforms for the marines for differing combat settings - but this may end up being abandoned. I may still use some of these early setups as alternate forces or background characters. I did a lot of early experiments with the Generation 1 and Generation 2 figures from Daz3D (not to be confused with Genesis) before finally deciding that I was going to use the Generation 3 family (M3, V3, F3, S3, D3, H3, A3) for most of my characters. At the time this generation was the most widely supported with a vast array of content, morphs, costumes, etc... and the Generation 4 family was just being introduced. While I did pick up a lot of Generation 3 content from various places, there was still a lot I wish I could have gotten before it was phased out. I still intended to use the Generation 1 and 2 figures as background and scene filler where needed. I set about kitbashing costumes and the look I wanted for the main characters, making changes as I picked up new content that fit the vision I wanted better. The look for the Colonial Marines in Falling Stars has been through a long development progress. First I had to find outfits and equipment that I could kitbash to get the looks I want on the figures I was using. Even this is just the beginning, as once I knew what Pieces, outfits, etc... were needed I would need to go into a graphics programs and make some custom logos, nametags, badges, etc...


All of my significant character costume designs and morphs were being done using on M3/V3/F3/H3. I had picked up a lot of morph pack such as Brom, Alien Heads, Creature Heads, Specific Character Heads... I still have a wider selection of morph availability for my Generation 3 figures than for any other figures I own - and sometimes this saddens me as I wish I had all of these options for Dusk, or Dawn, or the Generation 4s. For this reason, I will likely primarily stick with Generation 3 figures for most of my characters for this project. I may use Dawn or Dusk or and M4 in some places, but the roles of the main and supporting characters will be filed with generation 3 digital actors. Even many of the alien characters will be M3 or V3 based. I do not have as many skins as I would like, so I will have to be creative. The look of one of the main antsgonists for the story line is based on a Freak 3 multi-mix morph and photobashed textures.
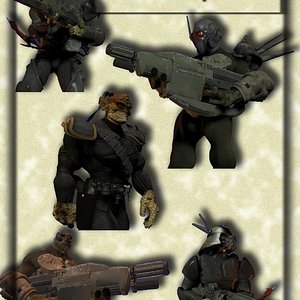
I do not want all of the aliens to be mindless, snarling, growling beasts, or faceless, silent warriors as is too often the case in Sci-fi these days. I wanted heroes and villains within the alien ranks too. I also want their costumes to be distinctive from the more human characters - and I decided I want some flair. One of the Alien Characters I have been working on the longest is General V'rconius. While I settled on the morphs and custom photobashed texture (merged from 2 commercial textures) early on, his costume as gone through many design changes and updates as I have continued working. The progression from oldest to newest is from Right to Left. I am still not happy with this dress uniform, and am still tinkering with it. I also need to create a seperate field armor kitbash for him. Then comes custom sigils, markings, and iconography.


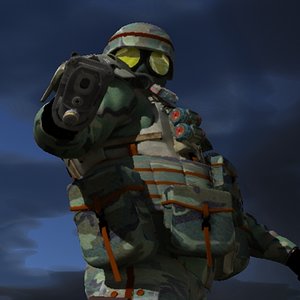
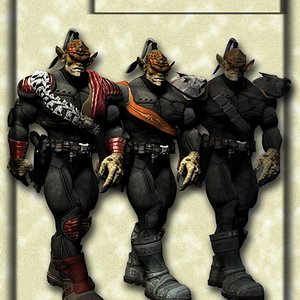
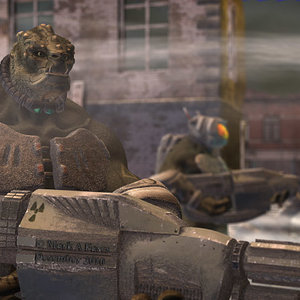
Of course, I also needed to design the non human aliens and antagonists. For the ones that were going to have similar humanoid form I also decided to go with Generation 3 figures, lots of outfit kitbashing, and lots of morph mixing. The main antagonistic aliens for Falling Stars I wanted to have several sub-species. So I needed to kitbash creature and character morphs, costumes, and variant figures. Despite wild differences in the base figures, I wanted to give them a themed look that at least plausibly fit together. Some of this work had to wait until I had the right tools. I knew early on I wanted to use the Reptroll and Alientroll. Finding just the right gun was a stroke of luck.


The Reptroll in Alien Troll Armor was a very early decision that I fell in love with the thought of mixing these two characters for the old Daz Troll. One of the first scenes I set up and toyed with in anywhere near final render style involved this guy.
 

KageRyu

Lost Mad Soul
Contributing Artist


As is clear from my Designworks folder, I am making extensive use of Davorama's G.V.C.S., F.V.C.S., and other construction sets for the creation of vehicles, weapons, equipment, ships, and more. While the materials are a bit dated, I find these sets invaluable for creating custom content for my project. I do miss the various "appreciation" threads of a certain long lost forum. One of the things I am going to be using these sets for a lot is for creating interiors. Some of the first kitbashes I made were rooms and interiors made for test clips. A good example is the Security Office and corridor I made for my first prrof od concept animation (shown in earlier posts) back in Poser 4. I intend to update the lighting rig. Many of these corridors and rooms will be saved modularly so they can be loaded and assembled into larger sets. As I build these rooms, I choose one part to act as the root of the build, and parent all parts out from this. I try to parent the parts to one another in a way that makes logical sense, but sometimes I lose track on larger builds and it gets messy. As I get lights set the way I want, I parent them to the Light Emitting objects (light Fixtures) in this way when I save the root object and all attached objects as a group to my library, the lights are saved as well. In this fashion, once a complex room build is done and added to the library for re-use, the room and lights are all loaded at once, and all of the lights move with the room if I need to reposition it. I do this with exterior builds and equipment builds as well.

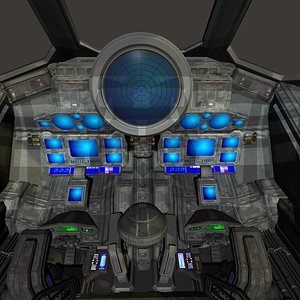
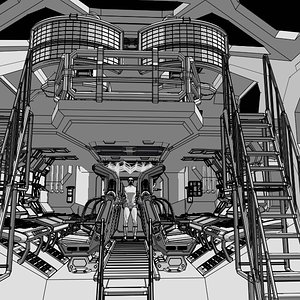
I was working on several custom interiors over the last few years before my HD suffered extensive corruption last year (which pushed my own emotional state well over an edge...still trying to recover). Among the many I was working on were the interior bridge layouts that would fit the bridge towers used on my Artemis Gunships, Escort Carriers, and Tiberious Destroyers. As I build all of the ships to scale with each other, the towers are essentially the same, with differing internal layouts. I had made extensive progress on the Gunship bridge, nearly finished with the layout and kitbashing, and just fine tuning the lights when everything crashed. The Tiberius bridge was only going to be a slight variation on the Artemis, Though I am unsure if I will need a set for that as yet - in the scenes written and planned it is not mentioned as yet, but a vast majority of the storyline for the 6 planned episodes is still synopsis, summaries, and rough outline.

I must admit I am having some difficulty lighting this bridge layout for the Artemis. Even once the Lighting is done, as can be seen in the above image, I have a lot of custom textures to plan for the screens and displays. The above image shows only the displays in front of the two pilot/navigator chairs. In addition there are numerous screens and displays that line a small electronics corridor directly behind these seats.

I had to make this in Cartoon with line because of issues with Poser showing lighting accurately in OpenGL when you have very complex light setups.
The layout of this bridge is very cramped, though it is supposed to be, this is making working on it difficult. Not only am I having issues with getting the lights placed and looking correctly, because of issues in Poser with how it chooses which lights to use in OGL preview I am mostly looking at solid black unless I work in Cartoon with Line mode. I would much rather work in Sreed or true OGL, but hardware and software limits are preventing this. Since I need to render in firefly I am unable to take advantage of any of the ambient lighting options in Superfly (many surfaces and objects in scene will rely on micro-poly displacement). I must say I would love help lighting these scenes from someone with more experience in lighting. I have never sat down to do the render tests and experiments I should to find appropriate values and falloffs for various wattages to use on point lights and spot lights.

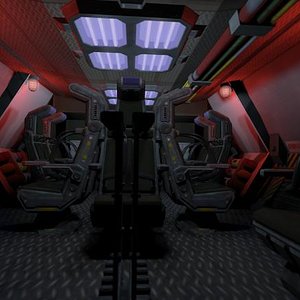
I have almost finished the full layout and lighting of the Skybus dropships used by the marines. These will be used a lot in the final animations, and there are many scenes planned that are inside. I do want the Lighting to be a little redder, but other than that I am happy with this. I also want the inside a little smokier - and already a, working on some environmental tests for that.


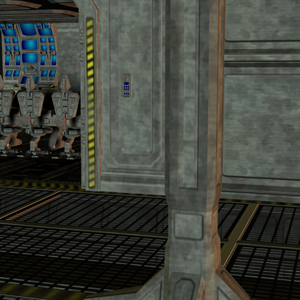
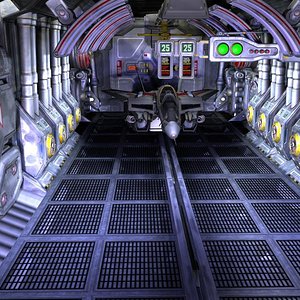
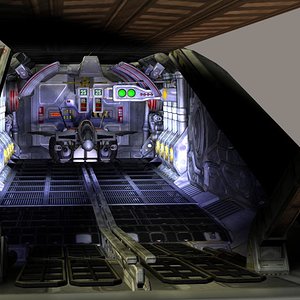
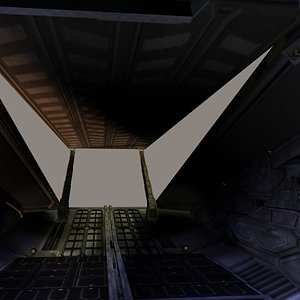
The other complex interior I had been working on when the HD had trouble was the Launch Shoe for the Revenge Class Carriers. This is Built to scale with the Escort Carrier build seen in my Designworks, and to scale with several craft. I still need to make some custom textures for the signs. While I very much want to call this build done, am not only not happy with the lighting, but I think I need to add some details and lighting to the more foreward section and around the door. Each of the visible bays on the Escort Carrier would have one of these Shoes inside the bay, only visible when the doors are open. Among escort carrier flight crews and pilots these launch tubes have come to be known as Shoes, in reference to a shoe of cards as in a casino. This is the result of the fact that the first ship of the Revenge class, the Revenge, was the home of the Crazy Ace fighter Squadron.
I would love to load all 10 Launch Shoes into the default build of the Escort Carrier, but as it is the Capital Ship builds are very resource heavy, and for some of the scenes that require multiples it can really cause issues - adding all of the shoes when they will not be seen would likely be too much for Poser to handle. Though I may Try it once. It's an OCD thing.
 

KageRyu

Lost Mad Soul
Contributing Artist
It's 3:56am as I sit here in my blind, hunting for sleep - though it knows I am here and eludes me. I am waiting for renders needed for products, and so I can not work on anything else as the one computer (aside from this laptop) that I have running is busy. So I am going over ideas and thoughts in my mind, trying to find the path foreward in what has become a difficult and winding road.

I know A.I. in use by creatives is a very controversial topic these days. I have not had much chance to use it or experiment with it myself, but I feel I would given the chance. I would not come to rely on it, but feel it could be a great tool or supporting material. Long have I joked around with those I was once close with that one of my greatest problems was I never have the resources or tools to keep up with the torrent of thoughts ripping through my mind at any given time. It takes too long to finish a drawing, write out a chapter, edit content together - and often when I put pen to paper on a story, though I already know how I want the book to end, by the time I am one paragraph in my mind has already moved on to other ideas... Even before certain emotional conditions set in, this made completing work and ideas somewhat difficult at the best of times - even would I could focus without painful distractions and thoughts. I have long joked that what I needed was a computer I could just think at - and have it so - and while not quite there, with A.I. we are getting closer. Of course, something I have long dreamed to have access to is on the horizon of digital art, and I have neither the computing power or means to take advantage of it... not a very funny cosmic joke on me.

All of that aside - in terms of this animated project what am I getting at? One of the greatest obstacles I have been wrestling with is the lack of voice talent for the characters. I do not have enough people in my life or friends to turn to, and I really do not have the finances to regularly hire voice talent. However, maybe it is an obstacle I can overcome with A.I. text to voice? I have been doing a little looking around, and there are many out there, but sadly they all have prohibitive pricing plans (for me anyway), or the ones that have some low cost or free options have few customization or very limited word counts. Still, I wonder if it is doable to take a voice segment generated in a narrator tone with an A.I. and through additional sound editing give it more emotional inflection? Well, I am sure it is...I mean is it something I can do, not being a sound engineer myself? If I could crack this, I might be able to start pulling together some voice segments and start animating some of the more interpersonal actions in the project. I only worry that if I do this, I will get backlash from fellow creatives for using A.I. in any form.

It is a shame so much controversy surrounds A.I. tools. I do agree with many of the concerns of fellow creatives on issues of intelectual rights, and misuse of A.I. to spit out poor imitations and remixes... but I also feel in the hands of creatives, used as only part of a set of tools to create something greater, they could take art and media to new heights.
 

KageRyu

Lost Mad Soul
Contributing Artist
Custom Cockpit and Bridge Displays - Pt.1
<<<
Informational/Tutorial>>>
Today I was working on figuring out the needed custom graphics foe the various stations in the Warhawk, so that I could set up some crew reaction shots to go with the action scenes I have already. I figured this might be some good behind the scenes details to share, as they might prove helpful, educational, or inspirational for others. The methods that follow are not necessarily the best methods, or only methods, it is just how I am doing things as I stumble along - there may be better ways out there. While I will be showing customizing control and cockpit displays, the concepts and practices are not much different for customizing outfit and character logos. For those interested who would could use a guide and are just muddling through like me, feel free to follow along.
STEP 1- Basic Design
The first step is to either choose the 3D assets to use as the cockpit or control center, or kitbash it from various props and assets. Make sure to scale it to your figures (in flight suits and costumes) especially if you intend to do interior crew shots. Once I am happy with the layouts, I render out a few goos, clean shots with all the displays visible. With the DAVO sets the screens are defaulted blue - so they stand out already. It could be possible here to set up these screens to be Green-screens, rendered in differing passes for compositing, and configure all of your displays in your VFX software through compositing - which I will probably do for some shots - but I also want in-render screens.
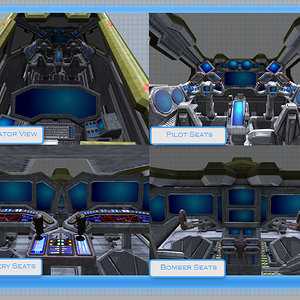
Step 2 - References
Now that I know what the layout of the cockpit looks like, I need to get some idea of what is going to go on each screen. I could fake it, and just throw some graphics together, but I really want a more believable layout based on actual craft. So here I fire up my internet, go to my chosen search engine that let's me specify Images as results, and I do a few searches. Before I say what search terms I used, I am going to urge anyone to turn on Safe Search in their search engine because... well, internet... I searched first for Cockpit, then for Flight Deck, then for Aircraft Controls. Each time got slightly different results.
CockpitRefSearchSM.jpg

I proceeded to grab numerous results from each search and save them for reference and for the later photobash steps. Just look through what comes up and pick what appeals to you. I had some idea of what I was looking for - which can make things easier when you see what you want, but can make it more difficult finding just the right images overall. I also went looking for specific military craft layouts, as the Warhawk is a Bomber. Though I really like that retro look of all the dials and switches on the B-17 and B-1b, it does not really fit with the style of controls in the DAVO sets. I also did specific searches for Radar, and grabbed a few variations on radar screens for reference.
Step 3 - Layout
Once I had some references I was happy with, I loaded up my Paint Program (any good graphics program with support for multiple formats and layers will work). I loaded in a view of just one of the sections of the Warhawk crew stations (in this example I am showing the Pilot/Navigator Stations). With this loaded in, on new layers, I began to label what I thought each screen should be or have on it. It is possible to skip this step - but since I sometimes get distracted for long periods of time, it is a good step for posterity. Font type and color are really a matter of choice - just as long as it is readable.
Warhawk Cockpit LabelsSM.jpg


Step 4 - Photobashing*
Now that I know what I want displayed on each screen, roughly, it is time to make a mock-up using some rough Photobashing. If you are unfamiliar with Photobashing, or are not real experienced with it, no worries, I have not only linked to a few tutorials, but we will be keeping it very loose and rough. The goal here is not to have a finished cockpit sample or backdrop, but to lay down the concepts of placement quick and dirty so we know what textures we need to create for what panels (Yes, the final panels and textures will be hand created by me from scratch...not photobashed). In fact, what I will be doing is closer to a collage of various instruments pasted over the areas of my cockpit render where I want them, and less of a proper Photobash - though certainly it is possible to go all out and do a full on final quality photobash which would be great for a single, static image...but I need a 3D textured environment with custom textures.
Now I start looking over those reference images I grabbed earlier, looking for elements in the controls that look close to what I want for the different areas I labeled. I start with the Radar, that's easy and mirrored on Pilot and Co-pilot side, same for threat tracker. The Horizon Guide and compass are also easy. I will select the needed pieces with either square or circular selections and copy them into new layers in the labeled cockpit. I will move, scale, and skew them as nescessary to "fit" them on the appropriate displays. My intent on the final is for some of these to still look like digital displays and some look like analog panels - but I am not as worried about that here - I am not even worried about perfect fit or cleaning them up. Here I am just trying to set up a visual guide to aide me when I start painting the textures themselves. I cut and paste appropriate bits from numerous reference photos until I am mostly happy. I placed the photbashed images for Main Bus A and B as insets above the controls so I could see the layout later - and here is what I have so far:
PhotoBashedLayoutSM.jpg

It looks as if there may be things missing, but I know what goes in the blanks in my mind's eye, so this is enough for me to move foreward. I will save this as a layered document for future use, and I will also create a flattened JPG version for loading as reference when I begin selecting and painting the actual textures. That will be the next steps, which will be part 2 of this Info-post, likely in a few days.

* Notes on Photobashing -
  • Some artists and creators dislike the practice and consider it a phorm of derivitive art that steals from others. Choosing to upload and share works created this way as original is, in some circles, a topic of discussion far more heated than of A.I. Though, in a nutshell, it can be compared to what A.I. image generators do in a sense.
  • A.I. Generated images could be very useful in Photobashing concept art.
  • The technique of Photobashing could very readily be applied to rendered 3D assets and images of your own creations to take them in new and different directions not possible through 3D alone. In essence, this was what I did for the Falling Stars Promo Poster "We Precious Few" and the Poster for "The misadventures of Jamie and Tommy".
 
Last edited:

KageRyu

Lost Mad Soul
Contributing Artist
I was hoping to have the next part of the custom readouts development log ready by now, but I got distracted first by finishing two Dawn products, then by other more intrusive distractions. In the second part I am not only going to briefly cover the process I use to create the needed graphics for a display in a graphics program supporting layers (I am using an old version of Photoshop, but any program supporting layers can work), but also how to export them in a way where the images can then be used to create animatable interfaces in Poser using tricks in the material room. Of course the easy way is to make animated clips as textures, but this limited to a specific clip for any scene... there is another way that is great for power gauges, targeting H.U.D.s, and radar screens that can be animated as needed in any given seen by using the animation options in the materials nodes... far more complex to set up, but can be more useful in the long run... and besides, my unique type of OCD requires me to do things the hard way - always... I hope to get some work done on this next part soon, but it requires a lot of scdreen grabs and also a lot of painting in photoshop to create the images needed in the first place.
 

KageRyu

Lost Mad Soul
Contributing Artist
It really sucks when you find frame corruption on sequences rendered a year or two ago only to find the source projects also corrupted so you can't easily replace the damaged frames.

That's what I get for daring to dream well beyond my means.
 

KageRyu

Lost Mad Soul
Contributing Artist
I still owe a Part 2 on the Custom Cockpit and Bridge Displays. In the meantime I have been busy with a lot both on and off the computer. I am trying to get some Screen Recording software that works with Windows 7 and familiarize myself with it, so I can record the process of things as I am doing them for educational purposes. The only problem is I currently do not have a decent mike, and I have already exhausted my budget for the next few months. I did want to get the forums thoughts. I can't seem to figure out how to insert a pol, so I will just ask:

Do you prefer Video Tutorials, or written Tutorials (HTML or PDF)?
 

Hornet3d

Wise
I still owe a Part 2 on the Custom Cockpit and Bridge Displays. In the meantime I have been busy with a lot both on and off the computer. I am trying to get some Screen Recording software that works with Windows 7 and familiarize myself with it, so I can record the process of things as I am doing them for educational purposes. The only problem is I currently do not have a decent mike, and I have already exhausted my budget for the next few months. I did want to get the forums thoughts. I can't seem to figure out how to insert a pol, so I will just ask:

Do you prefer Video Tutorials, or written Tutorials (HTML or PDF)?

If I had to make a choice I would prefer written tutorials although I have worked from video tutorials in the past. My limited writing is done in PDF so I am well equipped to use that.
 

KageRyu

Lost Mad Soul
Contributing Artist
I am about half way through the 2nd part of the Custom Cockpit texturing, and it looks to be three parts.

That been said, I have put this project on hold currently in light of the state of the world and events in the middle east. I do not feel comfortable or that it is appropriate to work on a sci-fi fantasy war story where I intend to depict some of the harsh realities of war while one is being waged with gruesome results and far too many civilians on both sides suffering from callous hatred.
 
Top