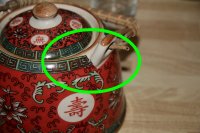
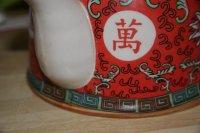
I'm told that I should include UV maps in case you guys decide that you wish to make texture sets for these models later. So where the heck are you guys when I NEED you? When I'm first making the model I could sure use your input then, like where to put a seam? Would you rather I model that detail or are you willing to just texture it in? Toon item or realistic?
Look, there are somethings I can texture on my own, I'm not THAT hopeless, but if I learned how to texture, then I won't need you, will I? What and how do you guys charge to texture a model? Do you charge by the model or project? How do I reach you when I need to reach you? (I'm not a phone person)
Hello... is thing on?

You should include UV maps because procedural textures aren't enough for anything but plain glass and water, and you should pretty much always texture your work. You're actually very well known, so you might have other people texture your work, but in my experience that's really rare. Mostly you need to map for yourself. And really, that's what will teach you the most about where to put your seams and how to map. Because it really depends on how you texture.
For instance, you look at most Blender tutorials on modeling, and they'll just auto map the item, because the tutorials don't tend to use anything but Blender. So many use multiple UV maps and texture painting to make their textures. Easy peasy, and it doesn't matter if the mapping has tons of islands, so long as those islands aren't crazy distorted. The same could be said for pretty much any method mostly reliant on 3D texture painting. But if, instead, you rely partially or mostly on a 2D image editor, you might want to watch your seams.
That goes double for if you manage to pair with a texture artist. If they're a great artist and use Photoshop and GIMP, you want to UV map to make life easier for them. That means making sure you balance number of seams with distortion (stretching and compressing, there shouldn't be twisting), and you make sure things that can be straight are.
With clothes and shoes, though, it's easy. You put seams where they'd be on real clothes. And with hard surfaces, you put your seams at most of your sharp angles. In my mind, you kind of extrapolate from how you map a cube, a cylinder, and a sphere. Like that cup, that's basically three cylinders or so: two for the cup (inside and out) and one for the handle. That garlic, it's essentially like a sphere with a cylinder on top. And you put your seams as much as possible where they either won't be seen or fit with the object. For instance, that cup handle is like a cylinder with open ends. So you put a cut around the top and bottom where it joins with the cup, and one down a side to make that into a strip. You could put that seam on the inside or the outside of the handle and it would be correct either way, but it's probably less hassle on the inside.
If you use Blender, I definitely recommend using its texture paint for seams. And if you want to get really fancy, you can use the multiple UV map trick. You can make a new UV map (or 3), set the map to projection, and then paint on the projected UV. You can do this with as many views as you want. You can even do the auto map, and get nice undistorted textures, then switch back to a UV map with fewer seams. I've only tried out Blacksmith as a demo, but I found Blender _much_ simpler and easier to use, with a lot more tutorials out there. But that's just me, and I find Blender easier in general. But it's free, so I figure it's worth mentioning in general.


