• Welcome to the Community Forums at HiveWire 3D! Please note that the user name you choose for our forum will be displayed to the public. Our store was closed as January 4, 2021. You can find HiveWire 3D and Lisa's Botanicals products, as well as many of our Contributing Artists, at Renderosity. This thread lists where many are now selling their products. Renderosity is generously putting products which were purchased at HiveWire 3D and are now sold at their store into customer accounts by gifting them. This is not an overnight process so please be patient, if you have already emailed them about this. If you have NOT emailed them, please see the 2nd post in this thread for instructions on what you need to do

Poser fur - Superfly

Me195

Extraordinary
Echo hair.jpg

As promised here is a Simple Cycles shader for Transparency Hair. Simple Transparency.zip As with the previous shader you can install it just like any other item from the store. It will be found under the materials tab in a folder called 'Transparency Hair'. Here are some "quick" instructions on how to use it.
Trans Shader.jpg

Load the shader into the scene using the double checkmark. Once it's in the scene connect the 'color' control to the hair's texture and the 'Opacity Map' control to the image we normally refer to as the transparency map.

If the hair uses a bump map or height map it can be attached to the 'Bump' Control. The 'Bump Strength' value controls how strong the bump map is.


Normal Menu.jpg


Normal connection.jpg

The next control is the 'Normal' control. This is used for attaching normal maps to the shader for displacement. Please note, do not attach a normal map directly to the 'Normal' control. In cycles and Superfly you must connect the 'Normal' controller on the 'Hair Shader' node to a 'NormalMap' node. This is accomplished by right-clicking a blank spot in the Material Room and a menu will pop up. On that menu at the very top it says 'NewNode'. Hover over 'NewNode' and an extension to the current menu will pop up. At the bottom of the new extended menu above the word 'Compound' will be the word 'Cycles'. Hover over 'Cycles' and another extension to the menu will pop up. On the new extension hover over the word 'Vector' and you guessed it; another extension to the menu will pop up. Finally from this newest extension to the menu you can select 'NormalMap'. A 'NormalMap' node will be created. Connect the 'Normal' control to the 'NormalMap' node where it says 'Normal'. On the 'NormalMap' node connect the 'Color' control directly to the normal map. Sounds easy right? Since it doesn't sound easy to me I'm going to add some images above this paragraph after I type it.

The last two controls on my 'Hair Shader' node go hand and hand. The 'Bright' and 'Contrast' together generate the translucency color of the hair just like my strand shader does. Just like the strand shader the default settings will produce produce a realistic color on most hair colors. The only exception is on blond and really light color hair. In those cases just set the contrast to 0.

I should have mentioned this on my last shader as well, but I thought it went without saying. Any shader I make and post in this thread you are free to use in any way you see fit.

I hope everyone finds this shader helpful. If you have any questions, comments, or concerns feel free to ask, and I will answer them to the best of my ability.
 

Miss B

Drawing Life 1 Pixel at a Time
CV-BEE
I was wondering if that's what you meant by strand hair. I have 2 mesh hairs, Neftis' Sharon HairStyle, and Business Hair for Dawn and Dusk by RedzStudio, so I'll now try it on them.

Oh and as far as Echo Hair goes Me, it's one of about 3 of Biscuits hair products I use a lot, and each time I style it differently. That's what I like about her hair products. ;)
 

Miss B

Drawing Life 1 Pixel at a Time
CV-BEE
OK, redid my first try, this time using the Transparency Shader, and the color is a bit darker, but I think it looks like a richer color. I may play with the settings some more.

Dawn-EchoHairStyling-1B.jpg


Thank you Me, you've made my day. Later I will play with the Simple Strand Hair Shader with one of my dynamic hair products.
 

Miss B

Drawing Life 1 Pixel at a Time
CV-BEE
OK, this time I used the Simple Strand Hair materials on one of my dynamic hairs. It's Neftis' Sharon HairStyle.

It looks nice, but I always play with the Diffuse and Specular colors to get what I want, but I don't see how I can do that with your setup Me, so if there is a way, please let me know.

Angel-SharonHair-2.jpg
 

CWRW

Extraordinary
HW3D Exclusive Artist
Here are the promised renders.

First one is exactly the same as my Mowgli pic (which was Firefly)- but rendered in Superfly and using Simple Strand.
MowgliBagheeraSF_NewShaderDefault.jpg


Here are some other tests using Caisson's Southern Ruins "skydome"- with one "sunlight". Also I did the 'up the smaples" and turn off the branched path deal like you mentioned in one of your posts Me. All are CPU renders- my comptuer and video card are so old, it won't let me render with GPU:)

BlackPantherTest2.jpg
CougarTest2.jpg
LeopardTest2.jpg
 

Me195

Extraordinary
OK, this time I used the Simple Strand Hair materials on one of my dynamic hairs. It's Neftis' Sharon HairStyle.

It looks nice, but I always play with the Diffuse and Specular colors to get what I want, but I don't see how I can do that with your setup Me, so if there is a way, please let me know.

View attachment 64752
Sorry it took so long to respond. I had a response prepared last night, but it was too convoluted. I wanted a more reasonable solution, and this is what I came up with. I did some research on the Sharon Hair by neftis3d. It turns out that Sharon hair is fiber mesh hair and not dynamic hair. It's also a little different from fibermesh models I work with or have made. Sharon hair has an opacity map with it (it's labeled as a transparency map). That will require the addition of a couple nodes to the outside of the shader.

The end result will look like this.
Mixcolor2.jpg

I don't have sharon hair, but I apparently do have Neftis3D's flat top which is also a fibermesh hair and works the same. So I will use that as an example.

First after loading the shader select Sharon Hair's texture in the 'ImageTexture' node. Next copy the 'ImageTexture' and paste another copy of the 'ImageTexture' node into the material. In the newly created 'ImageTexture' node change the image to the opacity map (transparency map) for Sharon hair. Still on newly create 'ImageTexture' node conect the 'Vector' control to the 'UV' input on the 'TextureCoordinate' node.

For the next part we will need two nodes from the color menu for cycles shaders. The two nodes are 'Invert' and 'Mix'. Both needed nodes can be found here.
MixMenu.jpg

Now that you have the two required nodes they just need to be connect just like in the image above. Change all four transparent settings on the bottom of the 'Strand Hair/WTexture' node to white and connect them to the 'Color' input on the 'Invert' node. Connect the 'Color' control at the bottom of the 'Invert' node to the 'Color' input on the 'ImageTexture' node containing the opacity map for the Sharon Hair.

For the 'Mix' node connect the color control on the 'Strand Hair/WTexture' to the 'Color' input of the 'Mix' node. Finally connect 'Color1' control to the 'Color' input on the first 'ImageTexture' node that contains the Sharon hair texture. You can now adjust the color using the settings on the 'Mix' node. The settings in the picture above are the settings that act most like changing the color on the firefly Hair node. You can use different settings and blend types to get different results.

The specularity is calculated by a built in shader to cycles and cannot be adjusted. It' is dependent on the color of the hair.

Here is what the flat top looked like after the settings above was applied.
Flat top2.jpg


I hope this helps despite my long winded way of writing instructions.
 

Miss B

Drawing Life 1 Pixel at a Time
CV-BEE
AHA!!! OK, now I'm going to have to try the Simple Strand Hair shader on a dynamic hair Doug Hunter had me testing last year with one of his sets. That is dynamic as he created it in the Hair Room for sure.

As for the Sharon HairStyle, and probably the Business Hair I also have, I'll try out what you just posted to see what I get. Thanks Me. :)
 

Me195

Extraordinary
Forest Dweller.jpg

Here is the third shader I promised. All Purpose Strand.zip This one is an all purpose cycles strand hair shader that functions similarly to the firefly hair node. I used it in the render above. Install it the same way you install anything else from the store. Once installed you will find the shader under the materials tab in a folder called 'Strand Hair'.
allpurpose1.jpg

This is what it looks like when you first load the shader. The controls on the main node 'Strand Hair All Purpose' are separated into three groups 'Root Controls', 'Tip Controls' and 'Entire Strand Controls'. The 'Root Controls' and the 'Tip Controls' work the same. They just affect the begining and the end of the strand. The rest of the strand is a mix of the two. Here is what each control does for the Root and Tip.

Texture<>Transmission= This determines how much of what is seen in the render is from the reflective color/Texture or the light from the translucent properties of the hair.

*Translucent Bright= This controls the Brightness of the translucent color of the hair generated by the shader.
*Translucent Contrast= This controls the contrast of the translucent color of the hair generated by the shader.
These two controls work hand in hand. Also note that in terms of hair the translucent color is also called Transmission Color.

I've tried to set these control to the most common setting used. However if you have a light color like white or blond you need to set the Translucent contrast to 0.

Just like the title suggests the 'Entire Strand Controls' affect the entire strand. The transparent settings will break up each strand into into four equal segments that can be adjusted individually. The last two Noise for root and tip break up solid colors for a more natural look.

allpurpose2.jpg

If you need to connect a texture to the shader like in the fur shader you connect the colors to the 'Image Texture' node as seen above. The 'Image Texture' node loads automatically with the shader but is disconnect until you need it. Notice that the Root color and the Tip color did not change. That is because the color will multiply with the texture just like the FireFly Hair Shader. Remember to set the root and tip colors to white if you don't want the texture to be altered.

As mentioned before all of the shaders I've created in this thread are free to be used any way you see fit. All comments, criticism, and questions are welcomed.

I hope everyone finds this shader useful.
 
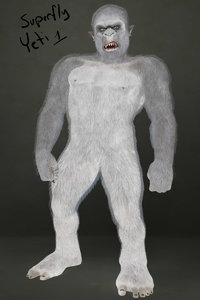
I just happened upon this thread and it's exactly what I need but I'm trying to play catchup on 5 pages while suffering a nasty cold and it isn't working. I could use a little bit of help? I'm trying to get the shader working for the fur on my Yeti for my graphic novel. It's strand based and I'm using Poser 12 Superfly. I'll attach my current WIP using the All Purpose Strand shader that I found in this thread. It looks good, I really like the translucence, but it's a little too transparent/thin and I need it to be a little shinier. How do I do that? I'm sorry if that's been answered but all words are blending together at the moment. :) The only settings I changed in the shader in my WIP were the root and tip colors to a dark gray and light gray respectively. Thank you!

yeti-sf.jpg
 
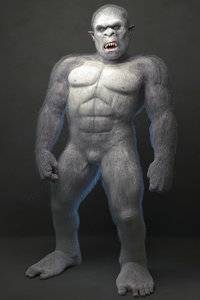
Whoops! I figured out one big mistake I made with my Yeti hair; I forgot to shade the skin underneath the hair! Here's an updated preview of my Yeti and now he's actually starting to look good. I'd still like to somehow make his strand based hair a little shinier but I don't know how. Any help would be appreciated. Thank you. :)

cre-full-yeti.jpg
 
That's looking very good. I'm liking what I'm seeing. :)

Thank you! I mainly just made him for my graphic novel but if others would like to have him, I would be happy to share the morph in the freebies section here. :) I think the texture is a heavy edit of the Hivewire Silverback Gorilla base texture so I wouldn't be able to share that but the morph I could definitely share. I think you'd just need Dusk, the Gorilla, and Dusk Shapes and Sizes Vol 1. I think that's all I used in terms of dialing. The rest is morph tool.
 

Me195

Extraordinary
Whoops! I figured out one big mistake I made with my Yeti hair; I forgot to shade the skin underneath the hair! Here's an updated preview of my Yeti and now he's actually starting to look good. I'd still like to somehow make his strand based hair a little shinier but I don't know how. Any help would be appreciated. Thank you. :)

View attachment 65691
Sorry it took so long for me to respond. In the shader's current configuration the shininess is adjusted by the 'Texture<>Transmission' in both the root and the tip. The lower the number the shinier and less transmissive the strand is. Just remember to change it for both the tip and root.

You might also try to set the 'Translucent Contrast' for both root and the tip to 0. That tends to make the hair a little shinier with colors that don't really need the contrast.

I still plan to add a better way to control the shininess. The current way is realistic, but it's far too heavily dependent on how the scene is lit.

I hope this helps. Let me know if you have any questions or feedback. I will do my best to answer any questions, and make adjustments to the shader.
 

FrahHawk

Inspired
Is it too late to say thank you for these two shaders? I wanted to be able to use the Polar Bear in a Superfly render, but the hair came out plasticky and shiny. THANK YOU!!!
 
Top